Brad Whitehead describes how his FTC robotics team learned how the design process is about discovery through iteration.
I’m a mentor for our high school First Tech Challenge (FTC) robotics team. First is a great organization that runs robotics competitions for various age groups ranging from elementary to high school. FTC is a high school level competition where teams compete in autonomous and wirelessly controlled rounds.
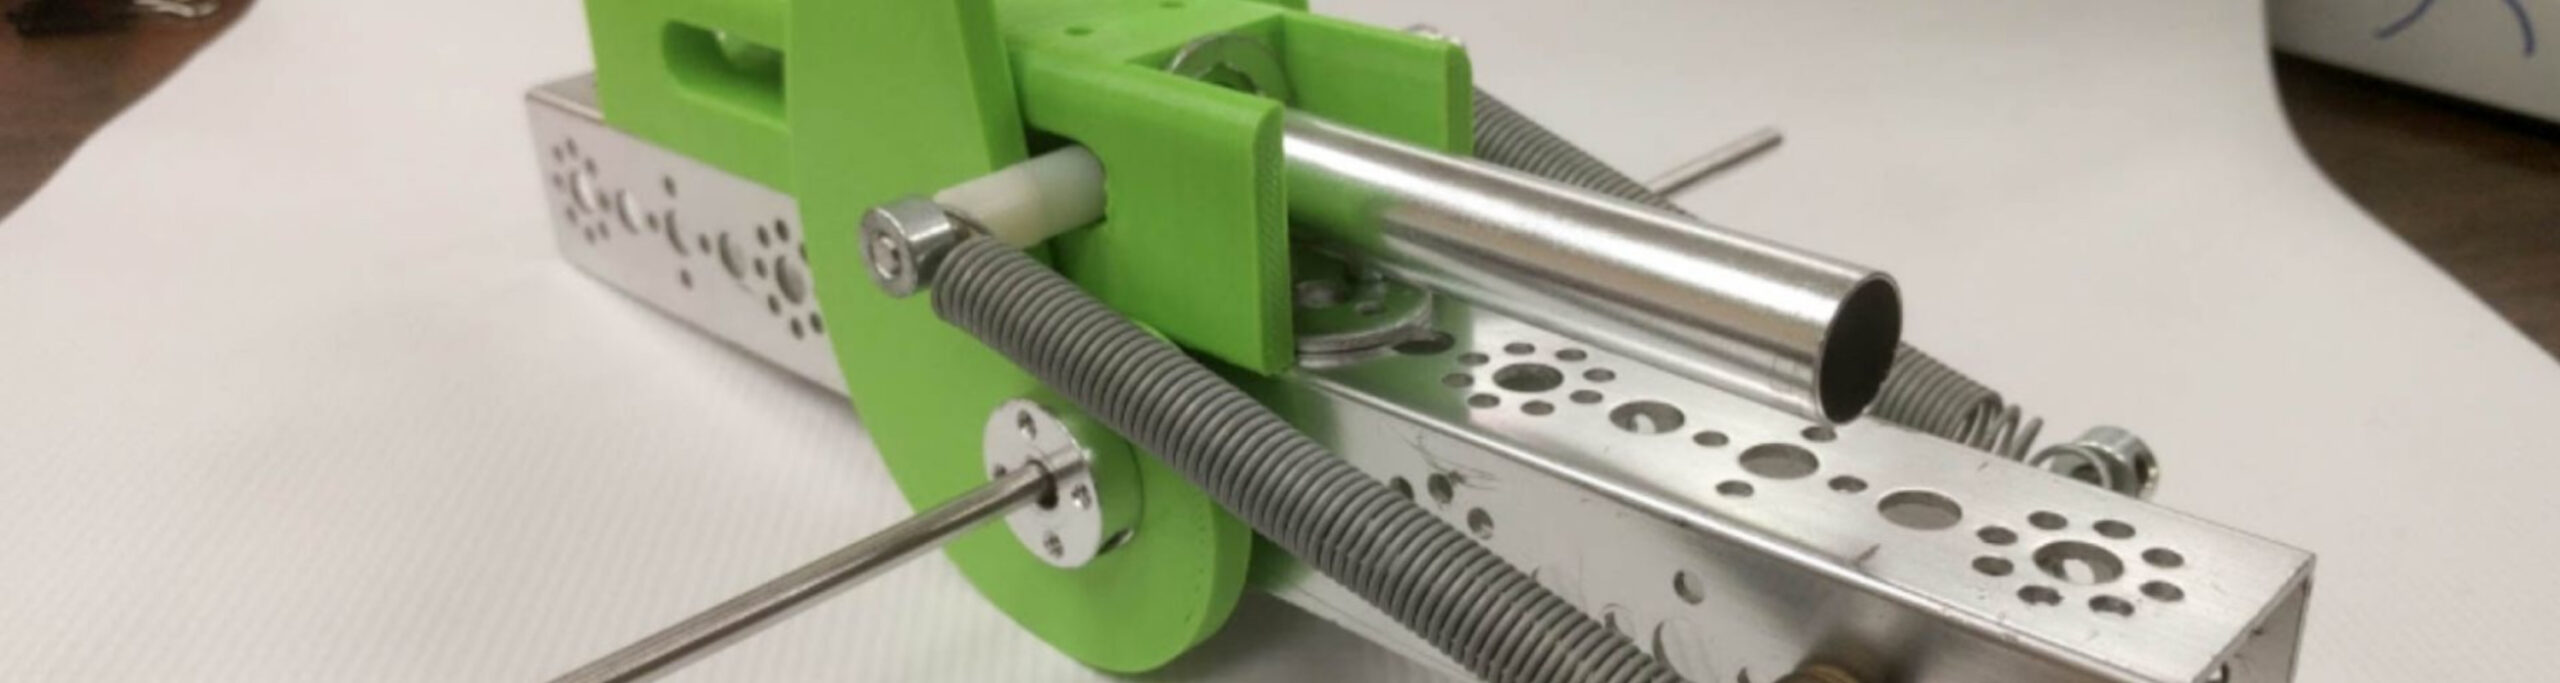
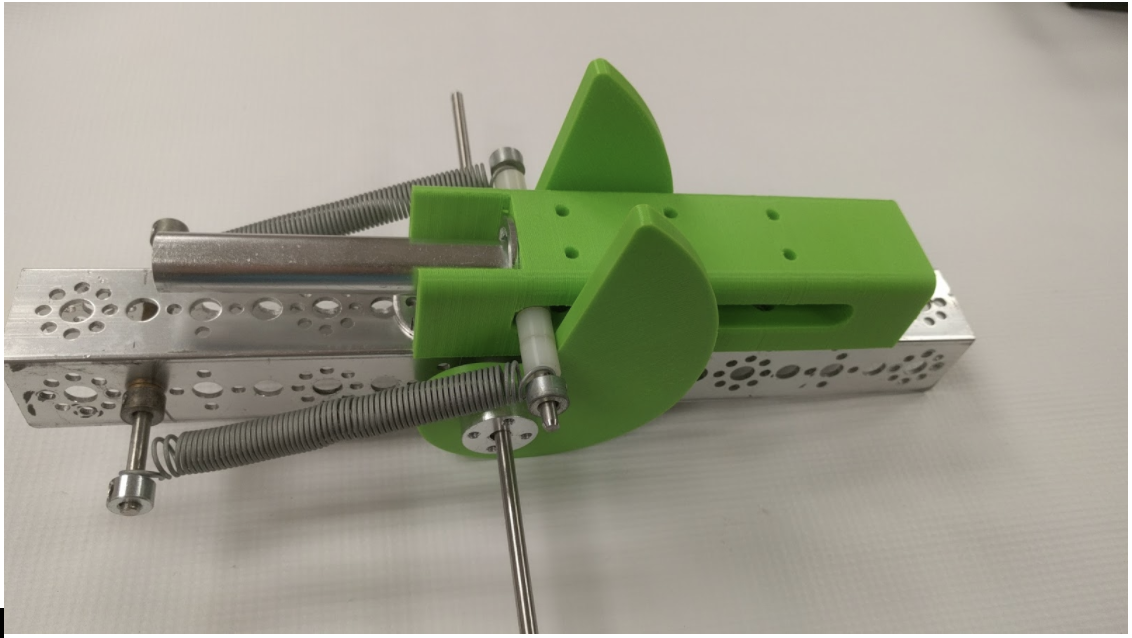
This year one of the tasks was to launch a wiffle ball through a goal approximately 30 inches high. We struggled most of the season to come up with a viable and original solution. Originality counts in First competitions, so we strive to be unique. Several of our students found a video of a cam and wondered if we could make this mechanism work in our application.
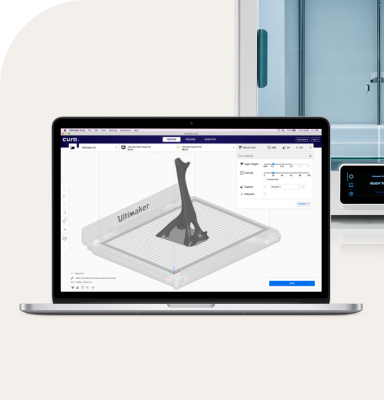
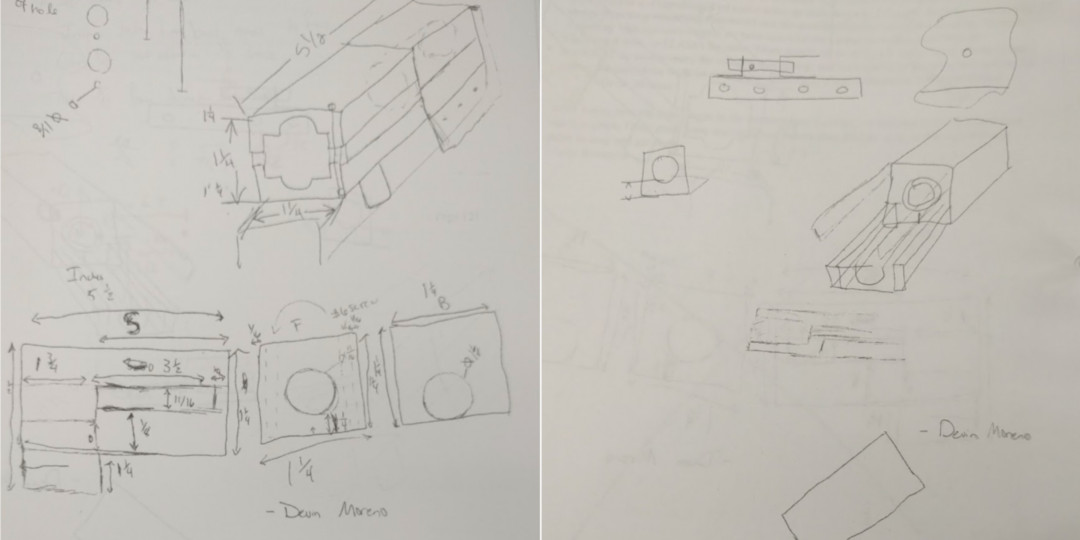
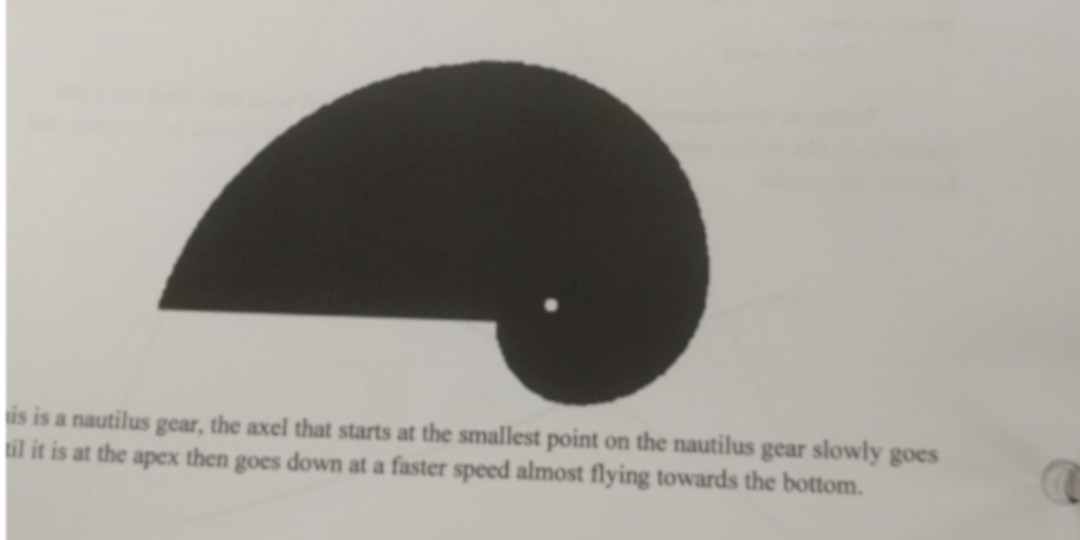
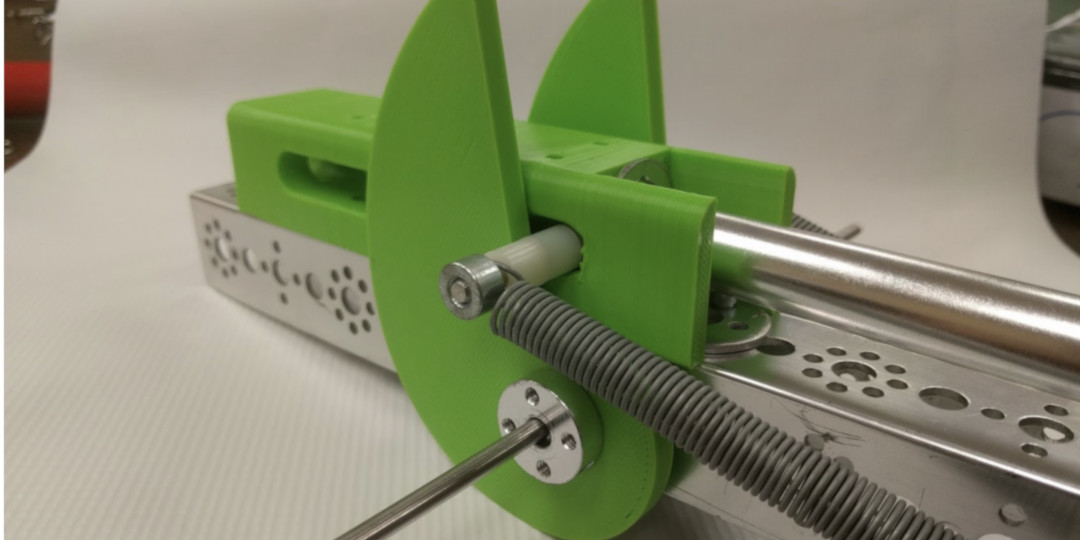
Using the Tetrix kit (think erector set) we cobbled together a rough layout of the launcher. We still needed the cams and a guide for the ‘plunger’ which would launch the ball. We talked about the golden ratio and how it is represented in the nautilus shell. We worked together in Onshape, a cloud-based collaborative 3D CAD system, to draw a sketch of the golden ratio then extrude it to make our ‘nautilus cam’.
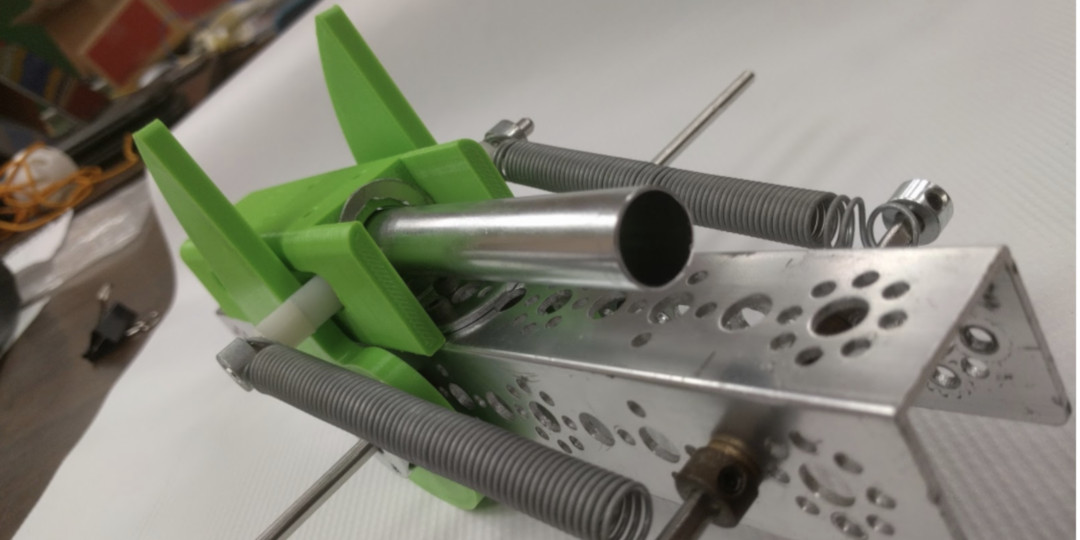
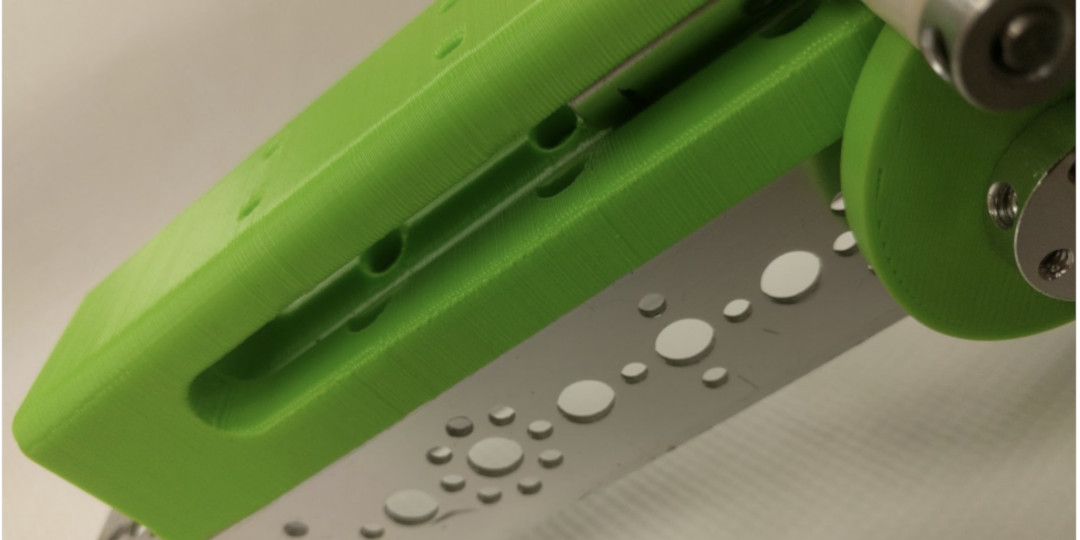
Next, we started on the ‘plunger guide’ which would keep the plunger aligned with the nautilus cam. I guided them through the design process, starting with a sketch. They used calipers to find the required measurements, also taking tolerance into account. Then we moved to Onshape and made a CAD model of the sketch. From there we exported the model and 3D printed it in PLA, with low infill, and at a fast speed. Our first print fit up great. We were all super excited until we fired the launcher and the assembly cracked in half. They learned that 10% fill density wasn’t strong enough. This was a valuable lesson in iterative design.
In print two they changed the density and layer height to improve strength. This print took over night and when we tested it, it still developed cracks in the high-stress areas. They went back to Onshape and took advantage of its parametric capabilities and modified the ‘plunger guide’ to improve its strength and remove extra material. We are limited in build volume, so smaller is better.
We noticed that the previous prints always failed between the seams because of the perpendicular tensile stress. In print three we positioned it so that the layers aligned with the tensile stress and we changed to ABS plastic. This resulted in a much better part, but we still developed cracks.
Not to be bested by our limitations, we printed number four at 100% density in ColorFabb XT. This material is very tough and we haven’t experienced any issues. Our team was very resilient and didn’t give up on this unique design. Many other teams asked us how we managed to print durable parts and we were able to help them with their designs. During our League Championship, we were able to use the Nautilus cam launcher to score multiple times and won the highest award for design of the robot, the Inspire Award.