


Here’s their story of exploring 3D printing in Multivariable Calculus with the Ultimaker 2+ during the Fall 2016 semester at SXU.
Our 3D printing journey in Multivariable Calculus
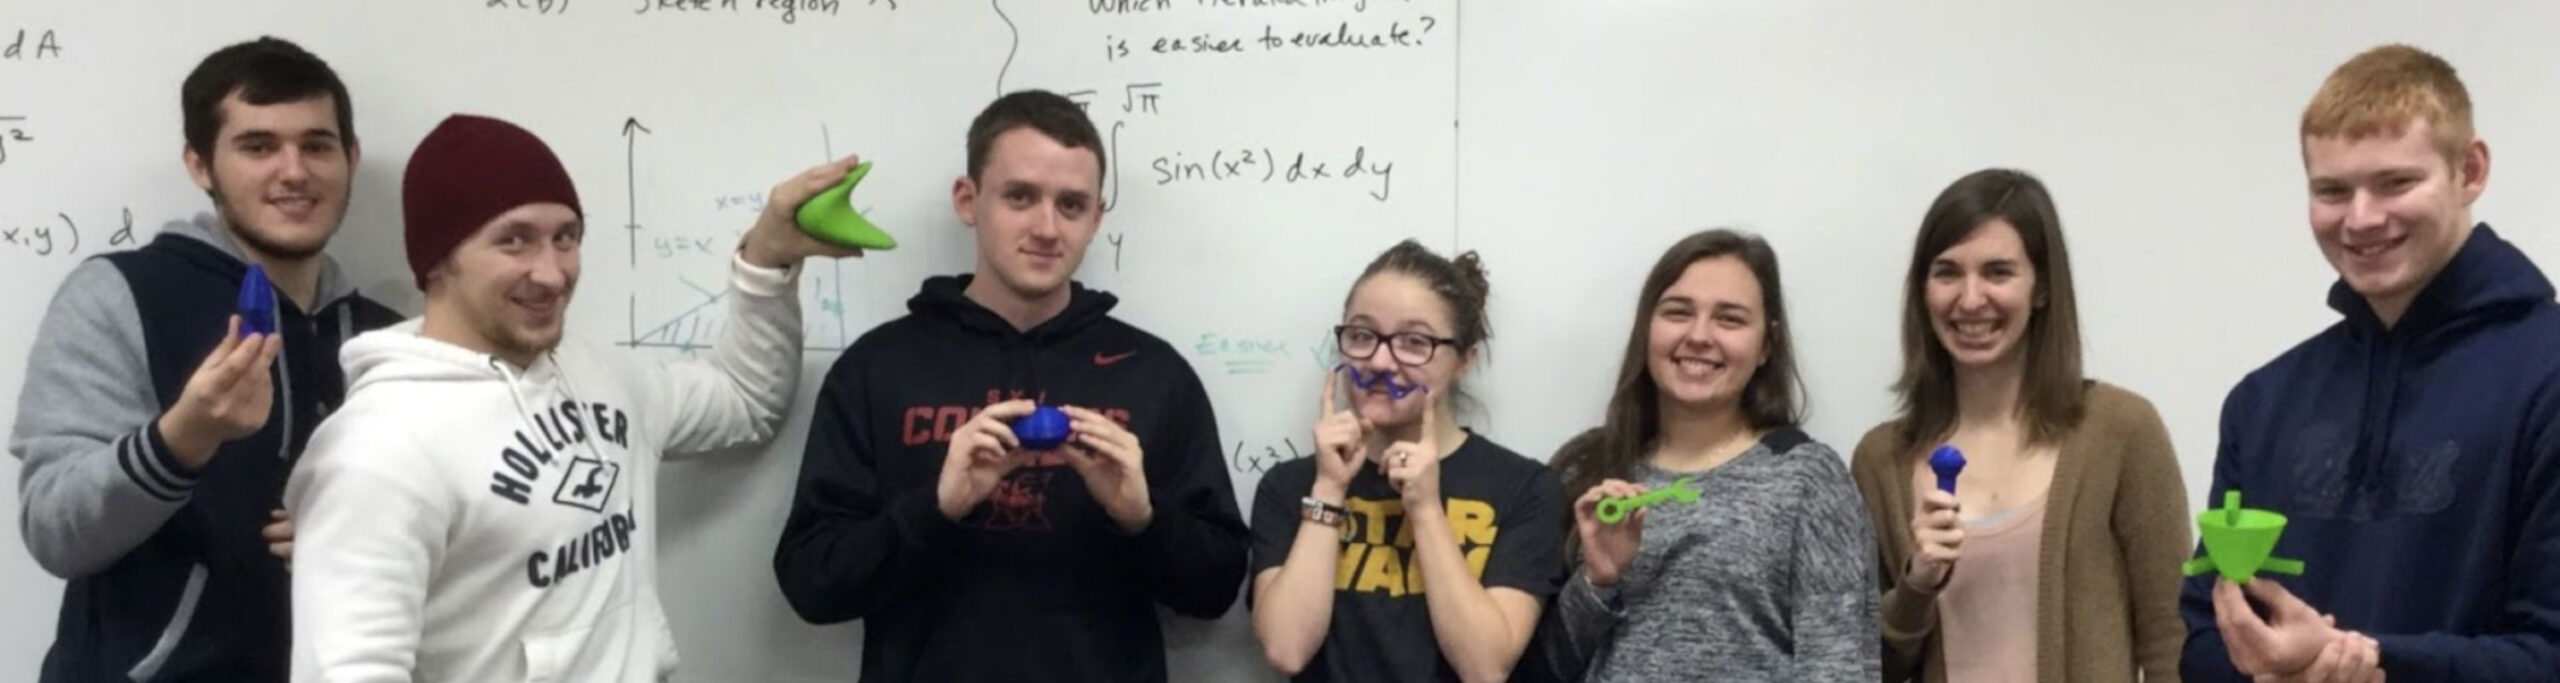
Now it’s time to meet some inspiring and accomplished mathematics majors and mathematics/secondary education majors who just may be the next generation of 3D printing pioneers.
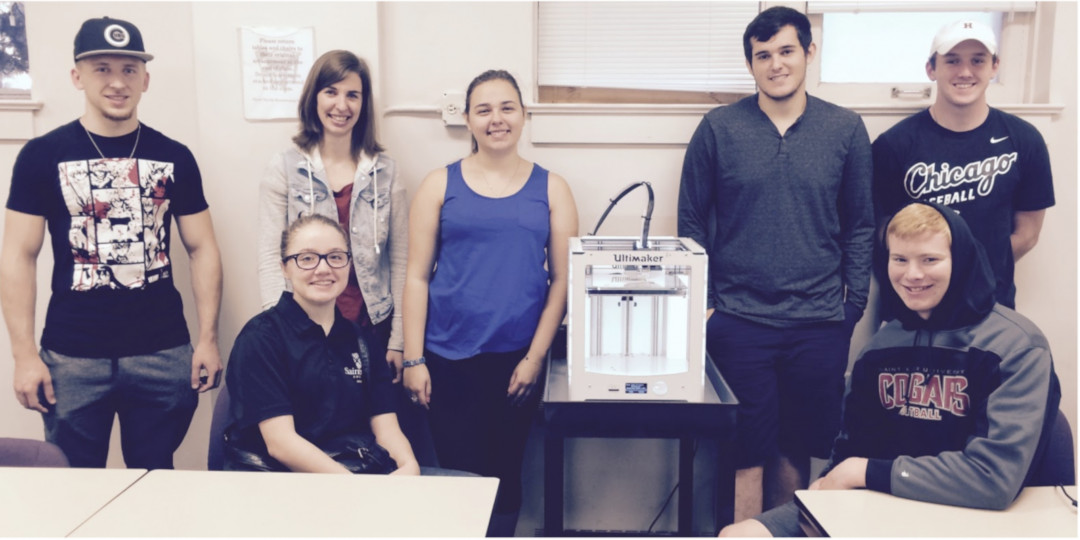
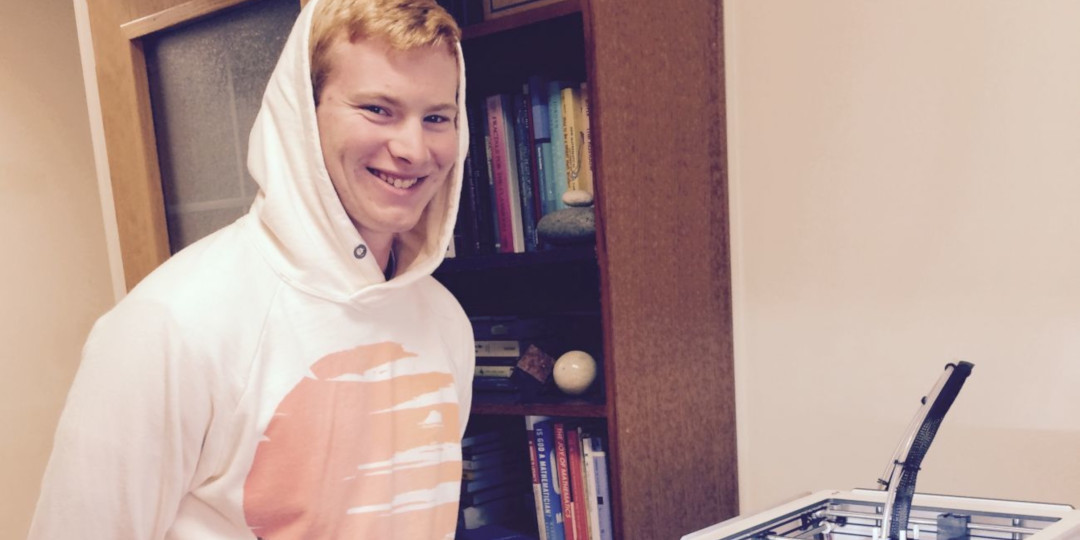
Edvardas, Kaitlyn, Caroline, Adrian, and Ryan (standing), René and Joe (seated)
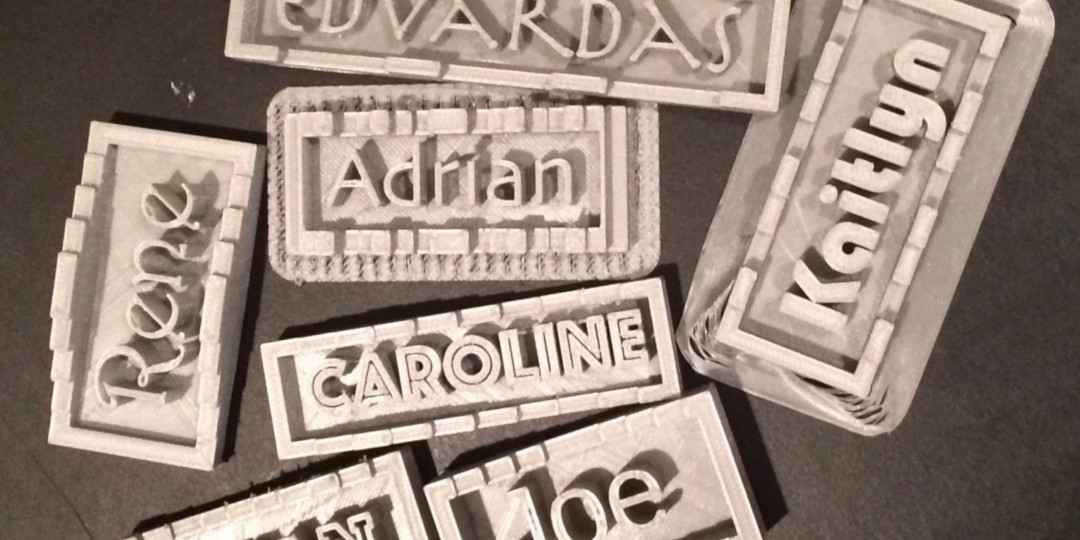
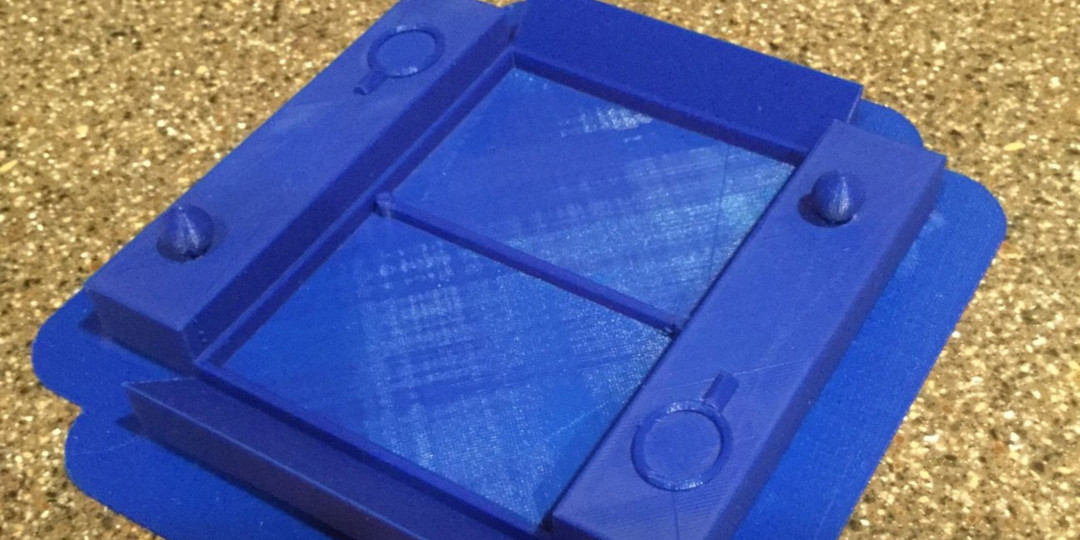
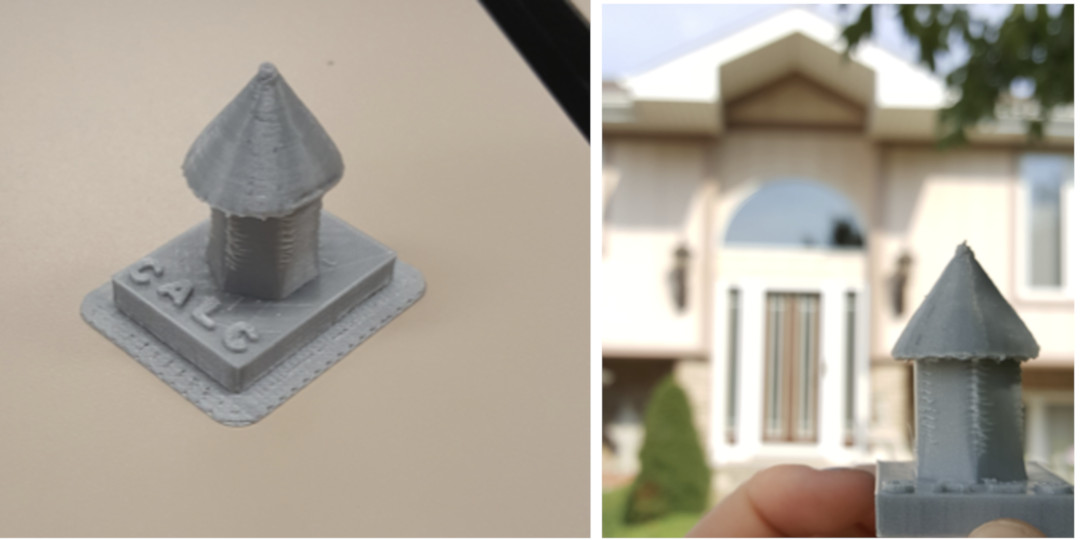
Printed from Thingiverse: Nameplate Generator with OpenSCAD
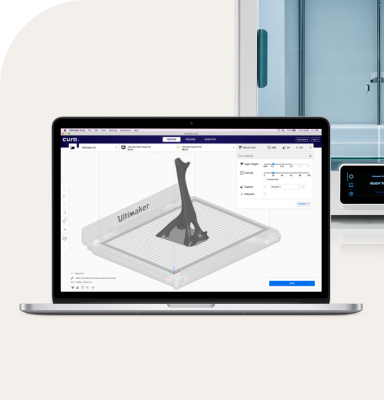
For class this semester, I created three lessons to introduce 3D printing into my learning outcomes for this course. Each student brought his or her own distinctive style and abilities while working on the projects. A few students had used CAD programs and a 3D printer in high school while others were experiencing 3D modeling, design, and printing for the very first time. These lessons can be found on the Ultimaker Education Pioneer Resource site.
Surface of Revolution using Tinkercad
This project introduced students to the design component of 3D printing. Students created a unique 3D surface of revolution from a piecewise function composed of at least three different geometric curves. Tinkercad was the program used for this project. A name or identifying equation of the surface was imprinted on the final 3D project.
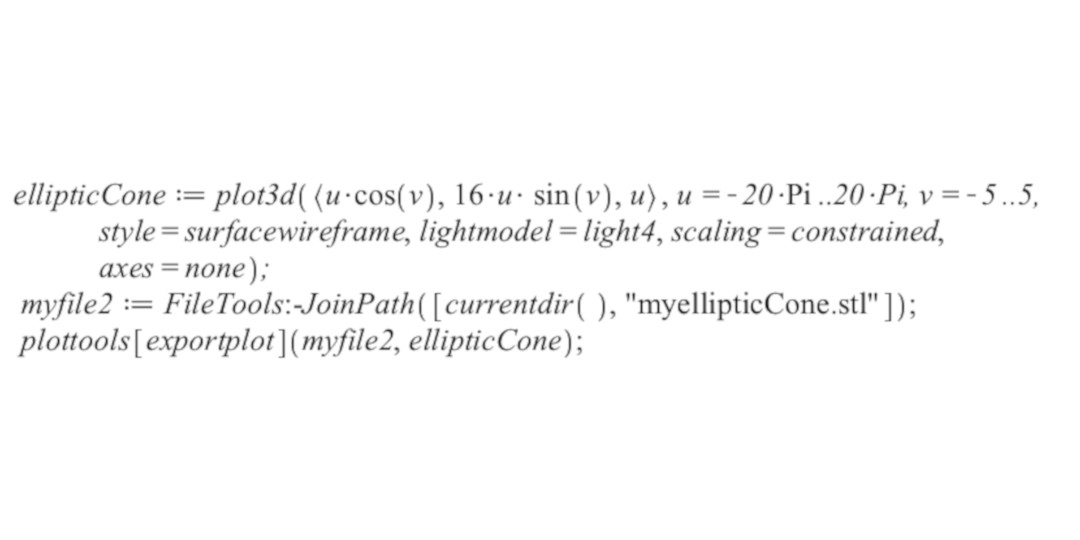
The mathematics software program, Maple, was used to plot quadric surfaces in both implicit and parameterized form. Students learned how to parameterize surfaces and to export their Maple code as an STL file to generate 3D prints of their surfaces. This project proved to be challenging in a variety of ways - some quadric surfaces were difficult to parameterize, and, while some surfaces could be readily printed from the STL file generated by Maple, other surfaces required some ingenuity and modification of parameters in order to print.
An Imaginative Surface using Concepts from Multivariable Calculus.
Students used a 3D modeling program of their choice to design an imaginative surface which illustrated particular concepts studied in Multivariable Calculus. Students chose their own topics from the course to make the mathematics come alive. In addition, students learned how 3D scanning works with 123DCatch. The students gave presentations showing their work and methods used to obtain their 3D printed objects.
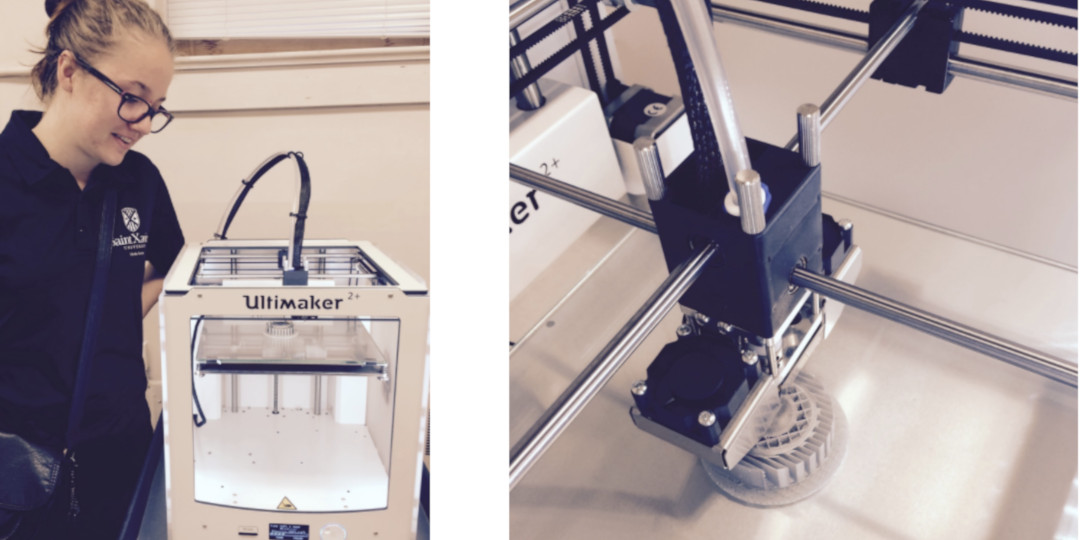
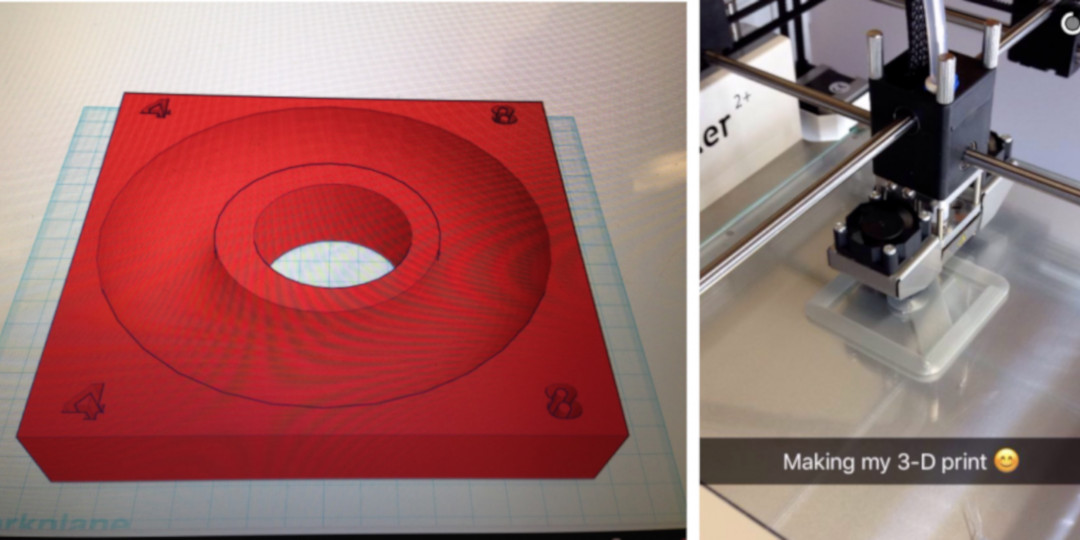
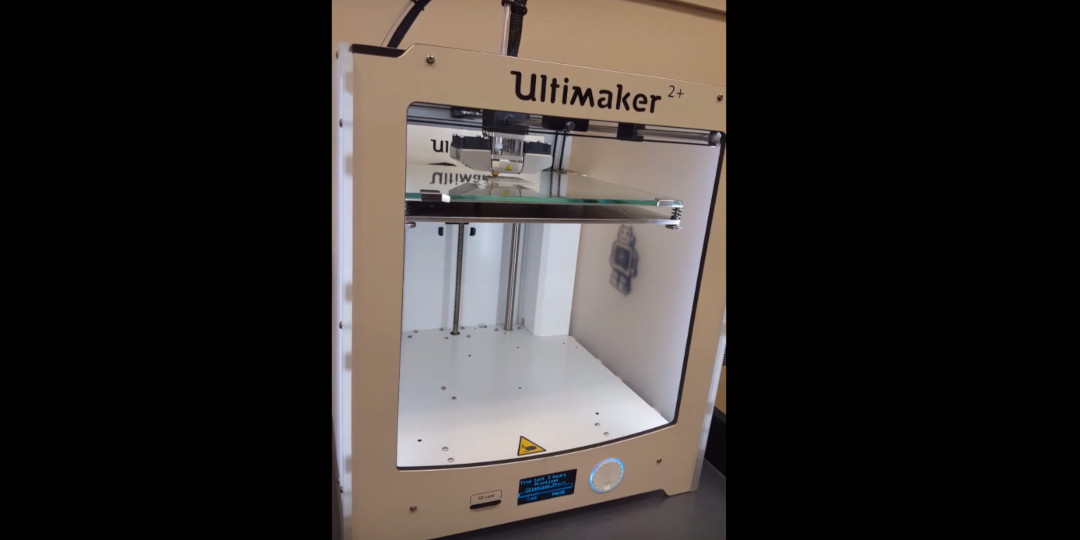
For each project, as students completed the design of their models and were ready to print, I wheeled the Ultimaker 2+ to class on a handy cart. We would get started on printing during class while working on the mathematics of the day. Usually, we would have enough time to print one surface in class. Students would convene after class in my office to print the remaining surfaces.
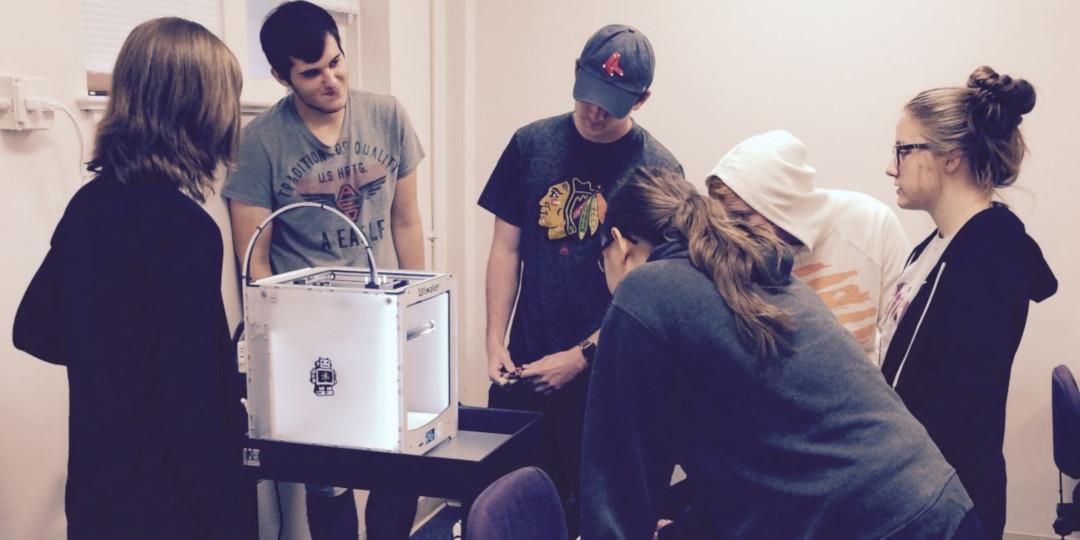
Students seeing the Ultimaker 2+ in class for the first time were fascinated by the printing process
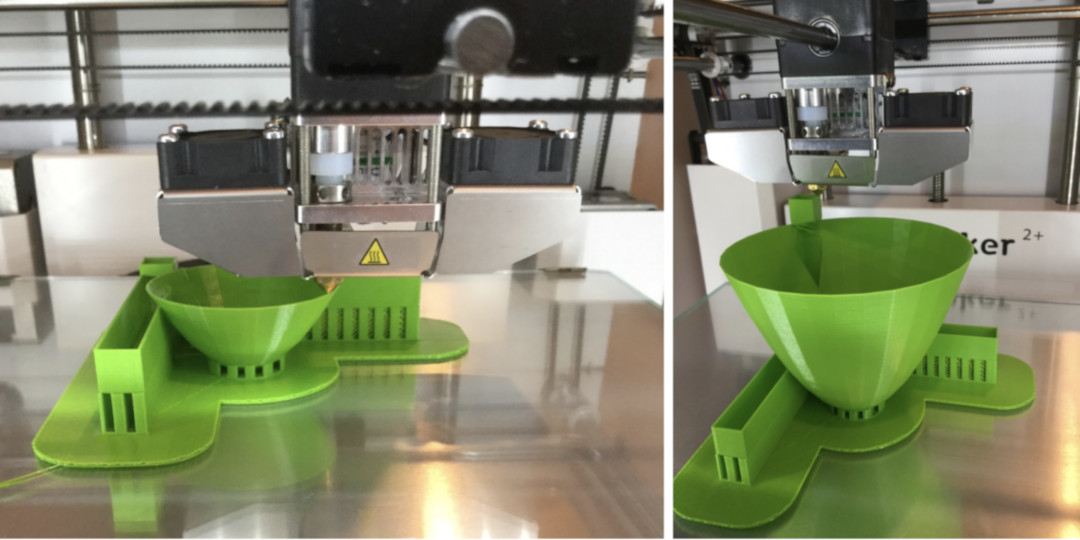
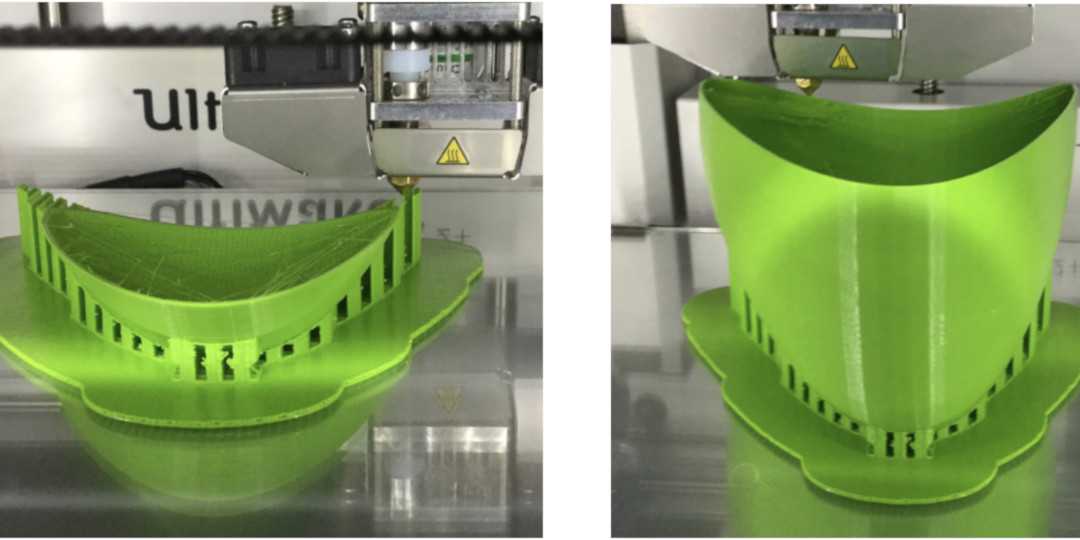
Our first print in class (by René - the beginnings of Ollie’s Treat Bowl)
The Ultimaker 2+ printer is quite a gem - it performed so efficiently and quietly during class - even throughout our postulating and theorizing of the calculus. The printer added an exciting element to class time when it was there. Often times, when the print head started working furiously on a specific part, one (or many) of us would rush over to see what was happening. The sound of the build plate lowering, signaling the print was complete, often drew cheers, then awe at the final product!
I would like to share the outcomes of our projects in each of the student’s own words and pictures, giving a wonderful peek into their thinking and personalities as they explored 3D printing for the first time in a calculus course. It was awe-inspiring and most fulfilling to see the evolution of my students’ designs and 3D prints of the mathematical surfaces we were studying over the course of the semester. It was a thrill to witness the students marvel as they held 3D objects in their hands that they personally created by modeling the mathematics.
Off we go!
René
“When I learned that we were going to be 3D printing in class, I was intrigued. Then I found out each of us were going to design our own 3D prints, and I was elated. On the day everyone had to bring their laptops to class to design, I was sitting there, wondering what to do. I picked a few shapes and started playing around with it, trying to make something that looked cool. I found the ‘make a hole’ option [in Tinkercad] when designing, and made a parabolic hole in the top of my object. I knew what I wanted to make! I was making a treat bowl for my hamster, Oliver (Ollie for short).
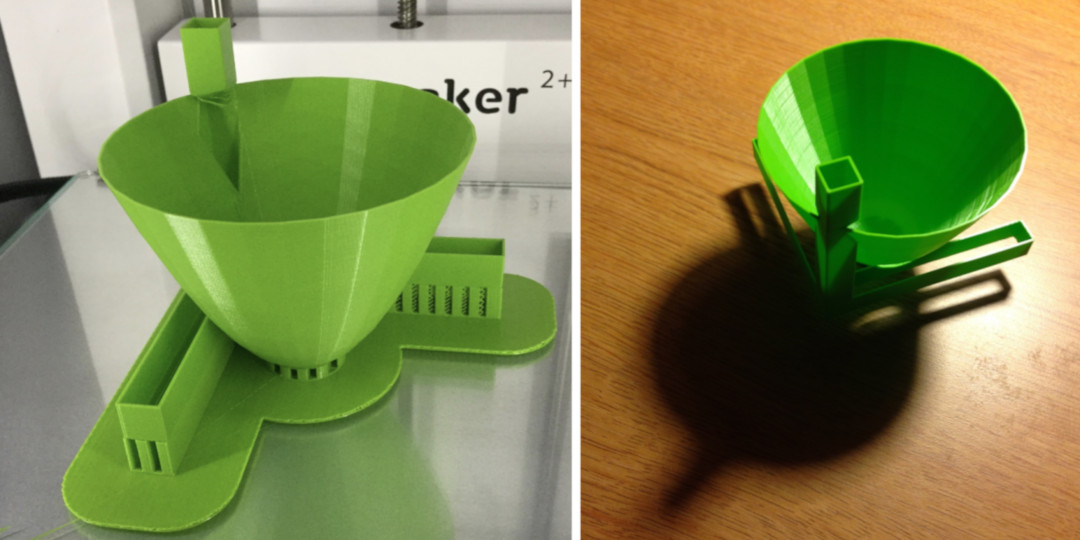
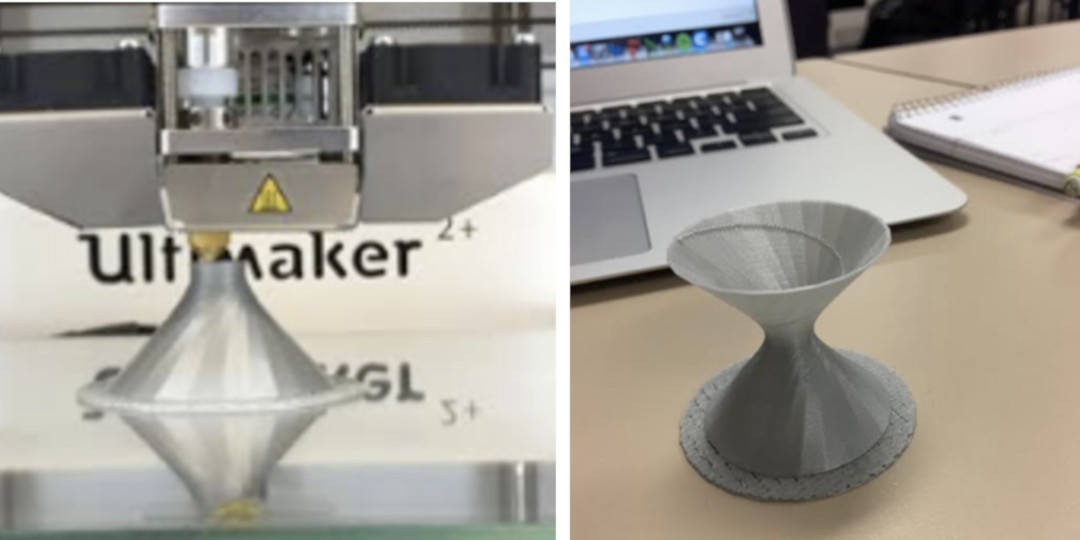
Ollie’s bowl was the first printed in class! It was so cool to be able to watch the whole process. The time on the Ultimaker 2+ was saying it would take 5 hours, so everyone was a little worried it would run over class time. However, it finished just before the next class started. (Whew!) When I finally got back to my dorm room, I wanted to show it to Oliver right away! Peeling off the supports raft on the bottom was tricky, only because I did not want to break off something important, but the bowl was pretty strong. Once all the support structures were off, I put a few treats in it and let him play! His bowl was just the right height was it was so perfect for him. It was so amazing to be able to be a part of the design, creation, and final product of something so cute and useful.” ~René
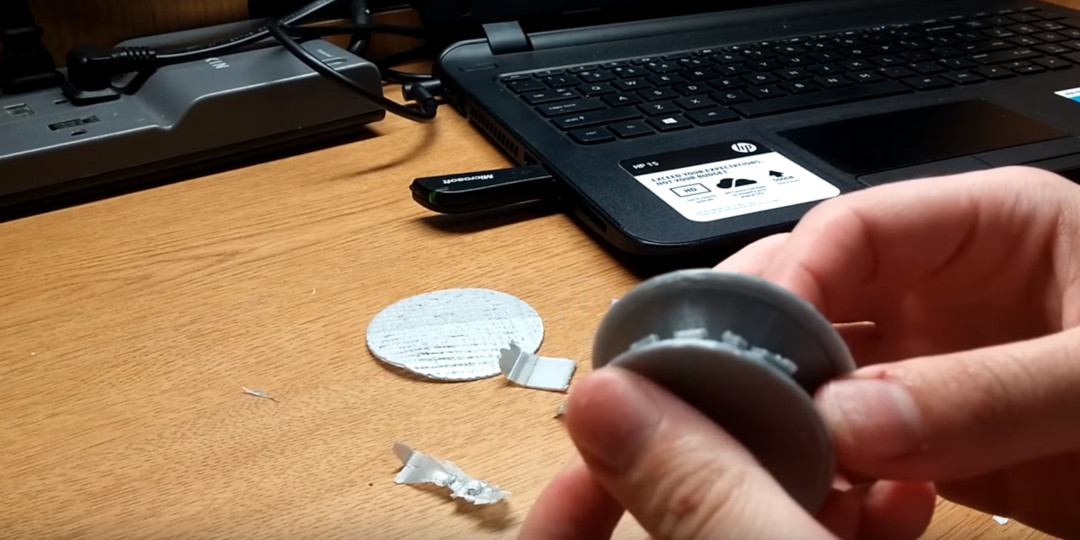
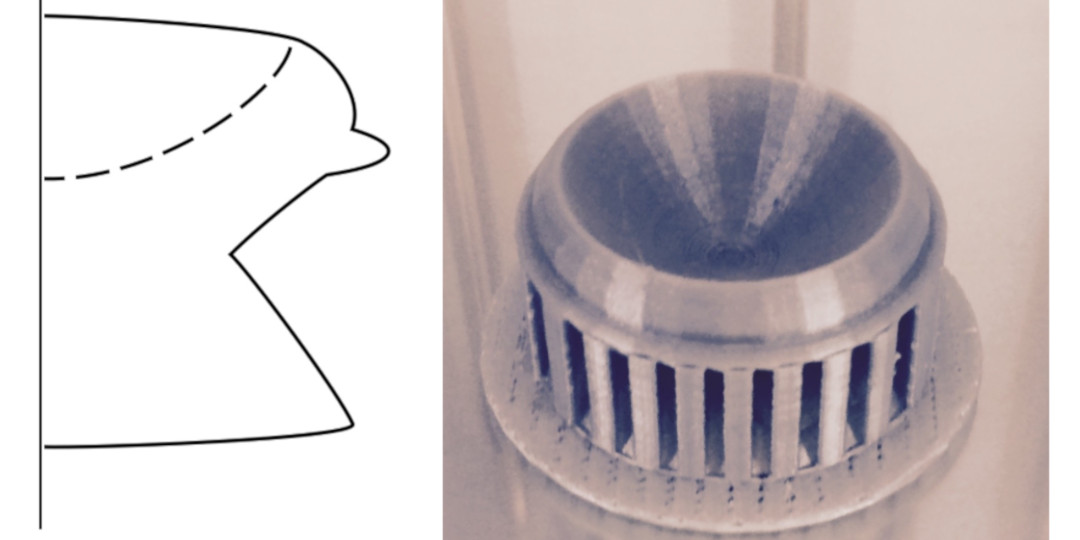
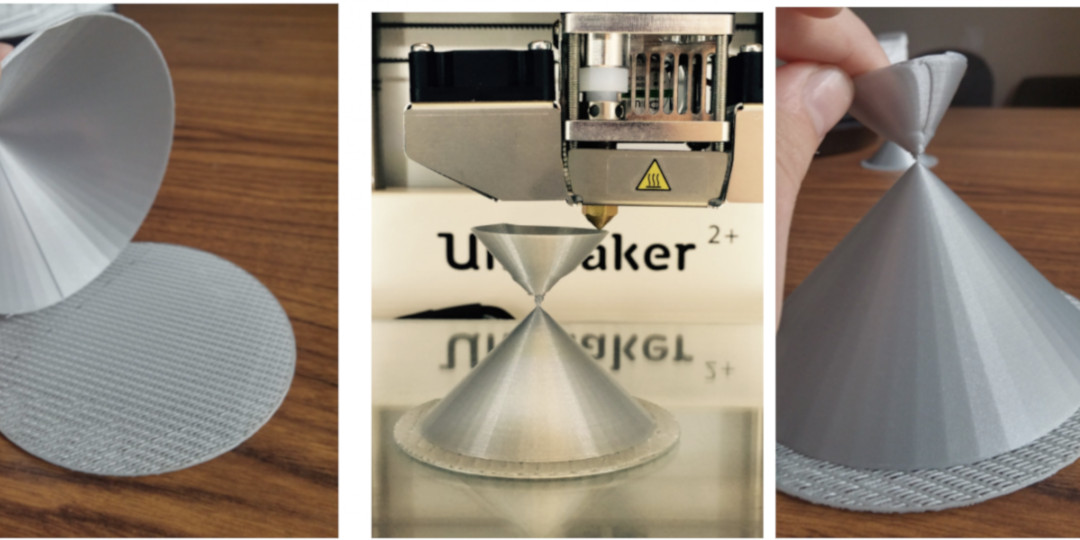
Below we see beginnings of this object as a piecewise function in the plane. When it is revolved around a vertical axis, we get Ollie’s bowl. The bowl is shown before and after the supports were removed.
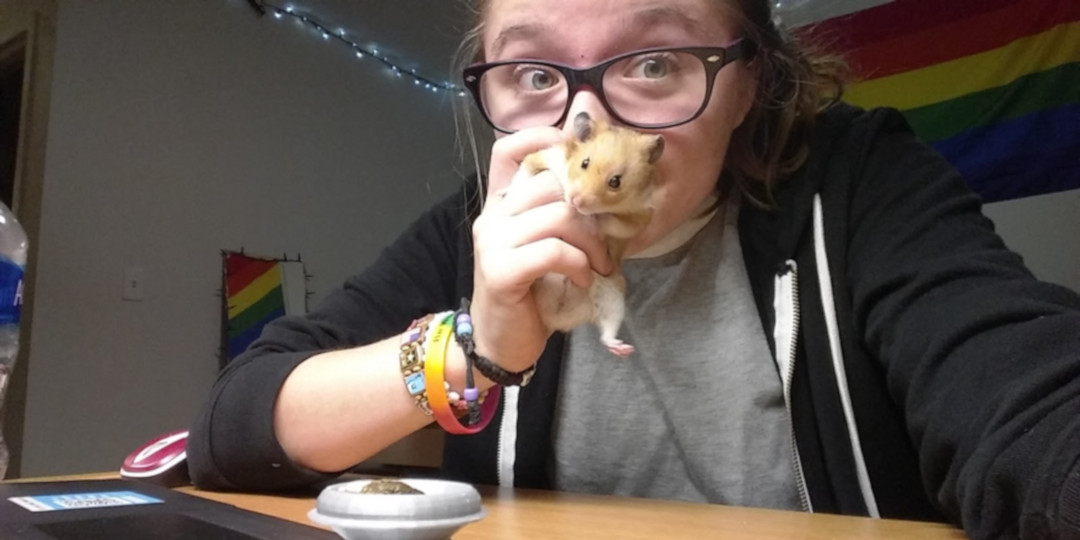
René and her hamster, Ollie
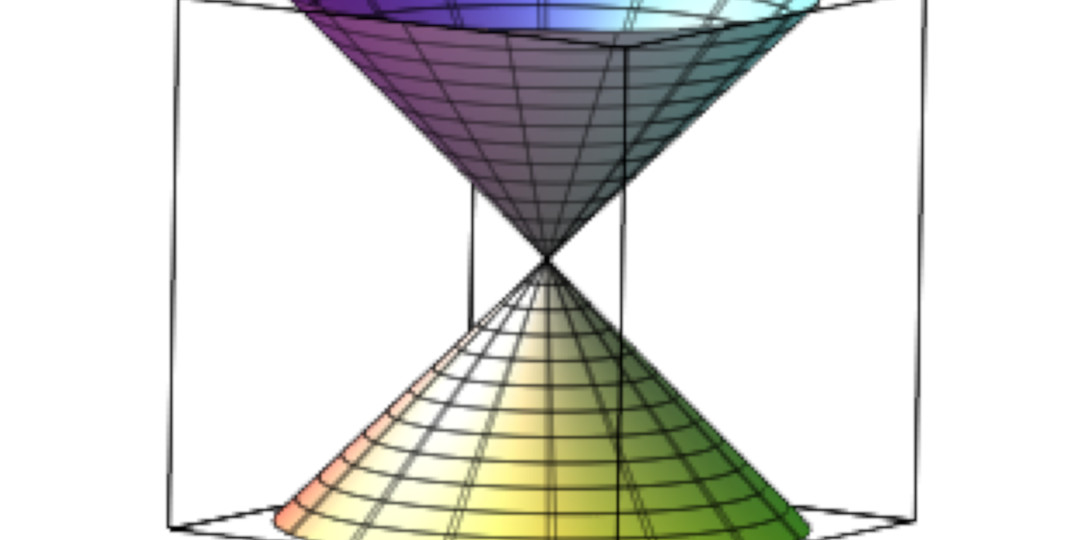
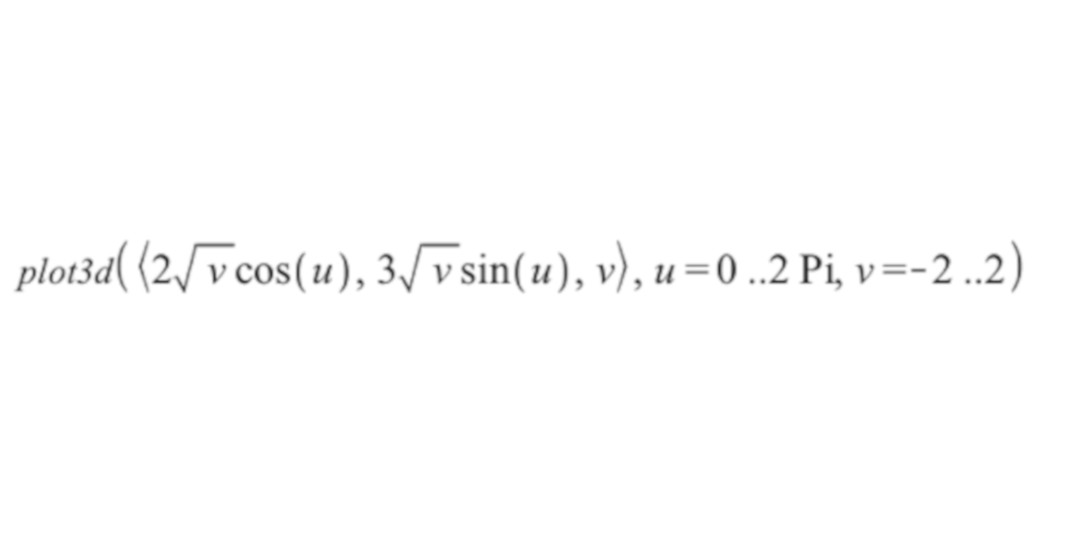
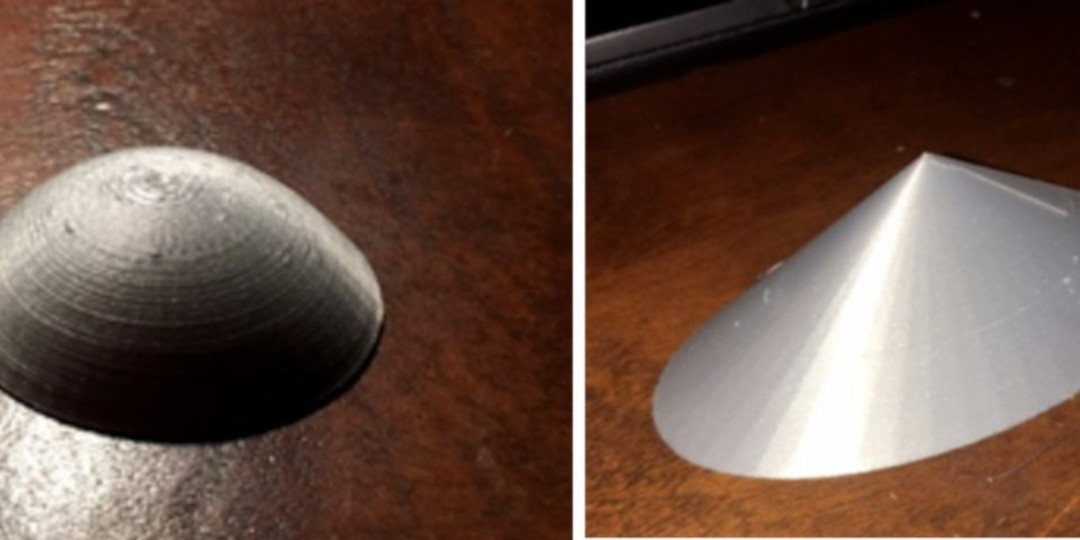
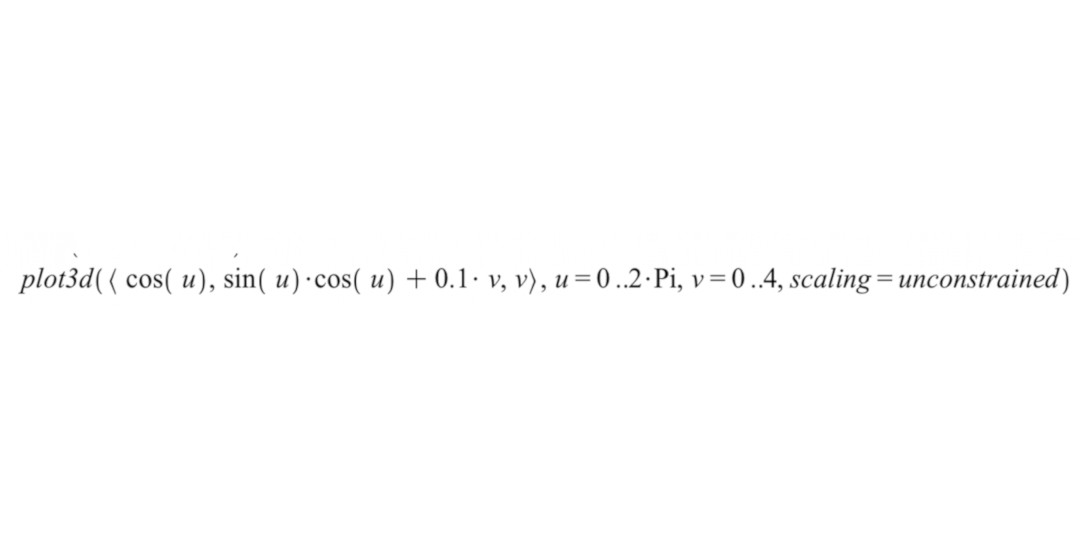
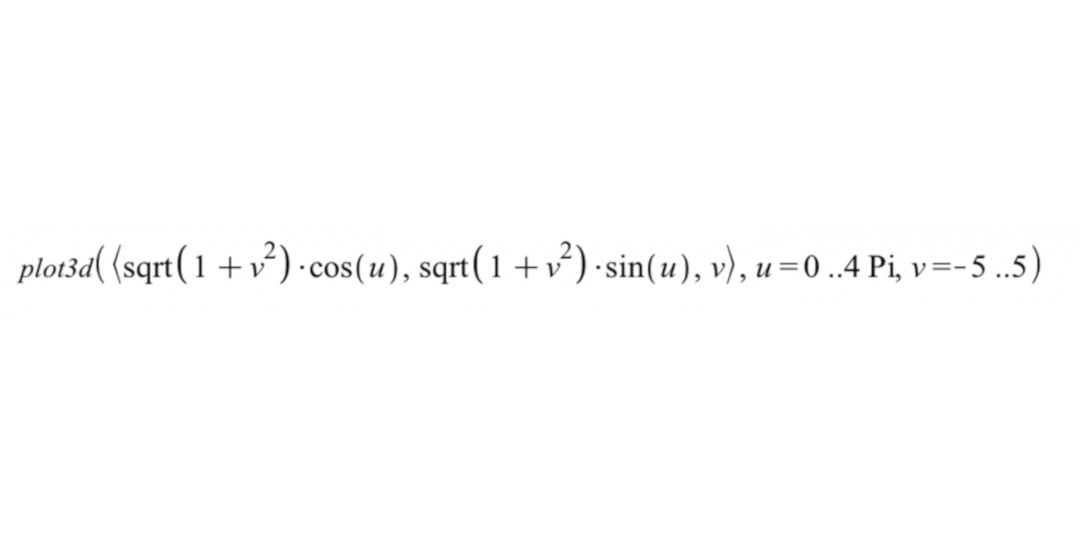
Elliptic Cone
The Maple parameterization and code René used to generate the STL file is:
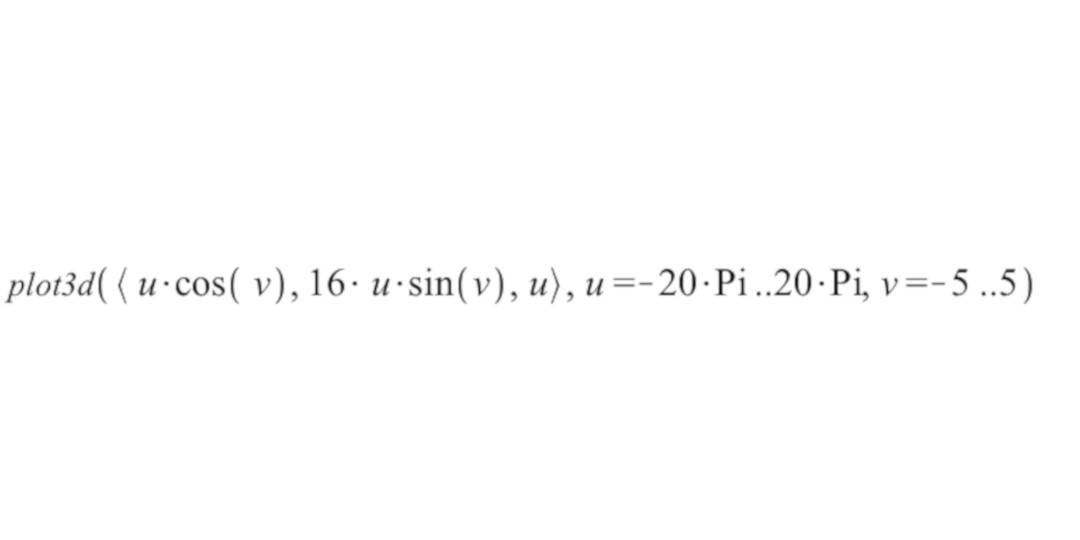
3D Sine Wave
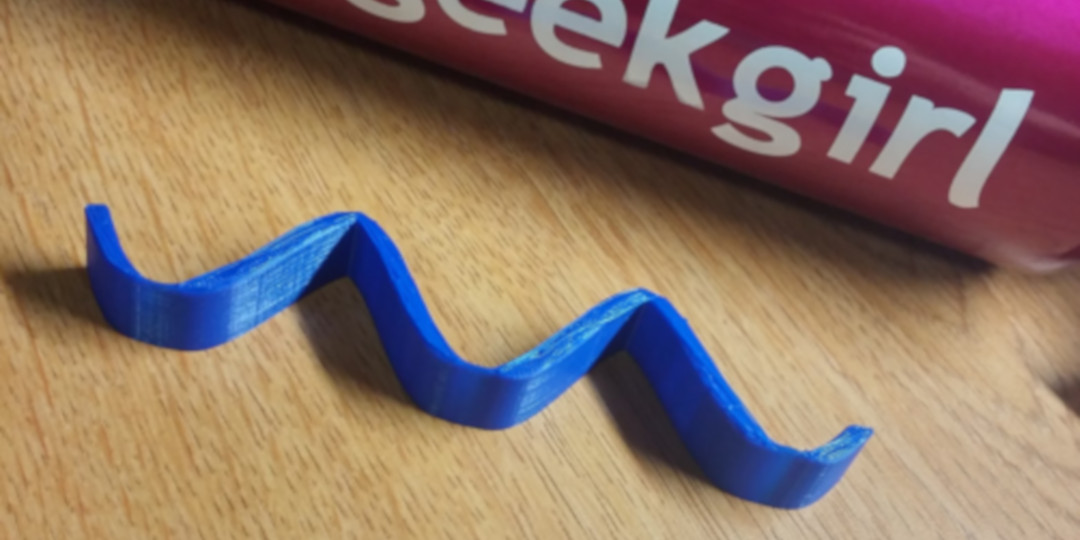
3D Sine Wave (or a fancy mustache)
Joe
“The 3D Printing Project was a very fun experience. It was cool to tinker on Tinkercad and design an object. I enjoyed it so much that I have started to design more objects just to test my creative limits.
In addition to making the object, it was neat to watch the machine make the object. It was very interesting in the way the machine went about making it with different patterns which corresponded to the cylinder and box that I used to design the object. Another thing that was interesting was how the other students chose their support systems. This experience makes me want to continue using 3D printers and hopefully it will help in my understanding of Calc III and of how to teach students about objects in 3D.” ~Joe
The Inside (or outside) of Half a Torus
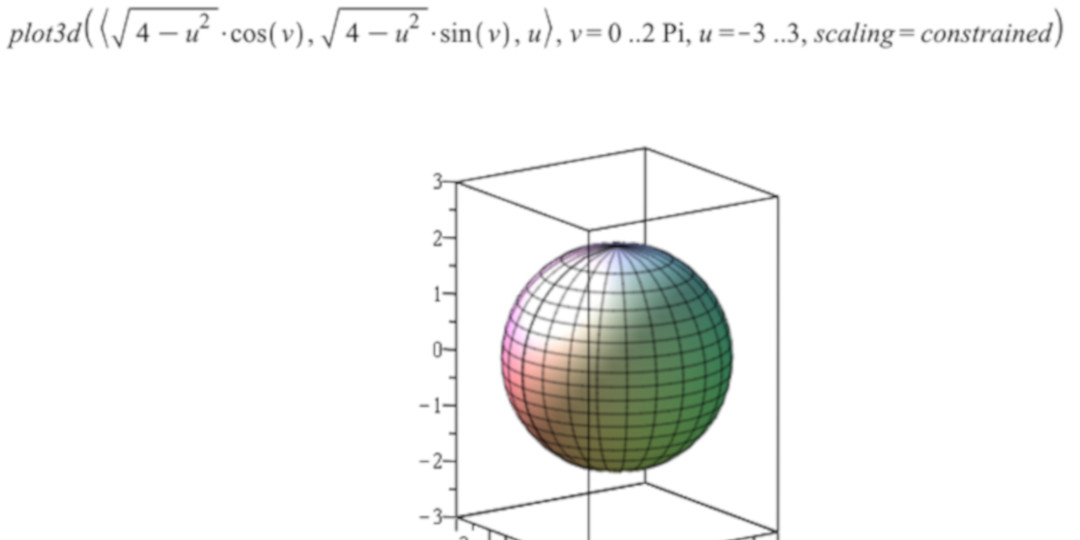
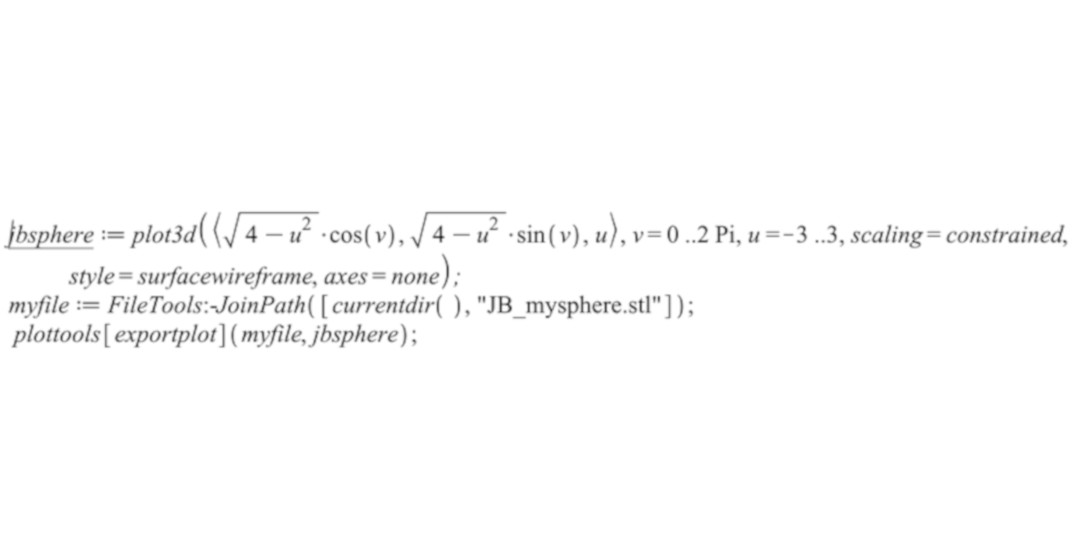
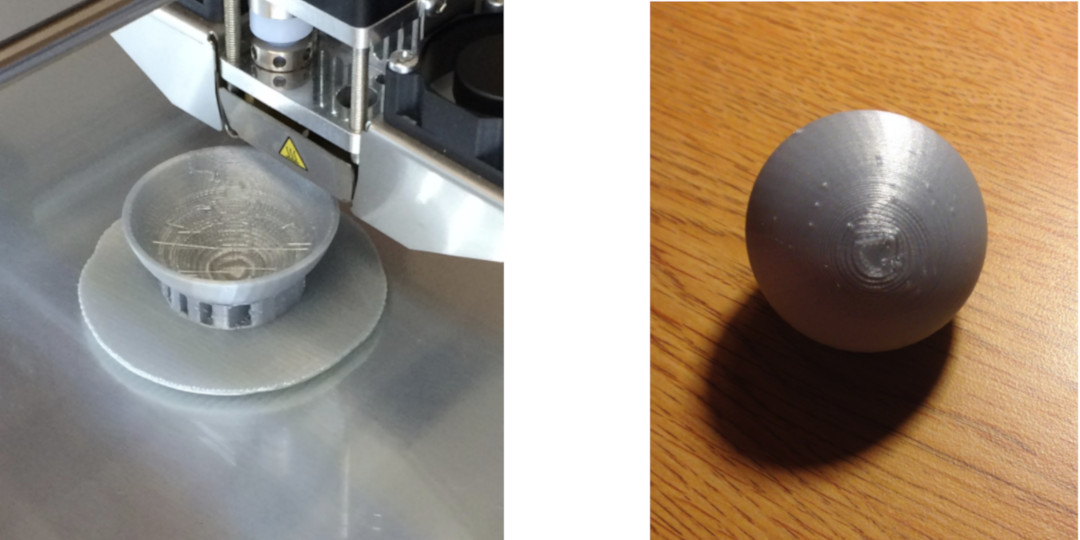
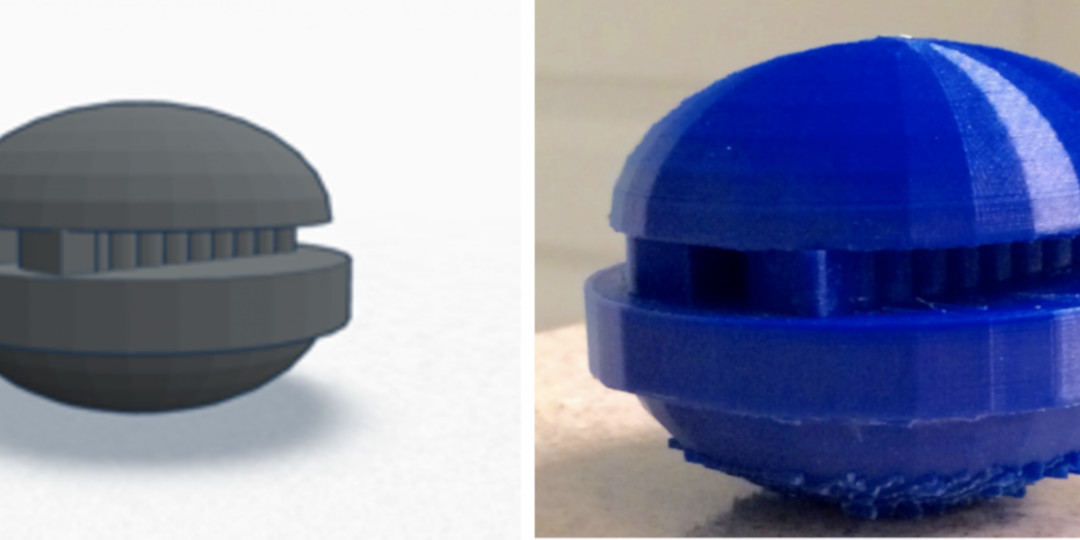
Sphere
Joe’s Maple code used for plotting a parameterized sphere and generating the STL file is shown below.
XYZ Coordinate Frame with Elliptic Paraboloid
How neat is that!
Tennis anyone?
Joe had been working on this Tennis Stadium (an extra fun project) since early in the semester. What an impressive result!
Caroline
“My experience with 3D printing was fun and exciting. First of all, this was the first time I learned about 3D printing, and how people use it. I learned that people can make prototypes for an object they are creating, and few examples could be a structure to a building, build a city with the 3D objects, and for any object that needs readjusting of shape or structure. Learning about 3D printing has brought another great experience that I would like to have in my future career. As a future teacher, it would be a great way to show students math visually.
My experience while building my house was very interesting. When I first started building in Tinkercad, I was stumped. I did not know what to build, so I started to play around. I had to redo my idea about five times, but then I was able to get the hang of it, finally giving me the house that I made. I learned most of the controls, and I was able to build my house faster and more efficiently. Although, I did not find a few mistakes until after I finished and had checked it over. I learned you must look at every angle to see if all the parts are connected and to see if the structure can stand up independently or not.
Overall, I learned a vast amount of information about 3D printing, and I am excited to learn new ways to build structures and watch how the printer works printing the next item.” ~Caroline
Prototype of a Structure of a Building Video
Cylinder with a Circular Base & Parabolic Cylinder
Wrench
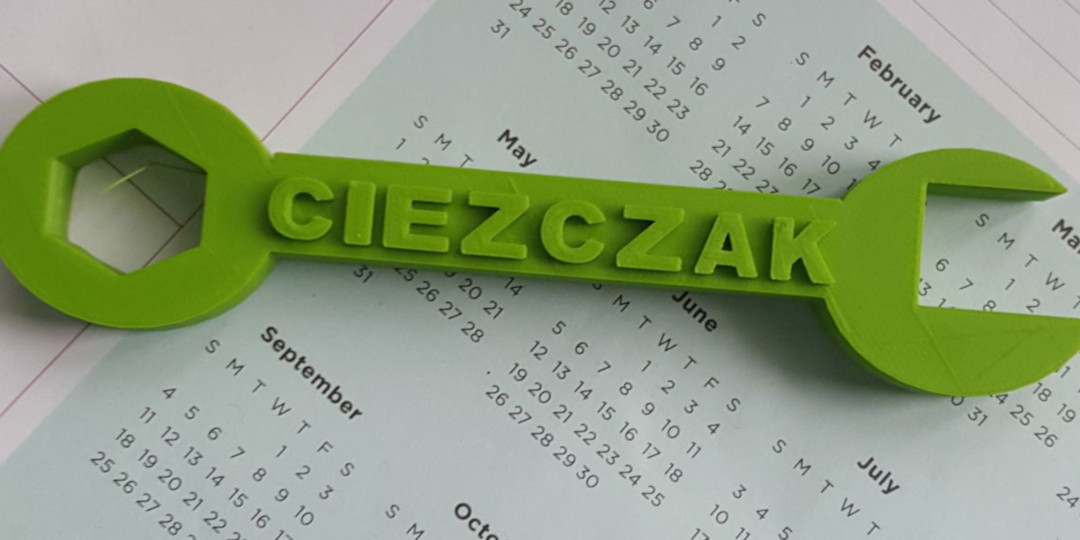
Caroline made this unique wrench for her brother!
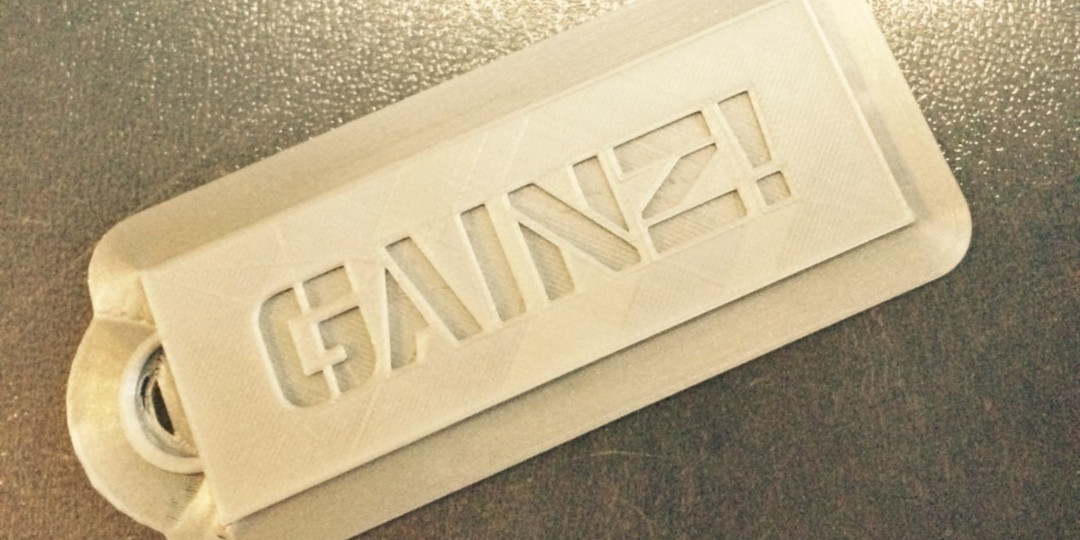
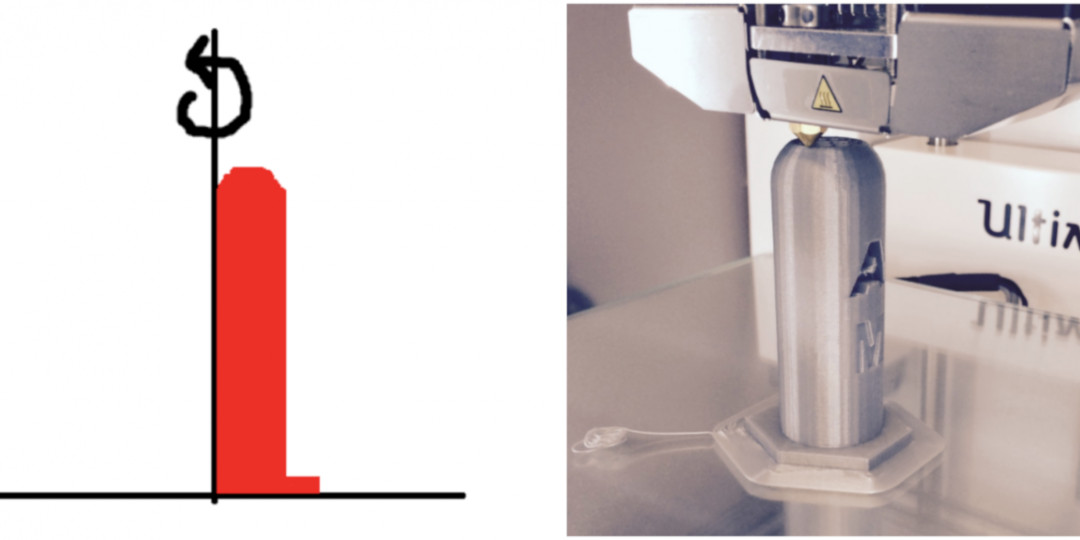
Edvardas
“My experience with 3D design was great. The printing process was not difficult. Create a design, export it as an STL file, download Cura, modify the design if necessary, save it as a GCODE file on an SD card, and start printing. The 3D printer printed very cleanly with my design and I think it came out really well. I created my Gainz keychain because I love to work out. Gainz is my term for results and what I strive for. I think this experience should be given to a lot of kids in schools because it can expand their imagination.” ~Edvardas
Paraboloid & Elliptic Cone (bottom half)
GAINZ Keychain
Ed’s Boomerang Surface
This surface was a bit hit in class - Ed created a very unexpected object.
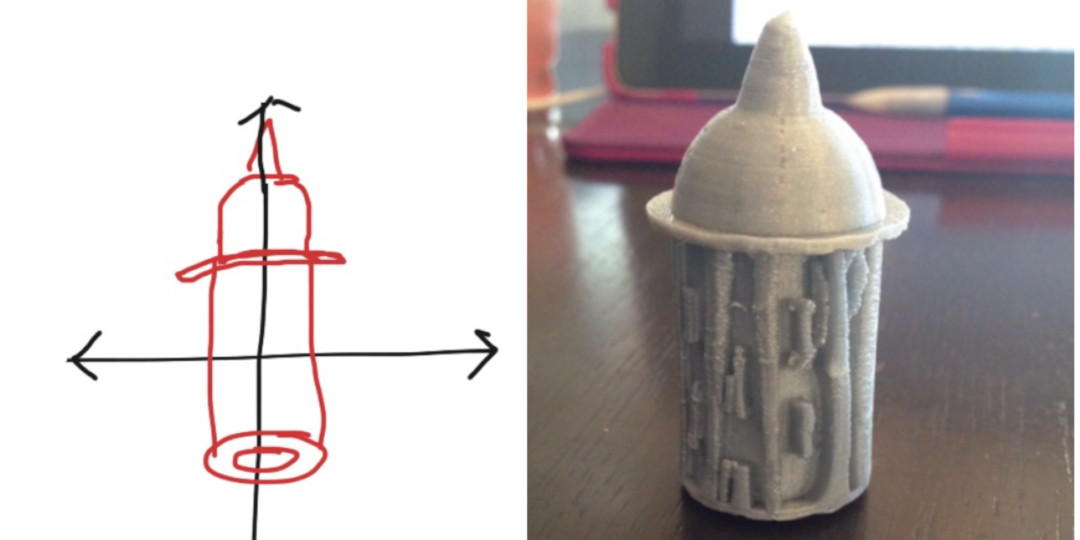
Kaitlyn
“I was very excited to 3D print. Especially designing our own images. Tinkercad was a little hard at first, mainly when I needed to group. After a few video tutorials I was able to do it no problem. I like the ruler feature on it to make sure everything was lined up. Coming up with an idea of what to print was hard since there were so many things going through my mind. But because in my job I work with two to six year olds that always show me what they make at school, I wanted to be able to show them and make something they could possibly use. The baby bottle is definitely something they can use with the amount of time they spend playing house and babies!
The printing process was fascinating. It is projects like this that make me excited to be a math teacher because that is what 3D printing is. The ability to add supports that peel off so easily is another feature that is helpful. My letters did not turn out exactly how I planned. The supports were stuck in the letters but for a trial/first time, I think overall it turned out well and I am excited to see the progress we make with our other projects.” ~Kaitlyn
Baby Bottle
Ellipsoid

Microphone
This very creative and authentic looking microphone called for some spontaneous music in class!
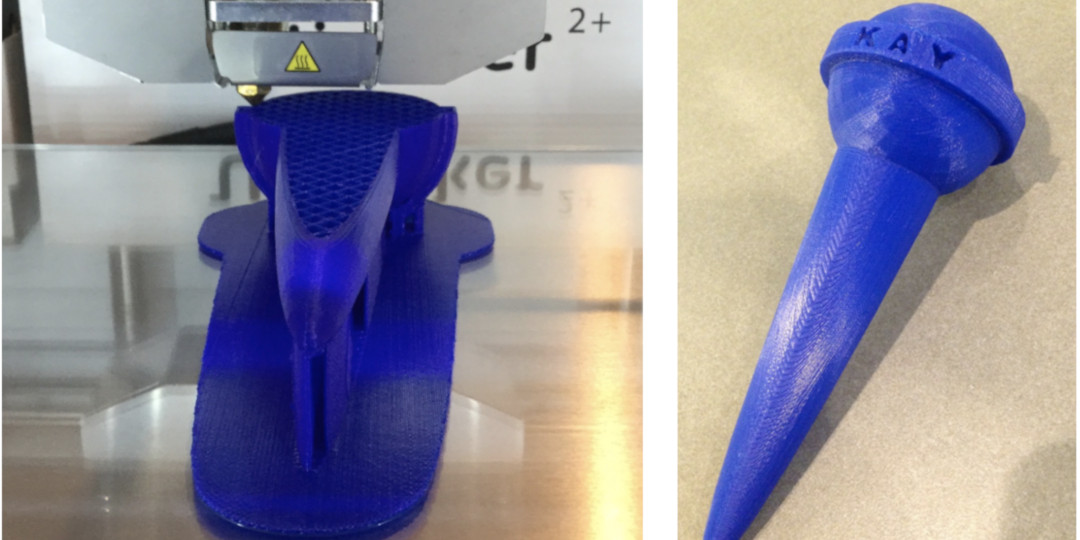
Adrian
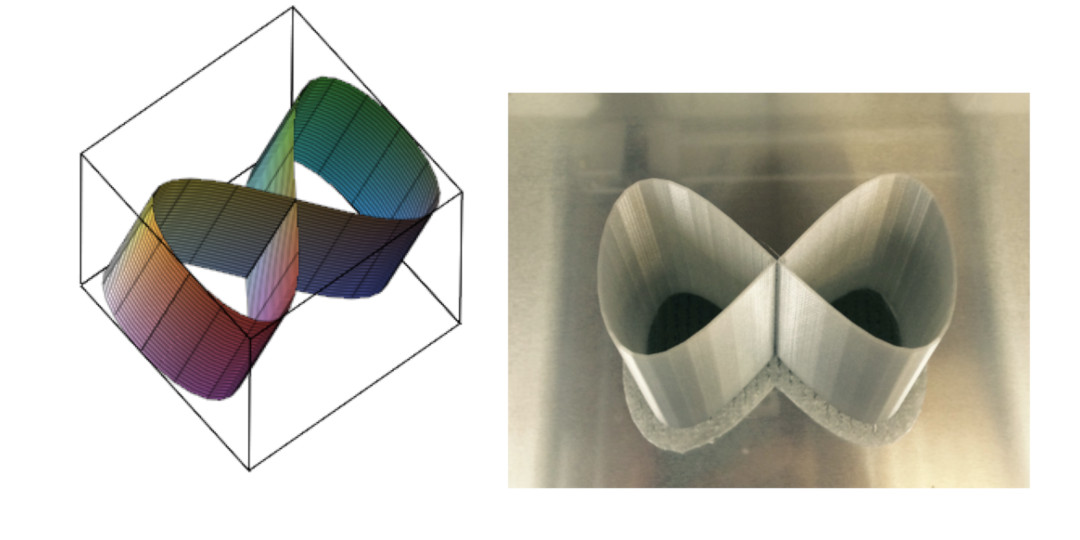
“I had never used a 3D printer before and this semester was the first time I used the programs to design our own 3D objects. When I was doing the lesson in Tinkercad, I thought it was going to be easy. As I began to create my object it started to become more difficult . . . and I realized that if you envision something and try to create it, just how complex the shape actually is and how hard it is to make. The object I created was a cylinder with a hemisphere on top and a hexagon shape on the bottom. The object will be useful for my work because I need to put a sticker on things that are a priority and it will be a great object to hold the stickers.
The best part of the project was seeing the printing take place. I had never seen how 3D printers work and when I found out we were going to use a 3D printer in class I was excited. I am extremely shocked by the number of things you can create by one spool of filament, and the printing process is just satisfying to watch. Sometimes it takes longer that you would have expected, but it it pretty cool seeing how the object is created little by little and the accuracy of the machine.” ~Adrian

Sticker Holder
Adrian created this to use at work!
Cylinder with Figure Eight Base Curve
Adrian developed an unusual parameterization for a cylinder with a familiar base curve.
Rocket
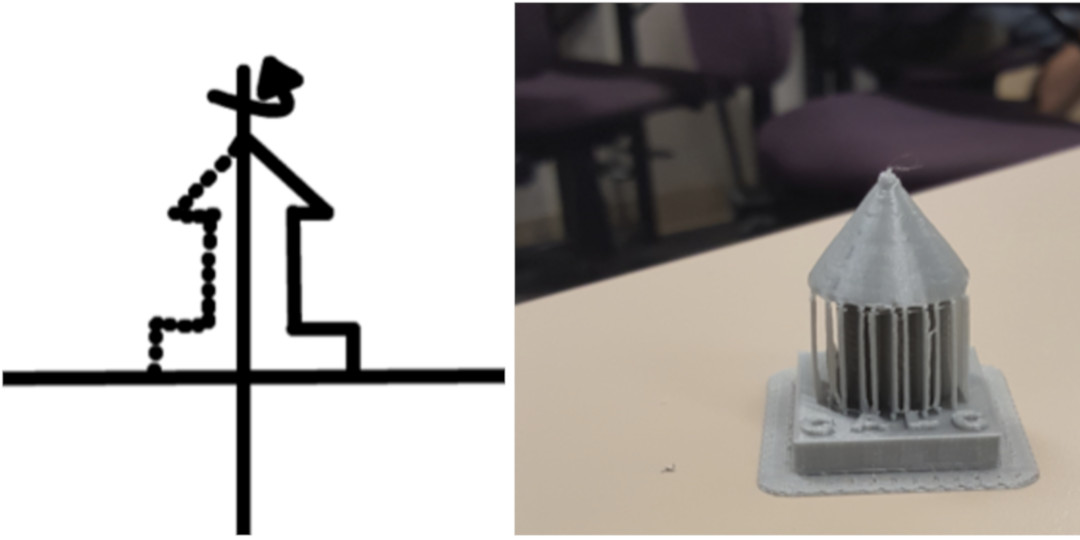
Ryan
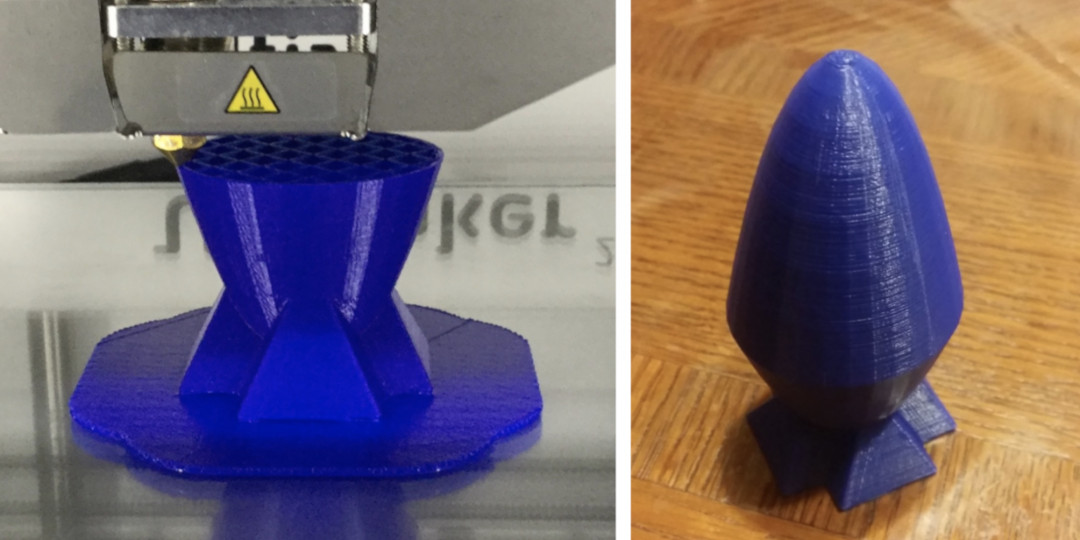
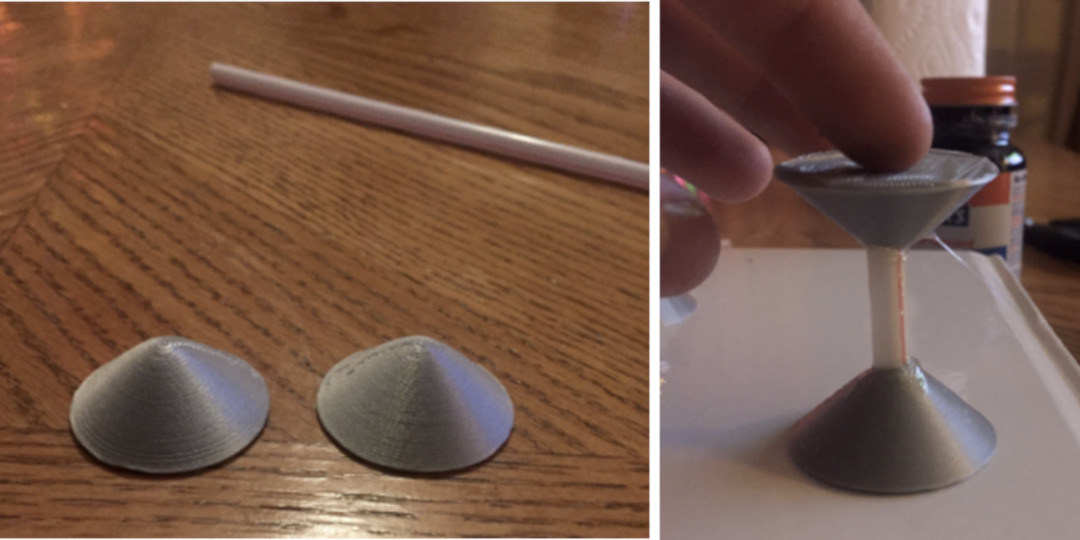
“In these projects, I have learned a lot about 3D printing. In high school, we primarily used Tinkercad in order to create designs for certain objects. For our first project in this course, we used Tinkercad to create a surface that would have an axis of rotation along the y-axis. The printing was a very quick and easy process. It was incredible to see how the printer knew exactly what to do based off of a simple design on the computer. The final product was extremely sturdy. This basketball hoop piece will be with me on my desk because it is a reminder of how fun the experience was.
In order to further our knowledge with 3D printing in this course, we discovered new ways to create surfaces for 3D printing. We used Maple, a popular math tool used in universities that help students visualize functions. The program takes some time to master, but with it you are able to do great things with 3D printing. We learned how to create STL files from Maple in order for us to print from the 3D printer. The 3D printing process was smooth, and the results were fantastic.” ~ Ryan
Basketball Hoop
The drawing of Ryan’s basketball hoop shows the axis of rotation. The original half of the hoop is on the right, in Quadrants I and IV. The hoop was rotated around the y-axis.
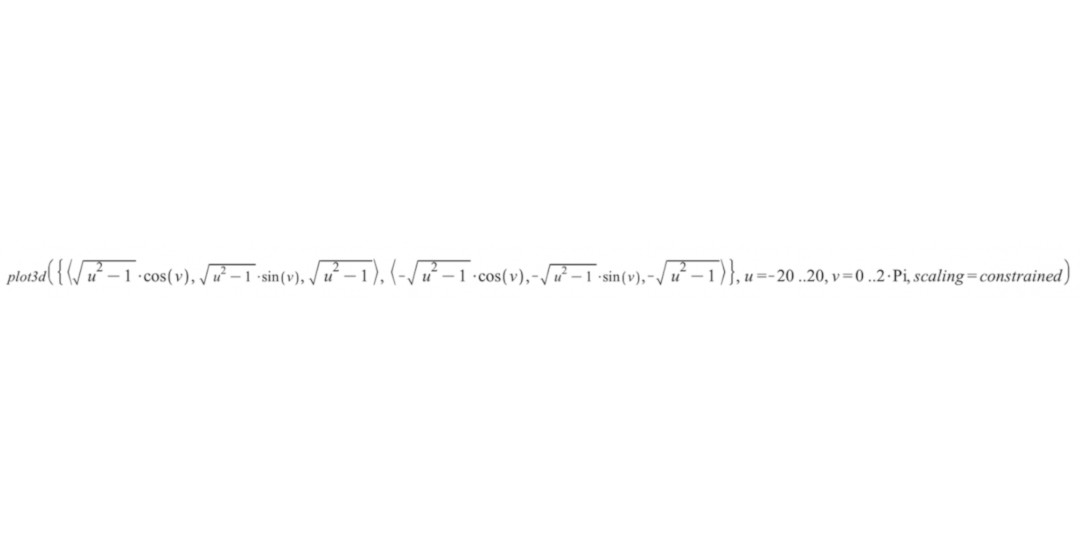
Hyperboloid of Revolution & Hyperboloid of Two Sheets
Burger with Bacon (two hemispheres, a cylinder, and two sine waves)
Ryan spent a significant amount of time thinking about and perfecting this multi-surface design to get it to print just right.
Note: The designs presented in this post are available on YouMagine in a Collection called Multivariable Calculus Surfaces.
Investigations with 3D Scanning
Towards the end of the semester, students experimented with and learned how to use the 123DCatch 3D scanning app. Their results are quite good!
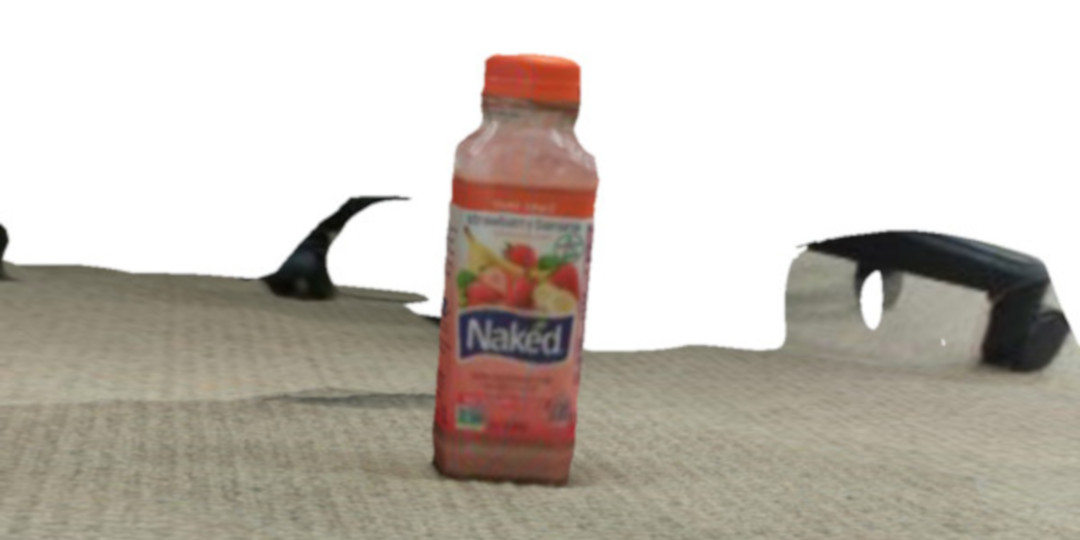
Smoothie Bottle by René
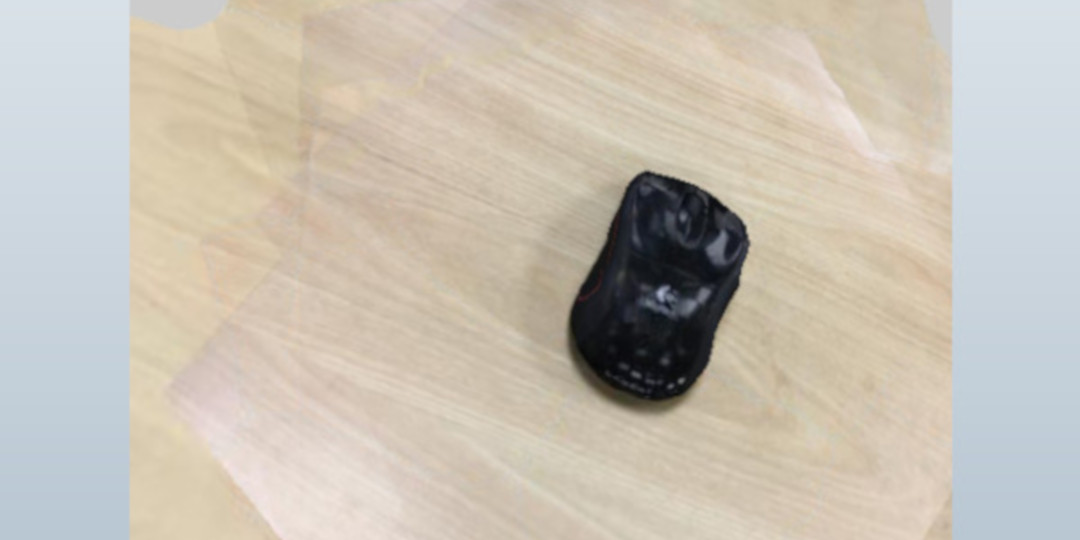
Computer Mouse by Edvardas

Chapstick by Kaitlyn
End of Semester Insights
As the semester winded down, I asked the students to:
Describe their experiences with 3D printing in the course.
Describe how they envision 3D printing being used in the future.
Here are excerpts from their responses for part (1):
My experiences with 3D printing in this course have been phenomenal. I have been able to create designs that I thought of, but also create designs that were based off functions studied in the course. This has elevated my learning of the material.
I thought it was a really fun experience and it brings a lot of creativity to math.
This is the first time I worked with 3D printing programs and a printer. I thought it was spectacular to create something digitally and then be able to make it in real life.
In the beginning, the 3D printing seemed a little difficult when using Maple. But with more practice, the easier it became and more interesting. It’s fun to make objects, but the fact that we now know how the objects are made with our knowledge of implicit functions and parameterizations makes it that much better. As a future educator, this is what I want to show my students: Math is everywhere and you will use it.
The experiences I have had with 3D printing in this course have opened new areas of thought for me. Unlike some of my classmates, I have never before designed and 3D printed something. It was awesome being able to see the functions that we work with in class in 3D and in our own hands. There are hiccups in math, and 3D printing is no exception. Troubleshooting problems, making mistakes, and ultimately fixing them is a crucial part of learning that 3D printing let me explore within math and using the software.
And for part (2):
I believe 3D printing will be integral to the medical community. Prosthetics and certain medical techniques can now be perfected with the use of 3D printing.
It can be used to give us an idea of the past - to repair or recreate artifacts. Being able to scan a 3D object to replicate and then print it at home is just fascinating and will be the future.
I envision 3D printing to be used in the car industry to print prototypes, new parts, or pieces that are hard to find.
We can make small models of a future building plan or a model city.
I see 3D printing expanding and becoming more prominent and accepted in the biomedical field. They are already using 3D printing technology for skin grafts - the possibilities are endless. I can only imagine how many lives this will help.
I envision 3D printing being used more in the STEM fields. There is a rise of “fixers”, people who fix their broken things and appliances, rather than throwing them away, and I think 3D printers will greatly assist with producing parts that either no longer get made anymore or are too expensive to be economical.
A note to my Inaugural 3D Printing Multivariable Calculus Class
Adrian, Edvardas, Ryan, René, Caroline, Kaitlyn, and Joe - thank you for your hard work, determination, perseverance, and awesome creativity this semester. Your excitement and willingness to venture into a new world in Multivariable Calculus with me was THE BEST, as are each of YOU! This is just the beginning of something big!