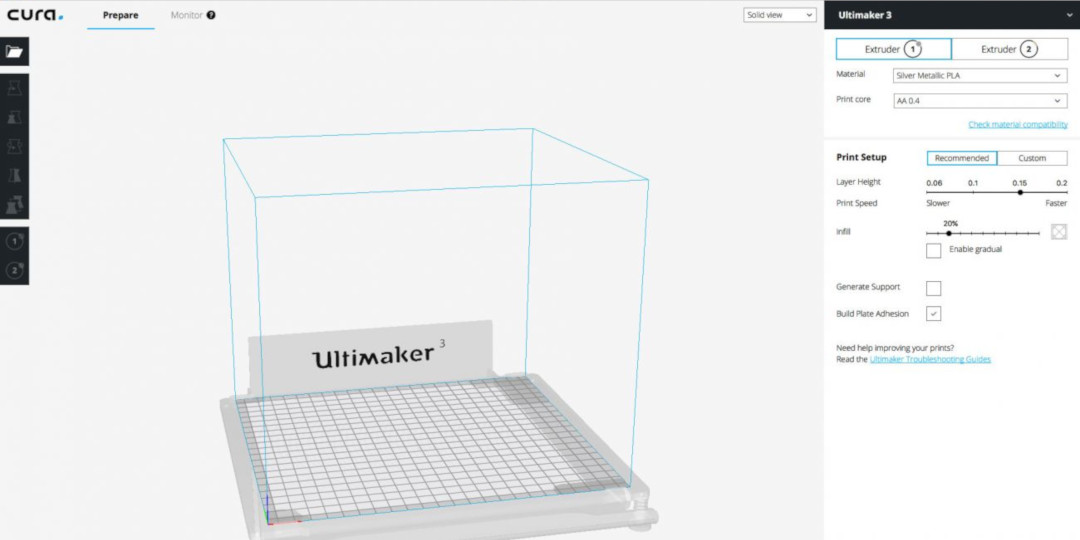
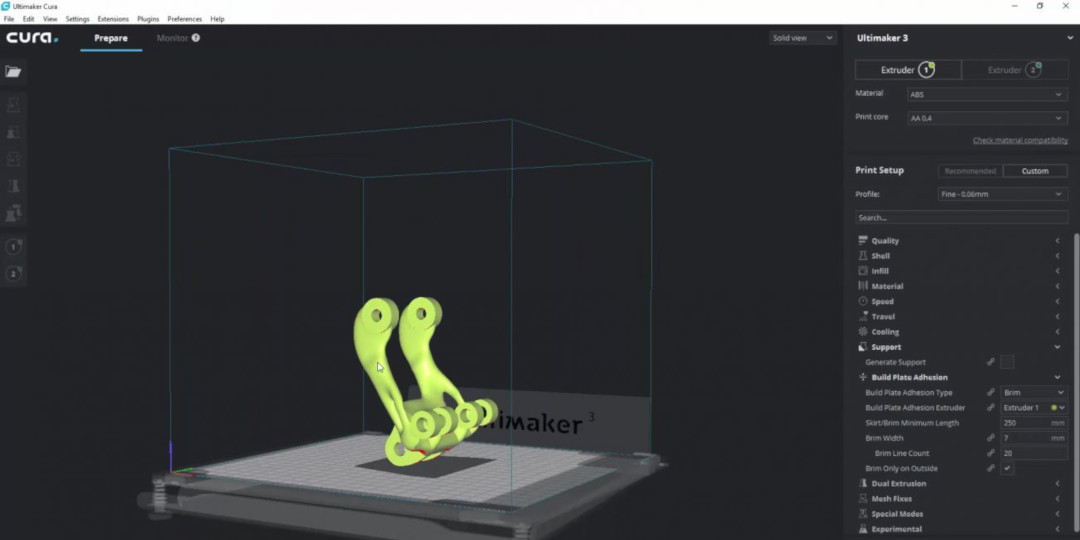
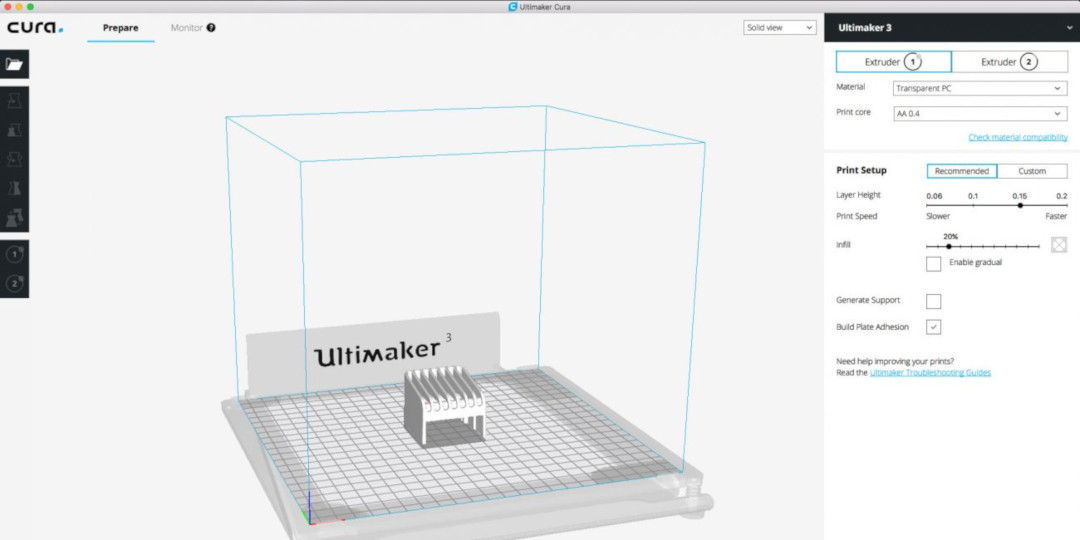
Ultimaker Cura 3.0 offers the easiest and most accessible experience for users, whether they are novices or professionals. With a fresh new interface, preparing your models for 3D printing has never been easier.
With all the new possibilities opened up by the creation of third-party plugins, we decided that moving from 2.7 to 3.0 is the perfect way to mark this new era. Serving over one million users worldwide, our software is designed as a solution for professionals who have adopted 3D printing into their workflow.
Ultimaker Cura 3.0 offers:
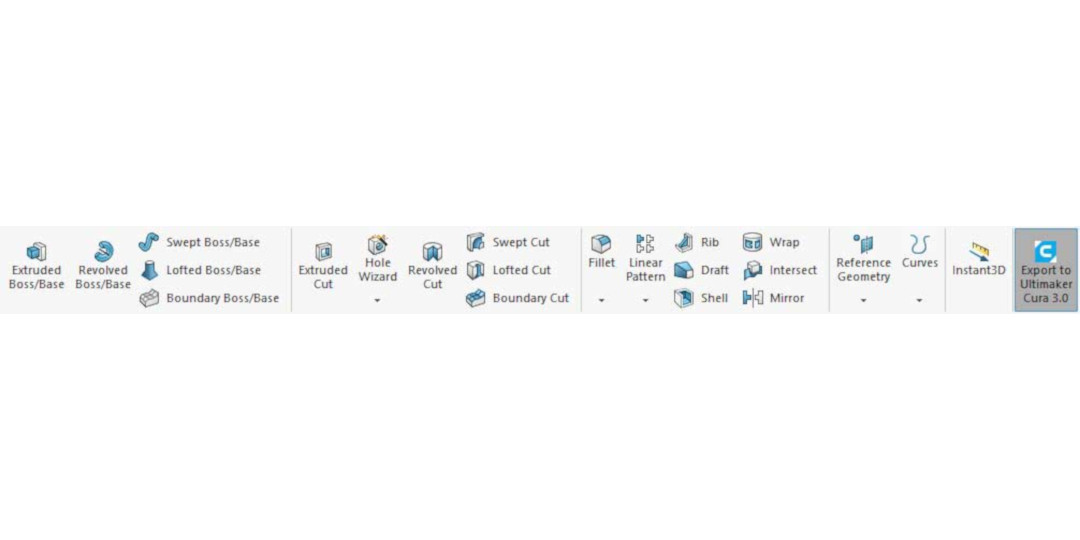
A brand new UI. Use recommended settings for quick and easy print setup using intuitive sliders to prepare your print, or use custom settings to individually tweak over 200 unique slicing parameters.
Reduced print time and material consumption. Recommended mode has new default settings that aim to save print time, material usage, and material costs.
Professional plugin integration. Seamlessly integrate Ultimaker Cura into your workflow. Use it with industry-standard CAD software packages such as SolidWorks and Siemens NX, or develop your own custom plugins to meet your specific demands.
The following shows a selection of features, improvements and bug fixes in Ultimaker Cura 3.0:
UI improvements
Ultimaker Cura 3.0 features a completely updated UI and color scheme.
Faster start-up. Start-up speed has been cut in half compared to the previous version.
Redesigned splash screen. The splash screen has been redesigned to reflect the new interface.
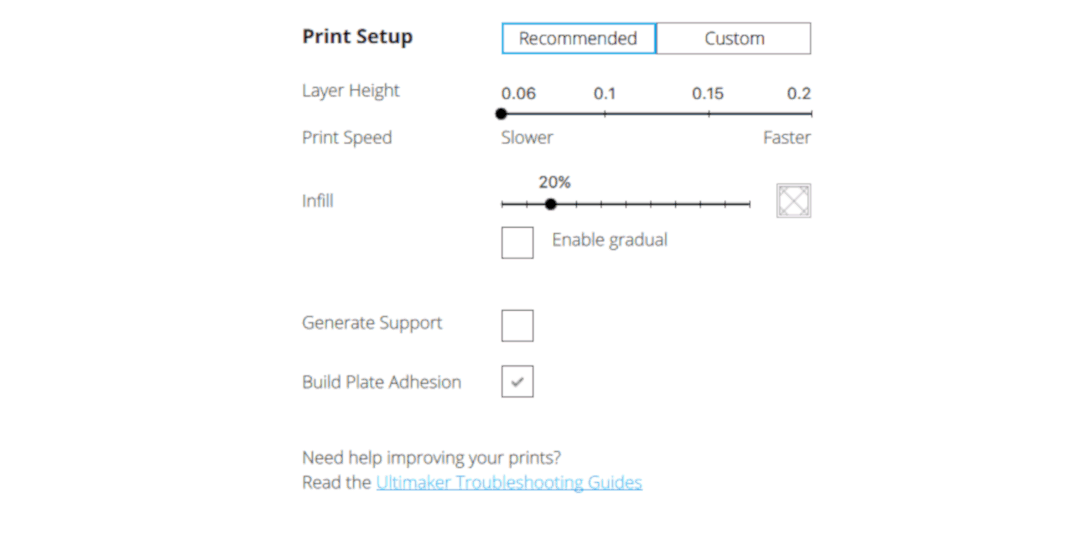
Sliders. Recommended mode now uses sliders to alter slicing parameters:
Easily control print features with intuitive sliders.
Rasterized build plate. The build plate now shows graduations of 10 mm and 1 mm for more accurate model positioning.
The build plate now shows graduations of 10 mm and 1 mm for more accurate model positioning
Extruder buttons. Extruder buttons have changed from tabs to buttons, and button colors have been changed to match the new color scheme.
Layer view position. The layer view drop down box has moved from the bottom-left corner to the top-right corner.
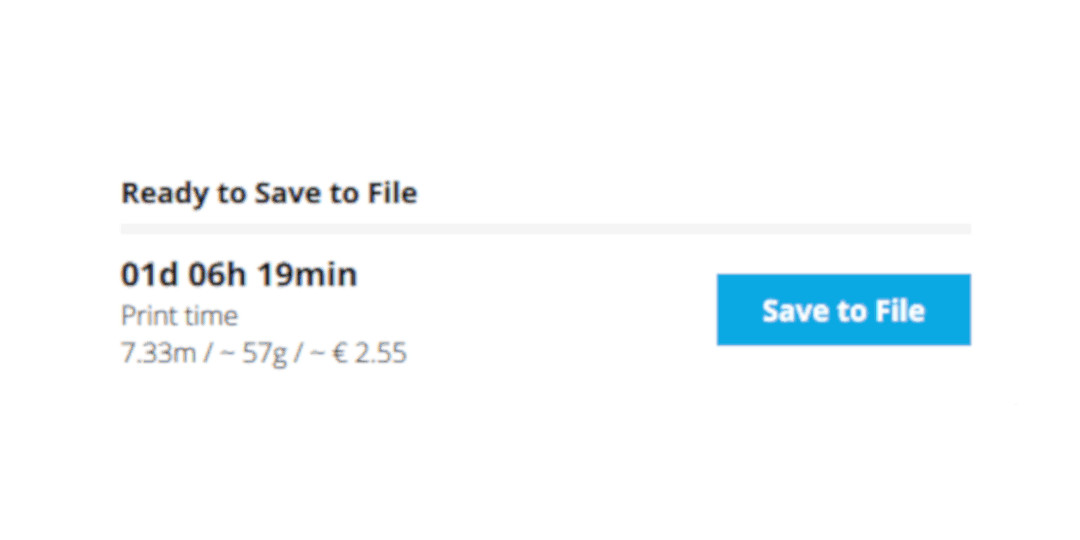
Print time location. The print time location has moved from the bottom-right corner of the 3D viewer to the left of the Print over Network/Save to File button.
Tab width. The width of tab functionality will change according to the word space (supported across multiple languages).
Third-party plugins and CAD integration
Third-party plugin capabilities. Professionals can now get the most from Ultimaker Cura by developing their own plugins to streamline their workflow. SolidWorks and Siemens NX compatible plugins are currently available and can be found in the Plugin Browser. Plugins can be installed with a single click, and updates will automatically be pushed when they are available.
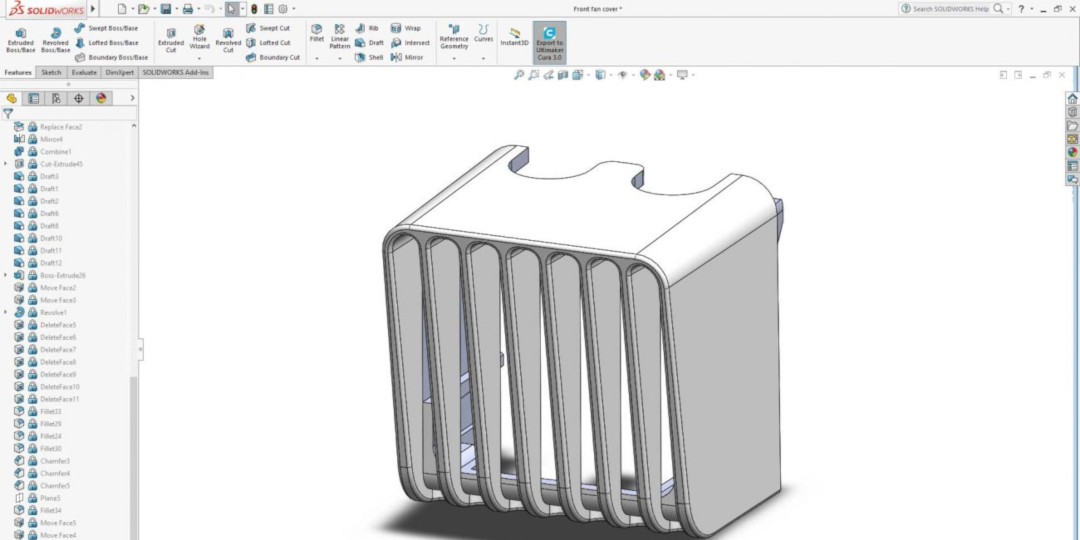
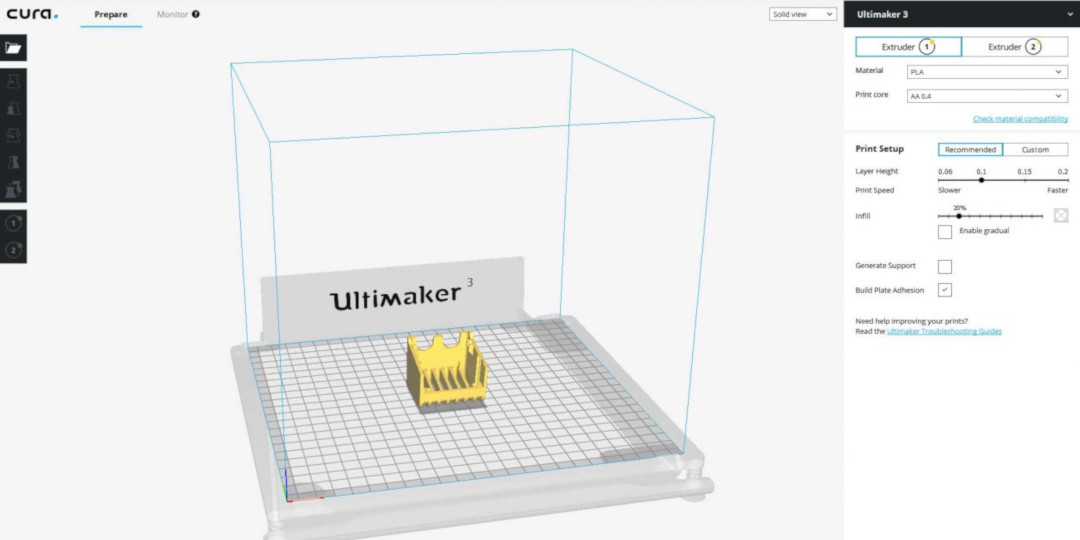
SolidWorks integration. Compatible with SolidWorks 2016 and above, this plugin enables seamless integration between the two pieces of software. The workflow is detailed below:
Prepare your design in SolidWorks
Press the “Export to Ultimaker Cura” button
Ultimaker Cura will open, with your design imported, ready to be sliced and printed
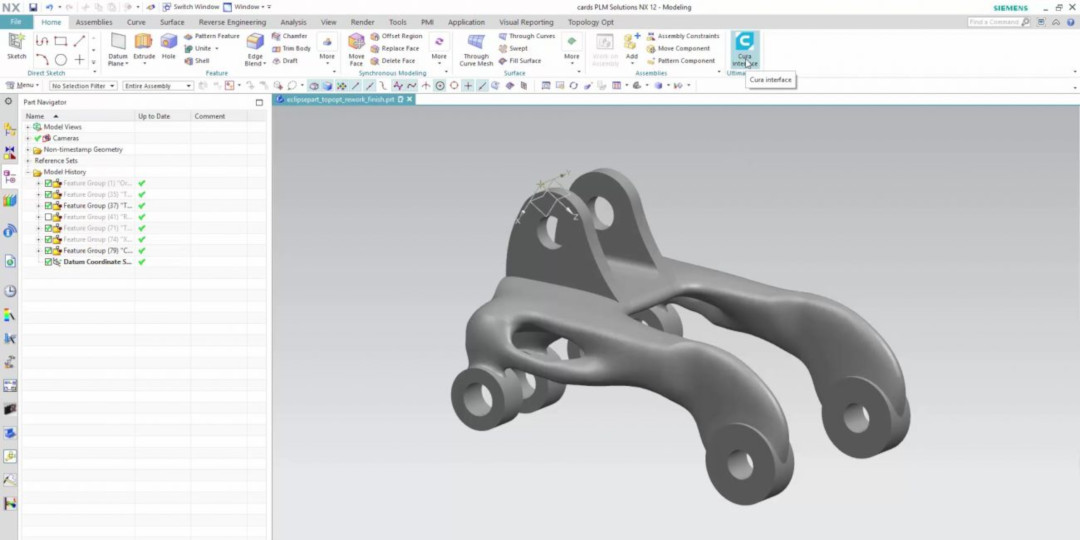
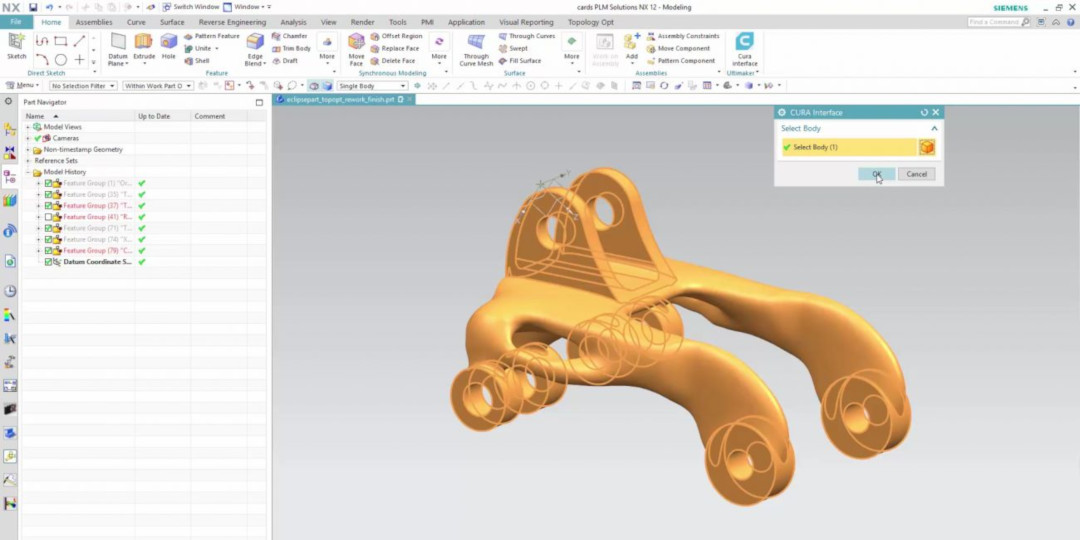
Siemens NX integration. Designs created in Siemens NX can be pushed to Ultimaker Cura at the click of a button. If a design is modified in Siemens NX, it can be updated in Ultimaker Cura by clicking the button again. This plugin is compatible with Siemens NX 10 and 11. The workflow is as follows:
Create a design in Siemens NX and press the "Cura Interface button"
The software will prompt you to select a body to export
Ultimaker Cura will open, with the design imported ready to be sliced and printed
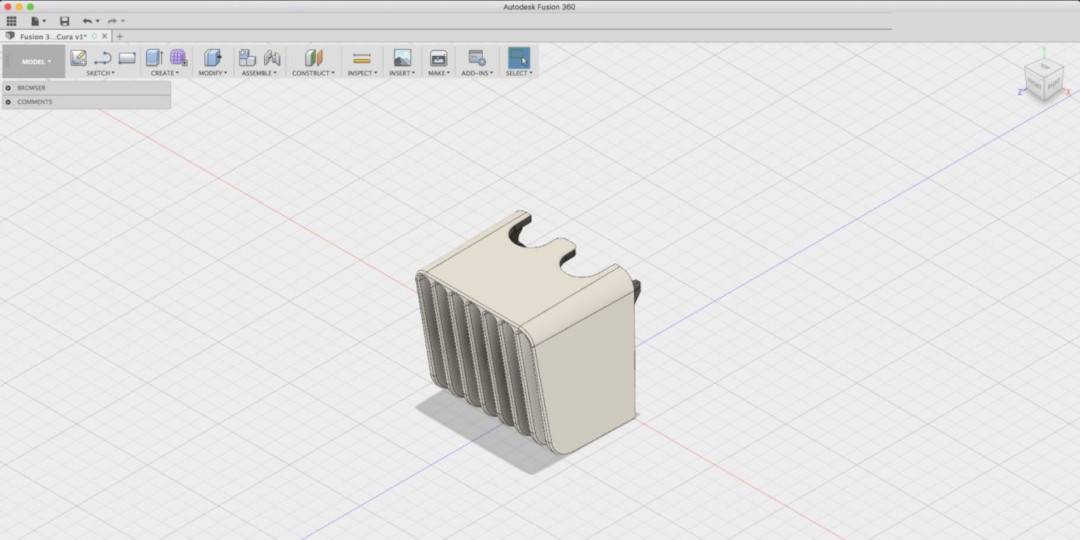
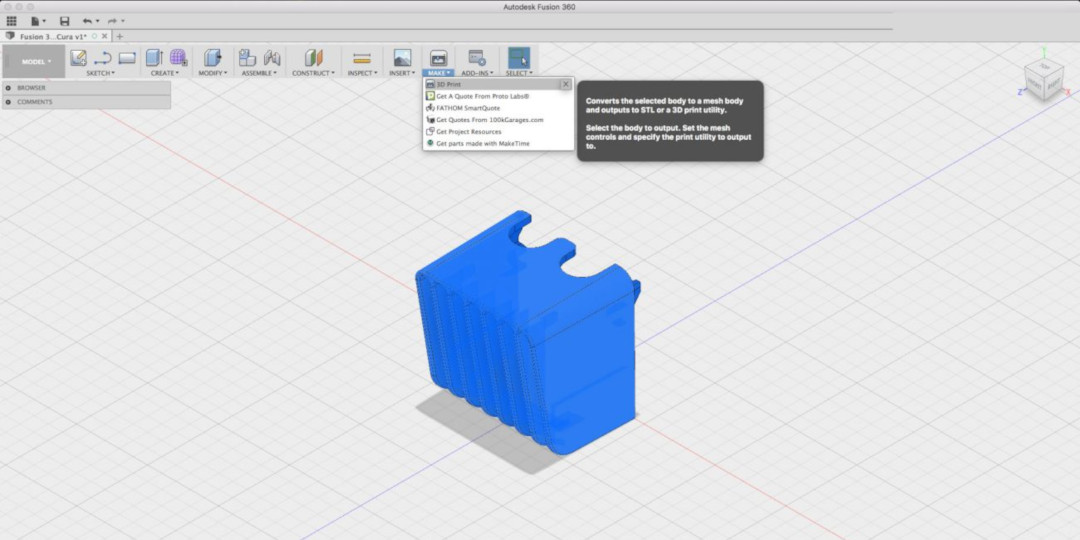
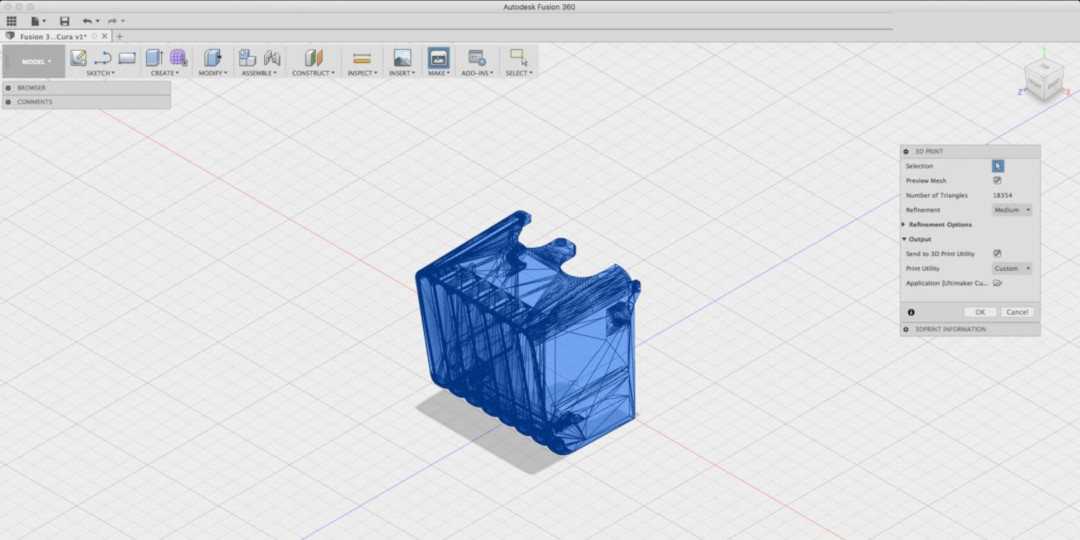
Autodesk Fusion 360 integration. Designs created in Autodesk Fusion 360 can be pushed to Ultimaker Cura using Fusion 360's "Make" function. The workflow is as follows:
Create a design in Fusion 360
Select the body to export and press "Make" > "3D Print" in the toolbar
Export the design to Ultimaker Cura
Ultimaker Cura will open, with your design imported, ready to be sliced and printed
New slicing features
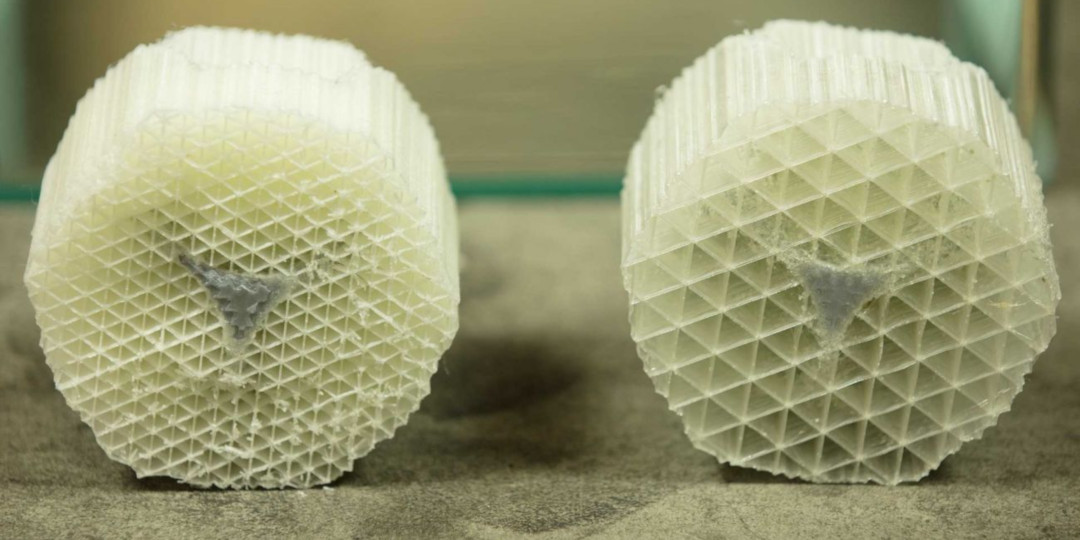
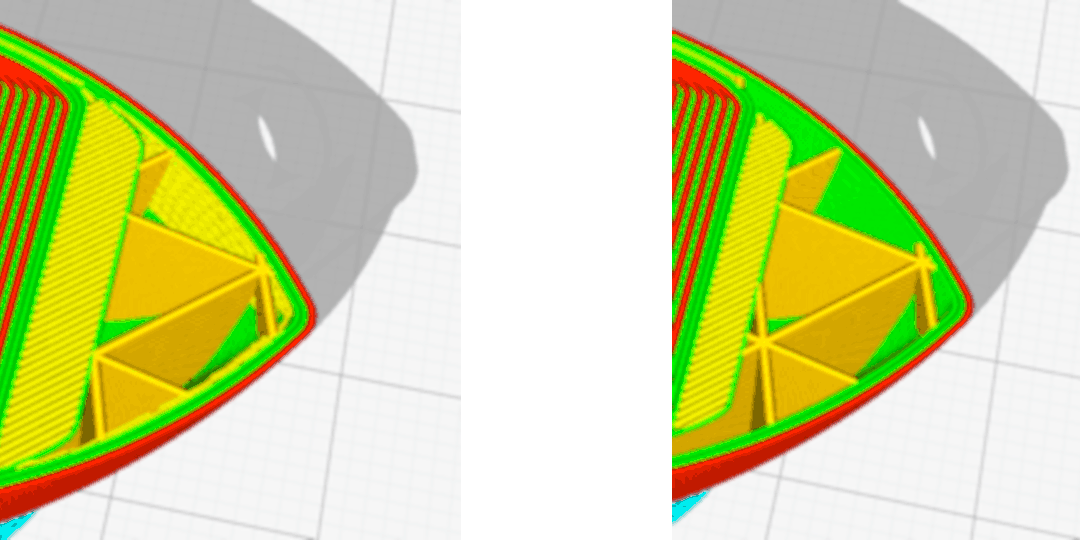
PVA gradual support. Printing times and material consumption are heavily reduced by printing a lower PVA infill in the support and increasing it towards the top. This also reduces PVA dissolving times. On the (extra) fine and normal quality setting, PVA infill layers are printed at double thickness, decreasing print time even more.
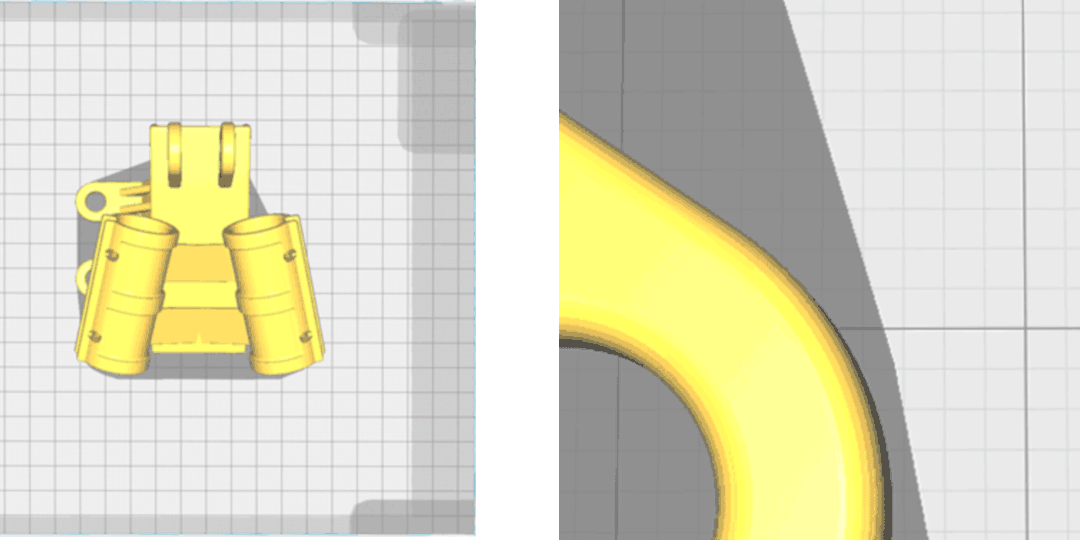
Infill becomes denser at interfaces, requiring less support material.
The left print was sliced using Cura 2.6. The right print was sliced using Ultimaker Cura 3.0. Note the less-dense supports with the right print - the support gradually increases in density towards the top and at interfaces.
Z seam options. Gives the user control over where to place the seam - hide it in convex corners or in easy to remove locations such as concave corners. This doesn’t let corner angles influence the seam position.
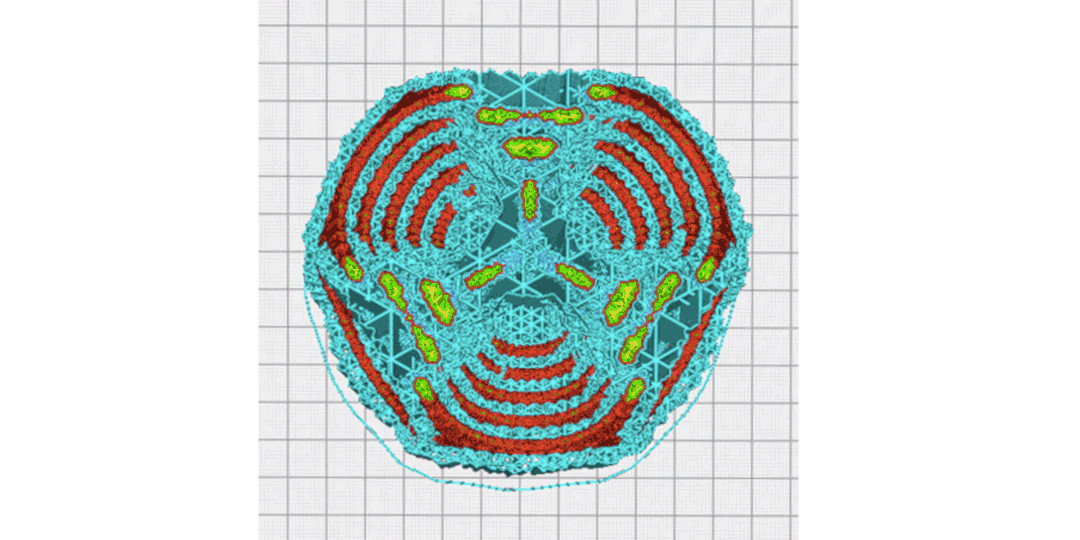
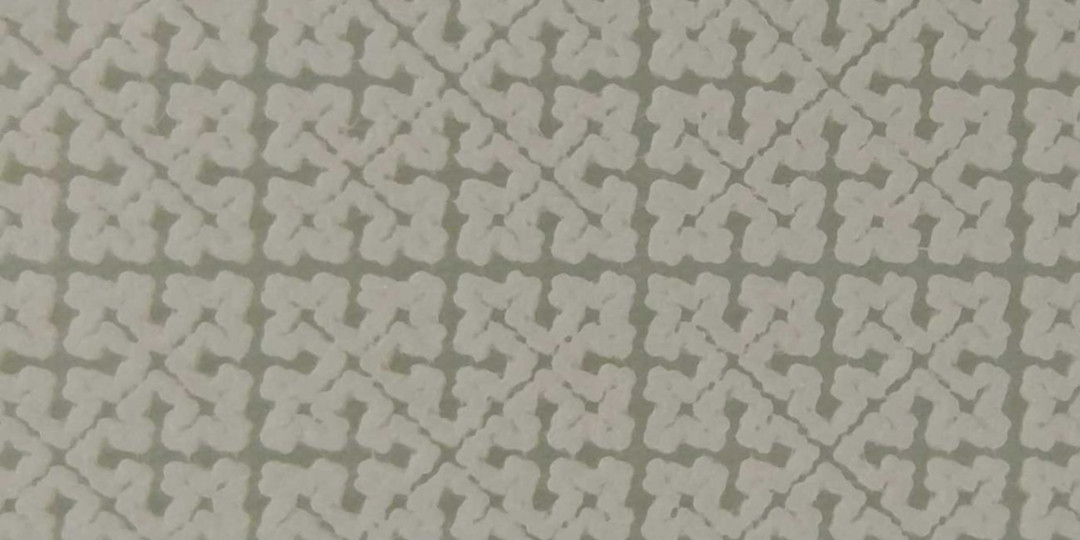
Cross infill. A fractal pattern infill that requires fewer retractions compared to other infill types. This is useful for flexible materials as it causes less material elongation when extruding. The internal structure provided by this gives flexible models greater resistance, while retaining ‘soft’ properties in all directions.
Cross infill in Ultimaker Cura
A printed example using TPU 95A
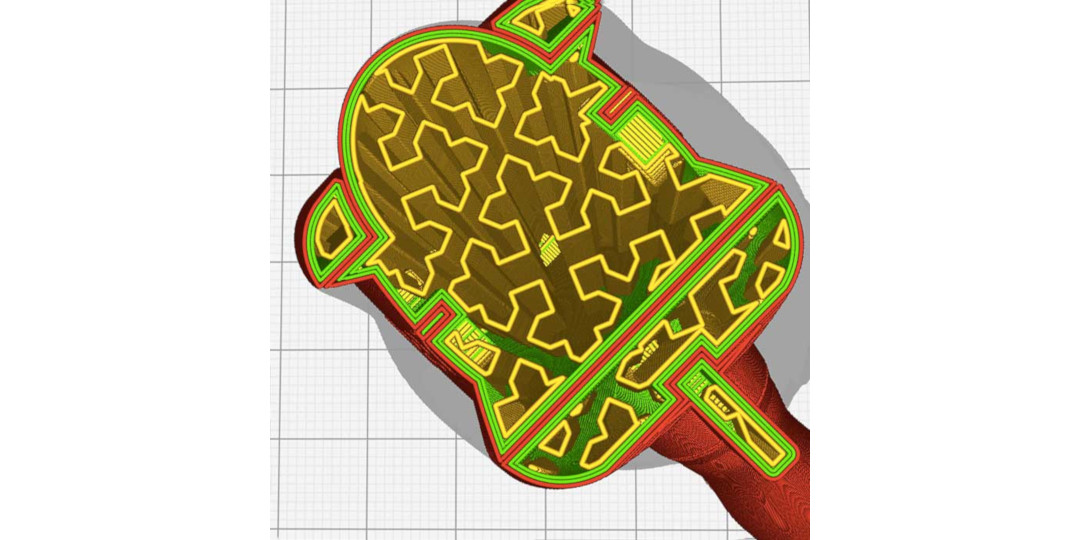
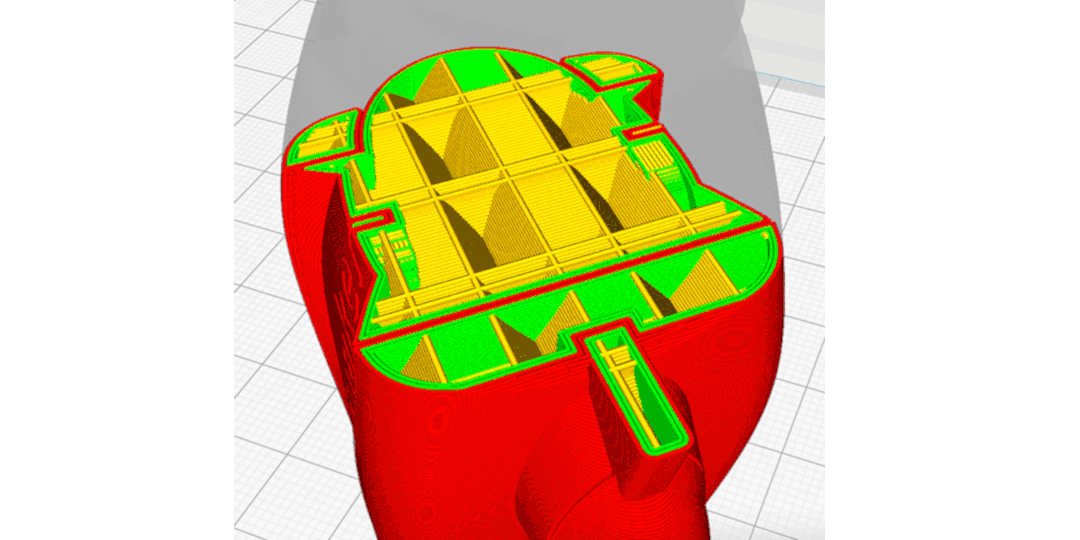
Quarter cubic infill. Similar to tetrahedral (octet) infill, but half of the lines are shifted half of the period up. This pattern sacrifices some rigidity of octet infill for greater toughness.
Skin removal width. Remove thin strips of skin from a model to prevent print head zig-zagging, in turn preventing vibrations. The lack of vibrations will also improve print quality on slight overhangs.
Skin expand distance. Cutting away skins on steep overhangs makes prints less sturdy. By expanding skins with the thickness of walls, features will be better supported. In addition, features such as towers on top of infill will be stronger.
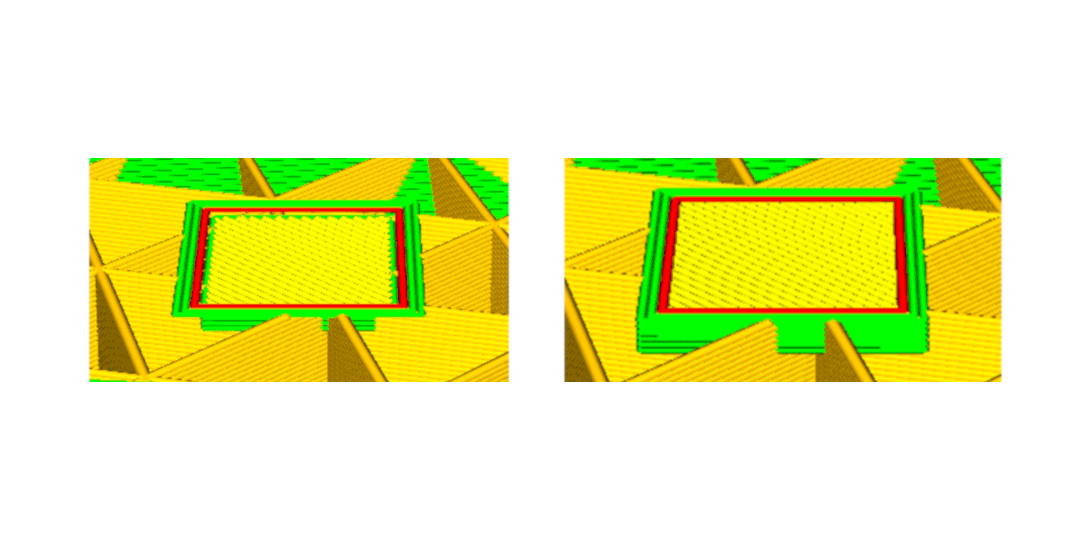
Extra skin wall count. This feature is now enabled by default. Printing extra skin directly on top of infill can lead to gaps, curling and pillowing. This is reduced by printing a wall around the skin first, and also improves the printing speed.
Minimum extrusion for skin. Will prevent Ultimaker Cura 3.0 filling small gaps that are probably filled already, resulting in less strings, better top details, and faster prints.
PVA retractions. PVA retraction length during a print core switch is increased. In combination with the reduced retraction distance and slightly higher max count, this ensures reduced stringing and more reliable results. Minimum travel distance for retraction is decreased, and max count is slightly increased. This significantly reduces stringing, at the cost of slightly increased print time.
Bug fixes
With the help of our community, we have addressed a number of issues related to:
Custom material profiles are no longer sent to Ultimaker Cura when connecting to a printer
Sync z-hop with layer changes
Memory leaks on MacOS
Printer name not loaded when project file is opened
Doodle3D Wifi box is selected by default on non-Ultimaker 3 machines
Notes
Software name change. The application name has changed from “Cura” to “Ultimaker Cura”. Please note that when updating on a Mac, this will cause an instance of “Cura” and “Ultimaker Cura” in the applications folder. The "Cura" instance will need to be removed manually.
Quick start guide. New to Ultimaker Cura? Our quick start guide will show you how to set up your model for 3D printing.
Update now!
For a full breakdown of features and new developments, view Ultimaker Cura 3.0 on Github. If you have any questions or feedback, feel free to join the discussion on our forum.
Be the first to see the benefits of Ultimaker Cura 3.0 and download today!