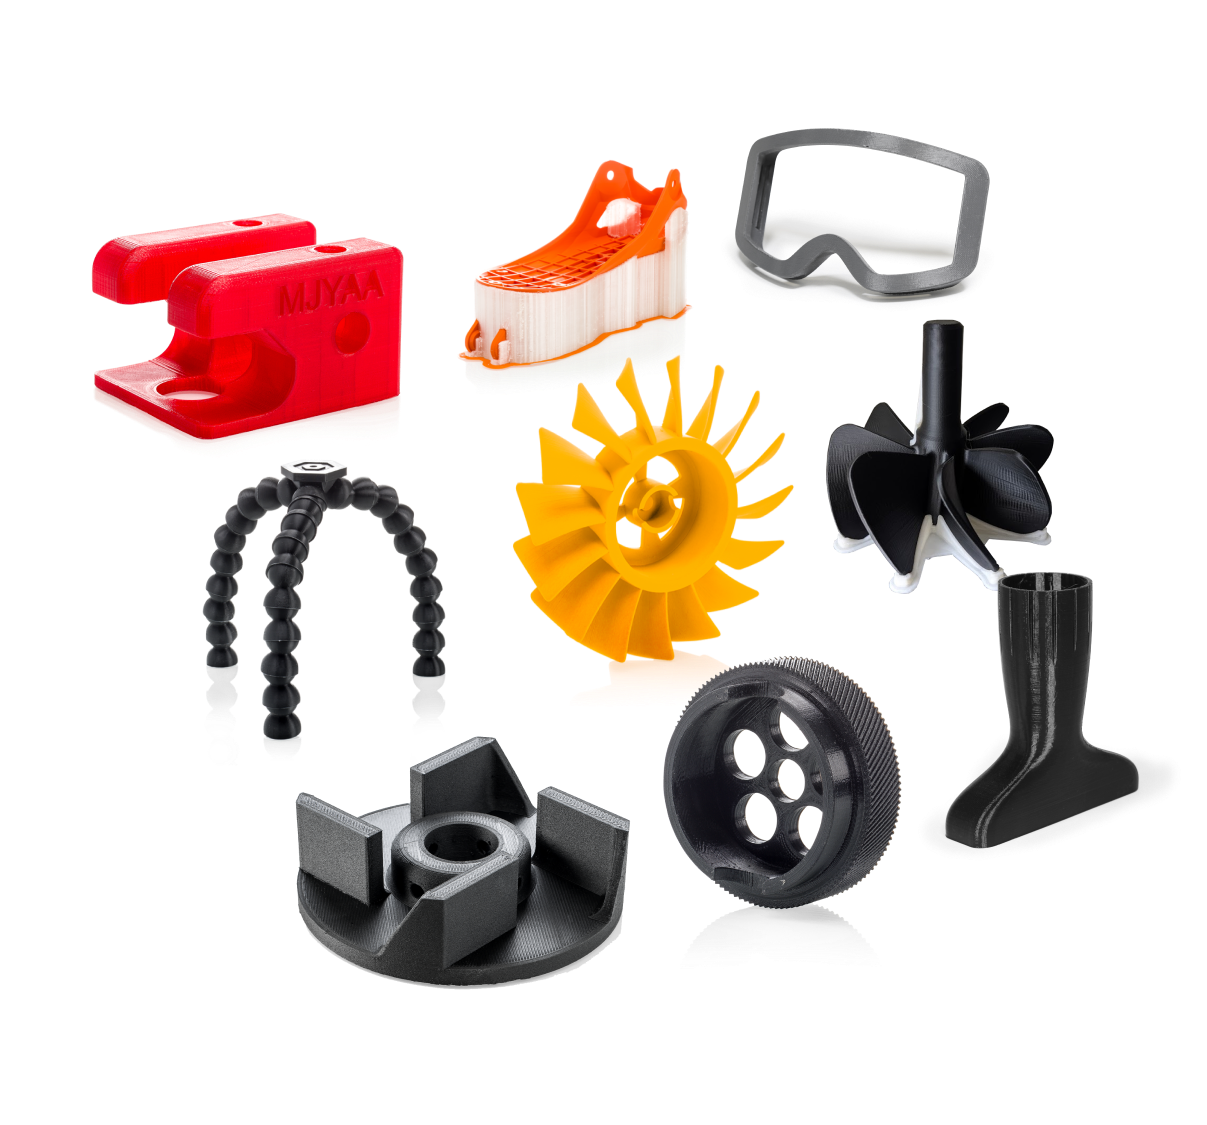
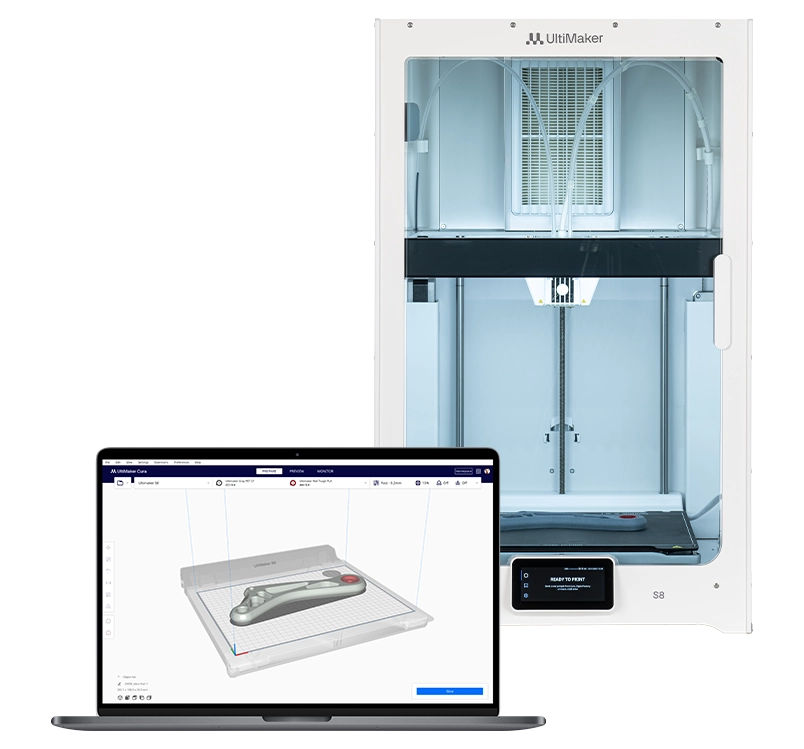
goblet project

Integrating 3D printing and The Goblet Project

Pioneer Chris Hanusa shares one way he integrated 3D printing into his Integral Calculus class.

In Fall 2017, I volunteered to teach Integral Calculus because I wanted to integrate 3D printing into its curriculum. Today I will share with you how I worked "The Goblet Project" into my calculus curriculum.

I learned about The Goblet Project when I went to the 2015 MAA MathFest in Washington DC. I was giving a talk about teaching mathematical art in the classroom in the special session on What can a mathematician do with a 3D Printer?

Later in the session, there were two successive talks on The Goblet Project, by Brenda Edmonds, Cathleen O'Neil, and Rob Grondahl, and by Scott Dunn, Douglas Meade, and Philip Yasskin. The goal of this project is to make tangible the concept of solids of revolution.

Solids of revolution

solid of revolution is a three-dimensional object formed by taking a two-dimensional region in the plane, and choosing to rotate it around an axis into a three-dimensional object. A common method for teaching this concept involves drawing representations of the 3D objects on a blackboard, hoping that the students are able to understand their intricacies.

Solids of revolution

The key idea involved in The Goblet Project is that when you rotate a solid that looks like

looks like

around the y-axis, the final result is a goblet!

goblet

Project specifications

Once I had decided to incorporate The Goblet Project into my class, I searched the web for resources made publicly available by other educators. I modeled my goblet module after pages at Kenyon College by Judy Holdener and Dana Paquin. (See also information by Douglas Meade or at Great Valley School District ). You can see the complete Goblet Project specifications from my course webpage.

The students were tasked with designing a goblet that satisfies the following criteria:

  • The goblet must be a solid of revolution created by revolving a piecewise-defined function.

  • The goblet must hold 150–200 cm3 (cubic centimeters) of liquid.

  • The height of the goblet must be no more than 20 cm.

  • The stem thickness must be at least 0.8 cm at its thinnest point.

  • The base diameter of the goblet must be at least 1/3 of the height of the goblet, so that it does not fall over.

In addition to designing a theoretical goblet satisfying the requirements, I required that the students create a virtual 3D model of their goblet and send it to me as an STL file. This allowed me to print the digital representation of the goblet on a 3D Printer. I also asked the students to write a two-page discussion explaining their learning process and verifying that their goblet satisfied the project specifications.

3D Modeling a Goblet

Past variants of The Goblet Project seemed to make use of the computational software Maple. I have more experience with Mathematica, and I find it more user-friendly especially in 3D Visualization and 3D Printing. (See my growing set of resources for 3D Design in Mathematica or related 3D Design blog posts). I created a worksheet tutorial in Mathematica that the students could follow to translate their theoretical goblet into a digital 3D model.

Since everyone is used to thinking of graphs of functions of x, the goblets are actually formed lying on their sides, rotating functions of x around the x-axis. The Mathematica file first teaches the students how to use the Plot command to display the pieces of their bounding curves:

code snippet 1

This gives the following visualization:

visualization

Then the file helps the students to define the piecewise-defined functions for the outer boundary and the inner boundary using the Piecewise command:

code snippet 2

I then provided the students with the code that makes the polygonal faces of the goblet based on these piecewise-defined functions and certain parameters that help to make the surface smoother or coarser. The final version looks like this:

goblet on screen

Then the most magical part of using Mathematica is that this virtual goblet can be 3D printed by simply exporting to STL format:

Export[NotebookDirectory[] <> "Goblet.stl", goblet]

The printing process

For my two classes with 40–50 students by this point, I needed to print out 17 different goblets. I enlisted two students to help keep the printing process going. They helped remove goblets that finished and restart the printers with new models.

To print the 17 goblets took a whole week of constant printing on three machines since there were the standard 3D printing issues along the way. Sometimes the filament ran out, sometimes the print broke because of a thin stem, sometimes the model had too much overhang to be able to print correctly which meant certain filaments didn't work.

failed prints

It's showtime!

Once the goblets were all printed, it was time for the most satisfying part of the project—the reveal! I bought all the goblets to class and the students got to hold their goblets for the first time.

showtime

My favorite part about class projects is how diverse the final results always are. I am lucky to be teaching such amazing students who work hard, take ownership of their work, and thrive when given high expectations, which they always exceed.

I asked for some feedback from the students about the project. They had the following comments:

  • "It's amazing to see your goblet come alive through the art of 3D printing."

  • "I got to apply the math I learned."

  • "I finally had a reason to learn how to calculate volume."

  • "This project helps to visualize the disk and washer method."

  • "I had never used Mathematica before; working in groups made it possible."

  • "This project opened up a new passion for 3D printing."

  • "Cool!"

I asked the students if given the chance, would they want to do the project again. It was an overwhelming YES! Furthermore, most students said that the difficulty was just right. It was not overly simple, but it did require problem solving and applying the math that they had just learned.

The next time I teach Integral Calculus, I will work to use this module again. But I would do a few things differently. I would change the height to 17cm because that's the maximum height of the 3D printer! I would require that the minimal diameter of the stem be 1.5cm so that the prints won’t break. I would also require that there be no vertical tangents to the piecewise-defined curves because that is where the 3D printer had issues with printing. I would also want to give students a choice of colors for their final prints. I definitely will want to have student helpers again, because they made the printing process much less stressful on my part.

Summary

Why use The Goblet Project in your own classes? The Goblet Project involves

  • Groupwork: Students must work in teams of two or three

  • Problem solving: Students are given constraints that restricted the possible solutions and the students needed to work together to ensure that the criteria were satisfied

  • Creativity: Most teams wanted to create a goblet that was unique and matched an aesthetic that they shared

  • Functional visualization: In order for their goblet to match their ideal, teams needed to determine which mathematical functions would lead to the shapes they desired. This meant a deeper understanding of the shape and properties of functions. They also earned a deeper understanding of piecewise-defined functions

  • Solving equations: Goblets were formed by piecing together different equations. In order for the pieces to be assembled with no gaps, the teams would need to find where two adjacent graphs intersect, which required (gasp!) solving equations

  • Computer programming and design: The students learned the basics of the computational software Mathematica, and programmed the computer to create the final 3D model

  • 3D printing: The students learned the principles of 3D printing / additive manufacturing

  • Enthusiasm: Students were extremely engaged — this project stimulated interest and enthusiasm in mathematics

Feel free to incorporate The Goblet Project into your own classes.

Christopher Hanusa is a mathematician, mathematics educator, and mathematical artist. To learn more about his teaching and research, visit his Queens College website; to learn more about his portfolio of mathematical art and jewelry, visit Hanusa Design.