3D printers promise endless applications. However, sometimes reality gets in the way of that promise. One example of where that can happen is when trying to print something that needs to hold water, only to watch it leak like a sieve. Read on to find out to avoid such a tragic waste of liquid.
Is it possible to print waterproof and watertight parts?
Yes, it can be done but it’s not always easy. To get the best results, you need to pay special attention to both the material and the settings you use. And even then, some post-processing may also be needed to get a part that is truly and reliably waterproof.
It is also worth talking about what we mean when we say waterproof. When talking about clothing or electronics, the word waterproof is usually used to indicate that an object is capable of keeping water out. For anything that needs to keep water in such as a vase, a more appropriate description would be watertight. Some industries like electronics also use the term water-resistant to describe something that can water out, up to a limit. Such as a phone which is only waterproof up to a certain depth.
In this article, we will use waterproof as an umbrella term to include all the above. The steps you take to make a print waterproof will also help it to be watertight and water-resistant. Although, most parts will not meet the same criteria that your waterproof phone is held to so it’s probably best not to go deep-water diving while relying on a printed part to protect anything sensitive.
How do you print waterproof parts?
To get waterproof parts, there are three areas that are important. The material used, your slicer settings, and post-processing.
It is possible to print waterproof parts with a variety of different 3D printing technologies. Some industrial printers with six-figure price tags are even capable of making extremely reliable waterproof parts with robust materials like metal. However, most people don’t have access to those printers so for this article, we will be focusing on the most common and accessible 3D printing technology, FFF printing.
Materials for printing waterproof parts
Most FFF filaments are thermoplastics. Plastics are generally good at being waterproof which is why most water bottles are made of plastic. Plastics are also not normally degraded or damaged by water which is also why so many of those plastic bottles end up in the ocean and are likely to stay for a long time to come. However, there are a lot of different types of thermoplastics and all of them have different properties which are worth knowing before you try to print your waterproof parts.
A note on swelling: Many 3D printing materials are hygroscopic, meaning they absorb water. Some are worse than others (PETG, Nylon, PLA) and some are better (ABS, PP) but most absorb water to some extent. The result is, if you leave a part in contact with water for a long time it may start to swell. The amount of swelling is usually small, but it can deform your part and even cause it to split or break in a way that stops it from being waterproof or watertight. The swelling will not continue indefinitely or cause the part to degrade completely like it would with untreated wood. Instead, the part will likely swell up to a certain point (depending on the material) and then stop. If you have ever printed a part that was initially waterproof but started leaking over time, this was probably why. It should be possible to dry your part to remove the swelling but allowing a part to swell and then drying it repeatedly may cause increasingly more damage.
PLA
PLA is one of the cheapest and most common FFF printing materials. PLA can be used to create waterproof parts, but it does have some disadvantages. As mentioned above PLA can be prone to absorbing water and swelling.
PLA is also biodegradable. Meaning that (under the right circumstances) it can be composted. This is not an issue if it’s only exposed to perfectly clean water, but if you were to leave a PLA printed part submerged for an extended period in a body of water that contains microorganisms, like a pond, there is a chance that your part could start to degrade. Albeit slowly.
Lastly, PLA has low heat resistance. Meaning that if you wanted to use a printed part to hold hot water, it would likely deform. This can be solved by heat treating your part after printing. Heat treating is explained more later in this article.
PETG
PETG is another common and affordable FFF material. PETG is particularly hygroscopic meaning it’s prone to swelling. On the flipside, PETG has a high heat resistance so printed parts can be kept outside in direct sunlight without issue, and they can stand up to hot (although not boiling) water.
PP
PP is one of the better options for printing waterproof parts. It is less prone to swelling than PLA or PETG and it is chemical resistant. PP can also be used to print flexible parts that hold their shape and do not break after repeated bending.
ABS
ABS is a decent option for printing waterproof parts. It has a high heat resistance and is not as hygroscopic as many other materials. The best reason to use ABS, though, is that you can use Acetone to vapor-smooth parts printed in ABS. Vapor-smoothing will be talked about more in the post-processing section.
PVB
PolySmooth is a PVB-based material made by PolyMaker that is easy to print and has mechanical properties similar to PETG. The big advantage of PolySmooth for printing waterproof parts is that it can be vapor smoothed using isopropyl alcohol. The process is similar to how ABS is smoothed using acetone but isopropyl alcohol is much safer and easier to handle than acetone.
Which settings to use for printing waterproof parts?
Just as important as the material you choose, is the settings you use. FFF printing works by stacking layers of material on top of each other, one at a time. The problem with that is that each layer has a chance of leaving a small gap between itself and the layer below. The following settings are mostly aimed at avoiding those gaps or mitigating their effect:
Wall line count
Wall line count is the setting that determined how many layers thick the outer wall of your print is. Generally, more wall lines will increase the chance of your part being waterproof. The reason is that they reduced the chance of water having a direct path through all the walls present. If under extrusion or some other issue has caused a small gap in one wall, the next wall acts as a backup to plug that gap.
A wall line count of 3 is normally a good place to start. It’s worth noting that increasing the wall line count for thin parts will have no effect. There is also one situation where a single wall is the best option, and that’s when using vase mode.
Spiralize outer contour (vase mode)
Spiralize outer contour (also known as vase mode) is a setting that enables smooth printing of objects with a single wall thickness. It turns the print into one continuous print path which means there are no retractions between layers and therefore no Z seam.
That is the biggest benefit of vase mode. The Z seam is one of the most common areas for gaps in your printed part to occur. Removing that seam makes parts with even a single wall capable of being waterproof. However, this setting is not suitable for most parts as it requires a very specific geometry. Vases, cups, and bowls are the kinds of prints that can be printed using vase mode.
Temperature
Gaps can appear when one layer is not properly bonded to the layer below. A higher printing temp is one way to increase layer adhesion. It’s generally best to print at as high a temp as your material will allow. Beware that when you print at too high a temp, the material can boil as it comes out of the nozzle, leading to more issues and potential gaps.
Flow rate
Under-extrusion is a major cause of gaps in your part. Even well-tuned print profiles can suffer from under-extrusion at times as they normally prioritize high dimensional accuracy, structural strength, or visual fidelit over other considerations. A slight increase to flow rate should be enough to see an improvement. Start with 105% and increase until you see diminishing returns.
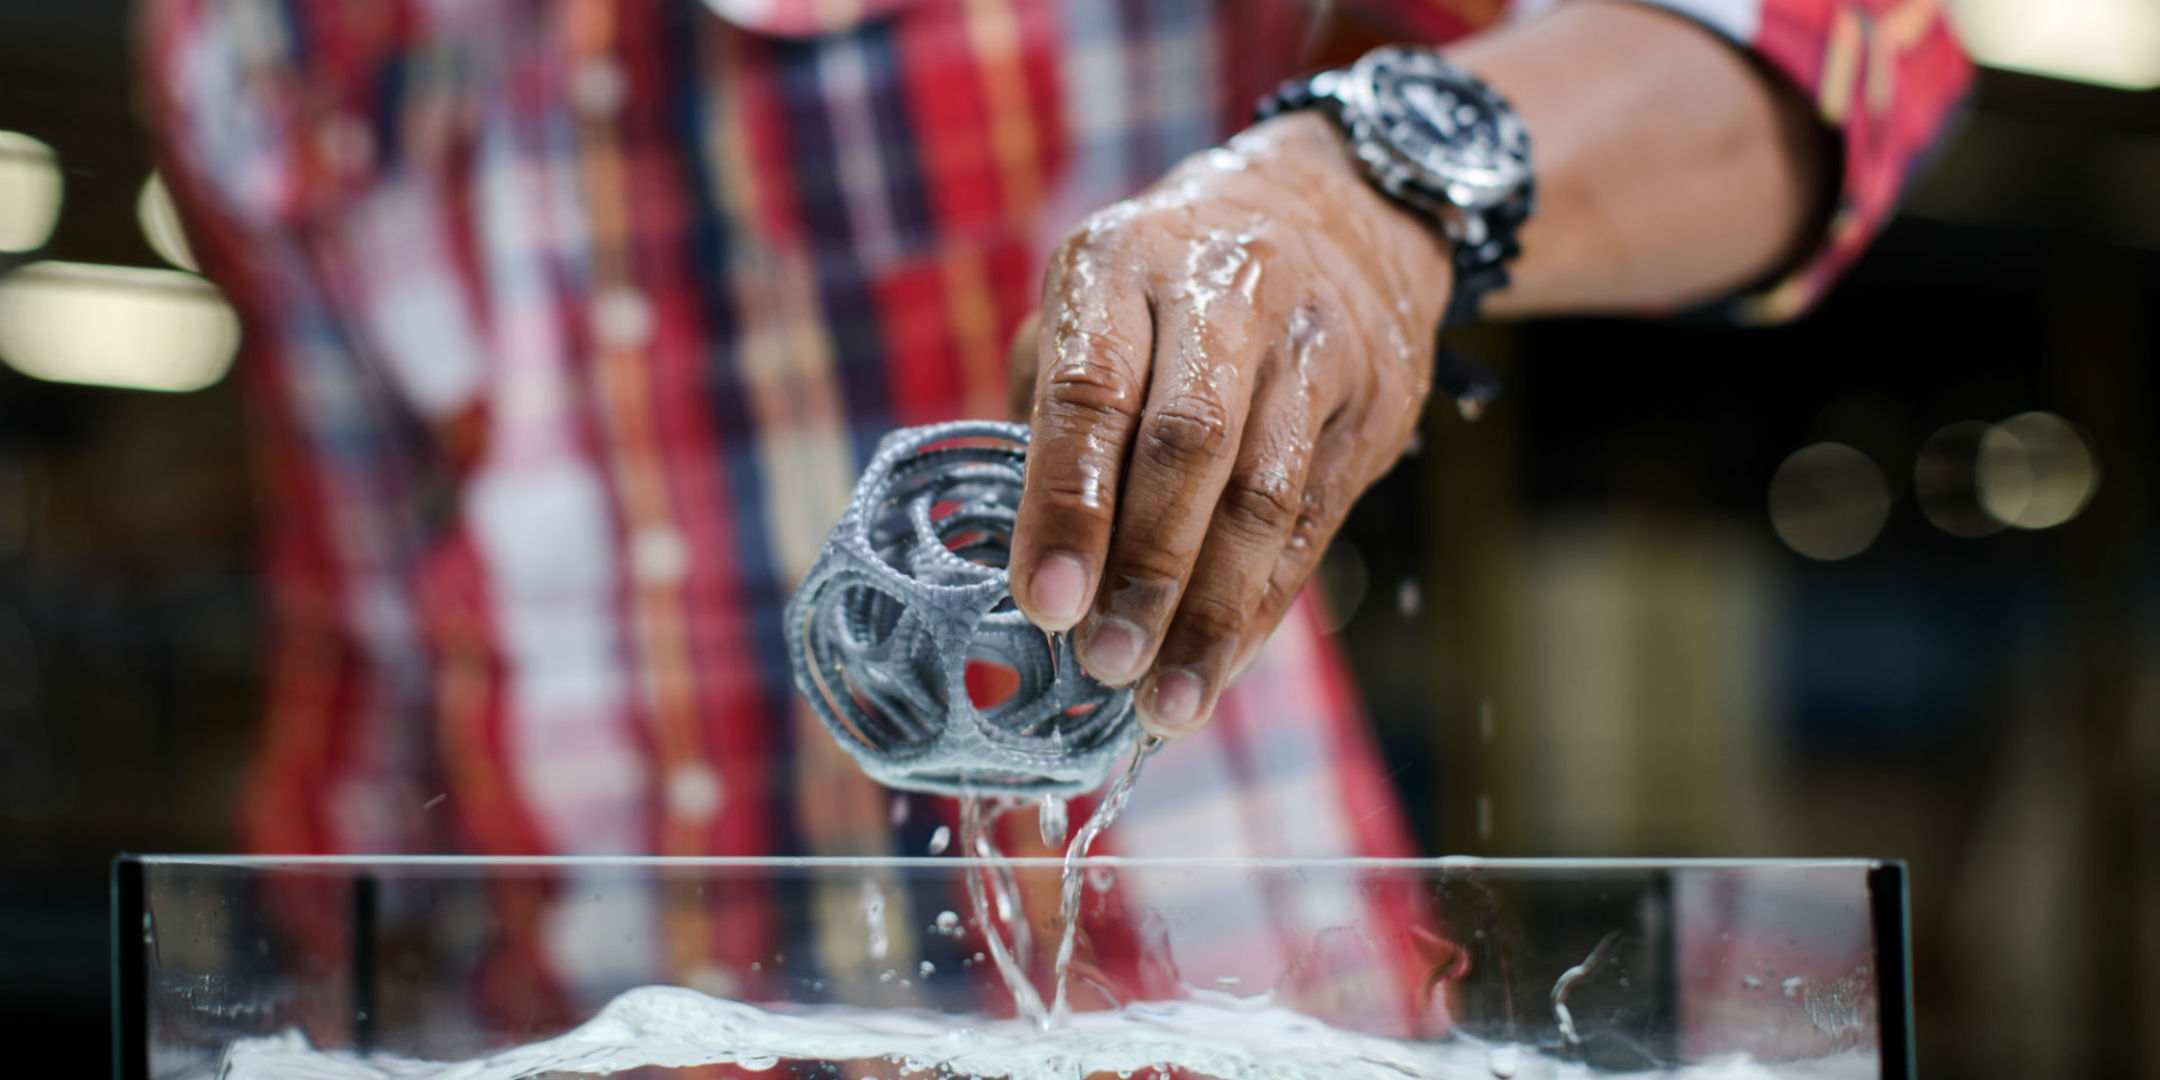
How to post-process a part to make it waterproof
Ideally, you should be able to pull a printed part off the build plate and have it be completely waterproof. However, sometimes a bit of post-processing is needed to shore up an almost waterproof part. Here are some of the main methods you can use:
Apply a waterproof coating
This is the easiest and most straightforward way to waterproof an otherwise leaky part. Applying a waterproofing spray, a clear coat, or even just water-resistant paint can help plug up any tiny gaps in your part. Multiple coats may be needed depending on the part and the coating used.
Vapor smoothing
Vapor smoothing using acetone for ABS or isopropanol for PVB is a great way to make a part more waterproof. Vapor smoothing is the process of using a chemical to melt the outer surface of a printed part just enough that it smooths out the part and removes the layer lines that are synonymous with FFF printed parts. Vapor smoothing is normally done to make a part look better but since it fuses the layers of a printed part together, it’s also a great way to fill gaps and make a part more waterproof.
Temperature treatment
Temperature treatment can be done in two ways and for two very different goals. The first is to apply heat to the outside of a print (usually with a heat gun) so that the outer surface melts just enough to fuse the layers together in order to remove the layer lines. This works in the same way as vapor smoothing and it helps remove gaps in the surface of a part and therefore makes it more waterproof.
The second is to heat soak a part over an extended period in an oven or other heated chamber. This process is called annealing. Annealing a part allows the layers of the entire part (even the interior) to bond together more strongly. This increases the strength of the part and makes it more temperature resistant in the future. This can result in PLA parts that have equal or higher temperature resistance to that of ABS or PETG parts.
What are the applications for waterproof parts?
Once you have perfected printing waterproof parts, there is a whole world of possible applications. One obvious area is food and drinks related prints like bowls, cups, or water bottles. While all these prints are possible, we would advise against it as FFF prints are often not food safe and the process for assuring they are is beyond the scope of this article.
However, there are plenty of other applications for waterproof parts. Some examples are:
Scientific research
3D printed parts can be perfect for helping in scientific research related to fluid dynamics and microfluidics. An example of this in practice are the researchers at Cardiff University using 3D printed parts to study microfluidics in a way that is cheaper and more flexible than traditional alternatives.
Gardening
Plant pots, composting containers, and hydroponics are just a few areas that are ripe for 3D printing to help with gardening. Beware that if you are using a printed part outside then you should make sure the material you use is suitable to the climate and environmental conditions. More robust materials like PETG and ABS might be a better choice than PLA, for example.
Water features
3D printed water features can be perfect for your pond or fish tank. And with the complete creative freedom that 3D printing provides, there’s no reason you can’t create an epic rube Goldberg-style water feature that fills your whole house with the soothing sound of gently flowing water.
We hope you enjoyed learning about how to print waterproof parts. If you found these tips valuable, you might be interested to know that a lot of the same techniques apply when trying to print transparent parts. To learn more, check out the blog post we did on the topic.