How to Design for 3D printing: A Comprehensive Guide to Creating 3D Printable Designs

User Profile Image

Sara Wickstrom

April 10, 2025

3D printable design is the art and science of creating digital 3D models specifically optimized for additive manufacturing. Unlike traditional design for manufacturing,

3D printable design requires a fundamental shift in thinking to account for the layer-by-layer building process of 3D printing.

Introduction to 3D printable design

Designing for 3D printing is crucial because it directly impacts the success, quality, and functionality of the final printed object. A well-designed 3D model can:

  • Minimize the need for supports, reducing material waste and post-processing time
  • Improve print quality by accounting for overhangs, bridging, and other 3D printing limitations
  • Enhance the structural integrity of the printed part
  • Optimize print time and material usage
  • Enable complex geometries not possible with traditional manufacturing methods

The 3D printing process begins with a digital 3D model, which is then "sliced" into thin layers by specialized software. The 3D printer then builds the object one layer at a time, fusing each new layer to the previous one. This additive process allows for incredible design freedom, but also introduces unique constraints that must be considered during the design phase.

Key considerations in 3D printable design include:

  • Wall thickness: Ensuring walls are thick enough to be printed successfully
  • Overhangs and support structures: Minimizing steep overhangs or designing appropriate supports
  • Orientation: Determining the optimal print orientation for strength and surface quality
  • Tolerances: Accounting for the precision limitations of the chosen 3D printing technology
  • Material properties: Designing with the specific characteristics of the printing material in mind

As we delve deeper into the world of 3D printable design, we'll explore these concepts in detail, providing you with the knowledge and tools to create successful 3D prints. Whether you're a hobbyist, designer, or engineer, mastering the principles of 3D printable design will unlock new possibilities in your creative and manufacturing processes.

Choosing the right software for 3D print design

As we delve deeper into the world of 3D printable design, selecting the appropriate software becomes a crucial step in your journey. The right tools can significantly impact your design process, print quality, and overall efficiency.

There are several categories of software used in 3D print design:

  • Computer-Aided Design (CAD) software
  • Sculpting software
  • Parametric modeling software
  • Mesh editing software
  • Slicing software

Each type serves different purposes and caters to various skill levels and design needs. Let's explore some popular options:

CAD software

CAD software is ideal for precise, technical designs. Options include:

  • Fusion 360: A powerful, cloud-based CAD tool with a relatively gentle learning curve
  • FreeCAD: An open-source alternative for those on a budget

Sculpting software

For organic shapes and artistic designs, consider:

  • Blender: A free, open-source option with robust sculpting capabilities

Parametric modeling software

These tools allow for easy modifications and iterations:

  • OpenSCAD: Text-based modeling for those who prefer a programming approach

Mesh editing software

For refining and repairing 3D models:

  • Meshmixer: Free software for mesh manipulation and analysis

Slicing software

While not strictly design software, slicers are essential for preparing models for printing:

When choosing software, consider factors such as:

  • Your skill level and willingness to learn
  • The types of objects you plan to design (mechanical parts, organic sculptures, etc.)
  • Your budget
  • Compatibility with your 3D printer
  • Available support and learning resources

Many designers use a combination of software tools, leveraging the strengths of each for different aspects of their workflow. For example, you might create the basic shape in CAD software, refine organic details in sculpting software, and then use mesh editing tools to prepare the model for printing.

As you progress in your 3D printing journey, don't be afraid to experiment with different software options. Many offer free trials or limited free versions, allowing you to find the tools that best suit your needs and working style.

In the next section, we'll explore the fundamental principles of creating 3D files optimized for printing, building on the software knowledge we've just covered.

Fundamentals of creating 3D files for printing

Now that we've explored the importance of 3D printable design and the software options available, let's dive into the fundamental principles of creating 3D files optimized for printing. This process builds upon the design considerations we've already discussed, focusing on the technical aspects of file creation and preparation.

File formats for 3D printing

While we touched on software earlier, it's crucial to understand the file formats commonly used in 3D printing:

  • STL (STereoLithography): The most widely used format, representing surfaces as triangular meshes
  • OBJ: Supports color and texture information, useful for full-color prints
  • 3MF (3D Manufacturing Format): A newer format addressing limitations of STL, including support for color, materials, and lattices
  • STEP and IGES: CAD formats that maintain parametric information, useful for engineering applications

Mesh quality and resolution

Building on our discussion of design software, it's important to note that mesh quality significantly impacts print success. When creating or exporting your 3D file:

  • Aim for a balance between detail and file size - overly dense meshes can slow down slicing and printing
  • Ensure your mesh is "watertight" with no gaps or overlapping faces
  • Use mesh analysis tools in your chosen software to identify and fix issues before exporting

Scale and units

A common pitfall in 3D file creation is mismatched scales. To avoid this:

  • Be consistent with units (mm, inches, etc.) throughout your design process
  • Double-check the scale when importing models from different sources
  • Consider creating a small reference object (e.g., a 10mm cube) to verify scale in your slicer

Optimizing geometry for printing

While we'll explore design principles in more depth later, some key considerations when creating your 3D file include:

  • Minimum feature size: Ensuring all details are printable at your chosen resolution
  • Support structures: Designing with minimal overhangs to reduce the need for supports
  • Orientation: Determining the optimal print orientation for strength and surface quality

File organization and naming

As your 3D printing projects grow in complexity, proper file management becomes crucial:

  • Use clear, descriptive file names including version numbers
  • Organize files into logical folder structures
  • Consider using version control systems for collaborative or iterative projects

Preparing for slicing

The final step in creating a 3D file for printing is preparing it for the slicing process:

  • Check that your model is positioned correctly in 3D space
  • Ensure all components are properly joined or separated as intended
  • Consider adding alignment features or text labels to aid in post-processing

By mastering these fundamentals of 3D file creation, you'll set a strong foundation for successful prints. In the next section, we'll build on this knowledge to explore specific design principles and techniques that will elevate your 3D printable models to the next level.

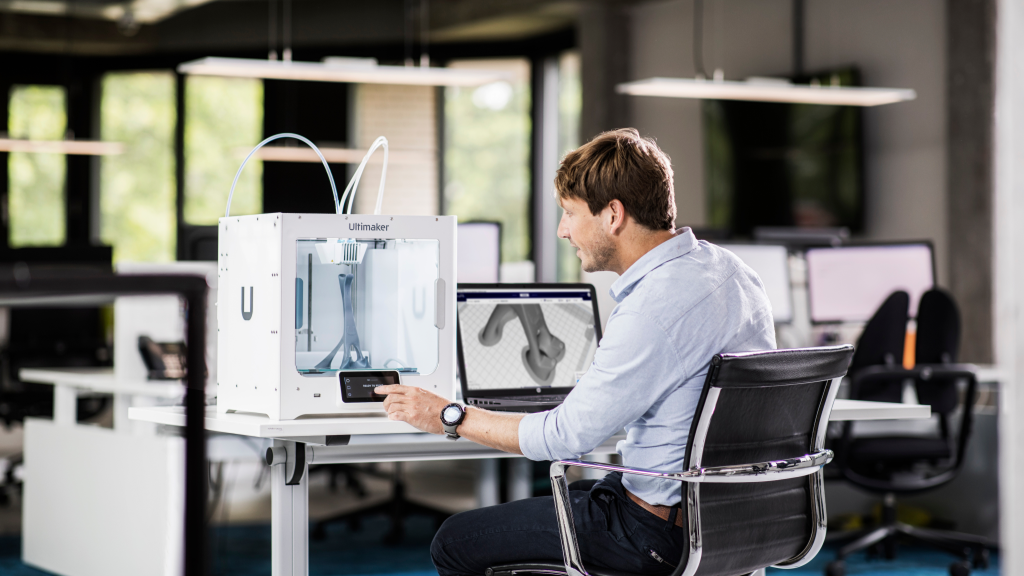
Designing 3D print models: Key principles and techniques

Building on our understanding of 3D printable design fundamentals and file creation, let's delve into the key principles and advanced techniques that will elevate your 3D print models to the next level. These concepts will help you create designs that are not only printable but also optimized for strength, functionality, and aesthetics.

Designing for layer adhesion

As discussed in the introduction, 3D printing builds objects layer by layer. To maximize part strength:

  • Orient your model to align stress lines with the layer direction
  • Use gradual transitions between thin and thick sections to improve layer bonding
  • Consider adding fillets or chamfers to reduce stress concentrations between layers

Advanced overhang techniques

While we've touched on overhangs before, here are some advanced strategies:

  • Implement gradual overhangs that increase angle over height
  • Use bridging techniques for short unsupported spans
  • Design self-supporting structures like arches or domes

Optimizing infill design

Infill isn't just about density; strategic infill design can enhance part performance:

  • Use variable infill density to reinforce high-stress areas
  • Implement custom infill patterns for specific mechanical properties
  • Consider designing your own internal structures for complex parts

Designing for assembly

Many 3D printed projects involve multiple parts. To ensure smooth assembly:

  • Design interlocking features or alignment pins
  • Account for printing tolerances in fit calculations
  • Consider printing-in-place mechanisms for moving parts

Topology optimization

Leveraging advanced CAD techniques, topology optimization can:

  • Reduce material usage while maintaining strength
  • Create organic, efficient structures
  • Optimize weight distribution for specific load cases

Design for post-processing

Consider the entire lifecycle of your print, including post-processing:

  • Add sacrificial layers for surfaces that will be machined
  • Design support removal features for easy clean-up
  • Include alignment marks for painting or assembly

Material-specific design considerations

Different 3D printing materials have unique properties that influence design:

  • For flexible materials, design thicker walls to maintain shape
  • With brittle materials, avoid sharp internal corners
  • For high-temperature materials, account for potential warping

Designing for multi-material prints

If your printer supports multiple materials, consider:

  • Using dissolvable supports for complex geometries
  • Implementing multi-material interfaces for functional or aesthetic purposes
  • Designing composite structures with varying material properties

By applying these advanced principles and techniques, you'll be able to push the boundaries of what's possible with 3D printing. Remember that successful design often involves iterative testing and refinement. Don't be afraid to print prototypes, analyze results, and adjust your designs accordingly.

In the next section, we'll explore how to optimize these designs further for 3D printing success, building on the solid foundation we've established here.

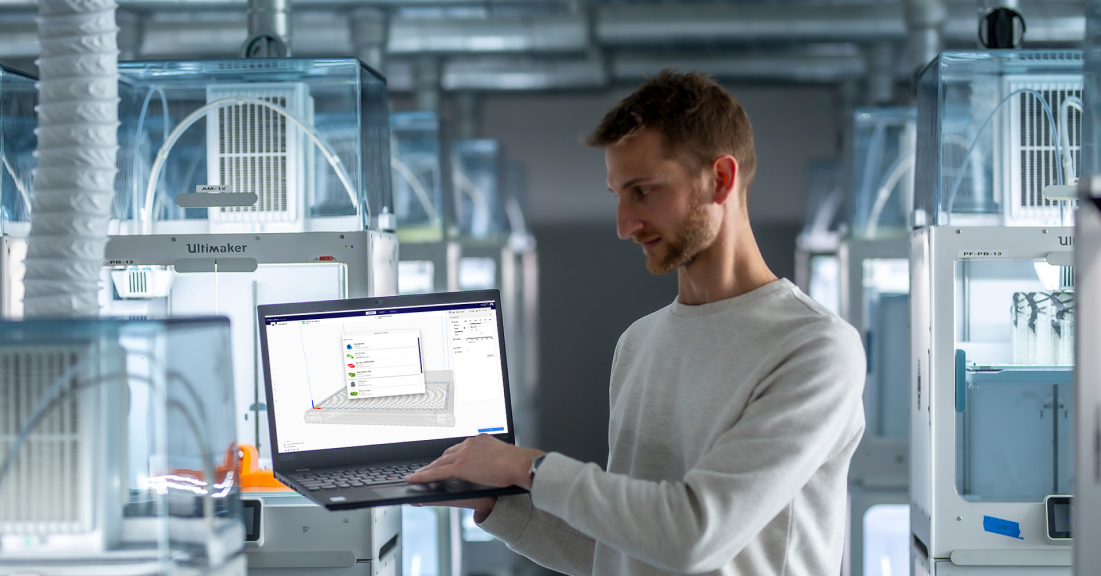
Optimizing designs for 3D printing success

Building on the key principles and techniques we've explored, let's delve into optimizing your 3D printable designs for maximum success. This section will focus on refining your models to enhance printability, reduce errors, and improve overall quality.

Fine-tuning wall thickness

While we've discussed wall thickness before, optimizing it requires a nuanced approach:

  • Use variable wall thickness to balance strength and material usage
  • Implement gradual transitions between thick and thin sections to prevent stress concentrations
  • Consider the nozzle size of your printer when determining minimum wall thickness

Advanced support strategies

Building on our earlier discussion of overhangs, consider these advanced support techniques:

  • Design custom supports that integrate with your model for easier removal
  • Use breakaway interfaces between supports and the model to improve surface finish
  • Implement internal support structures for hollow models

Optimizing for specific printing technologies

Different 3D printing technologies have unique considerations:

  • For FDM: Design with minimal bridging and optimize for layer adhesion
  • For SLA/DLP: Account for resin drainage and support removal
  • For SLS: Consider powder removal and nesting efficiency

Designing for print orientation

Expanding on our earlier discussions, consider these factors when determining print orientation:

  • Analyze critical features and align them for optimal resolution
  • Balance strength requirements with surface finish preferences
  • Consider the impact of orientation on support structures and print time

Optimizing infill for functionality

Beyond basic infill settings, consider:

  • Designing internal structures that mimic natural load-bearing forms
  • Implementing gyroid infill for isotropic strength
  • Using sparse infill combined with internal ribs for efficient reinforcement

Thermal considerations

Managing heat distribution can significantly impact print success:

  • Design heat dissipation features for large, solid sections
  • Implement gradual transitions to minimize warping in high-temperature materials
  • Consider adding pause points in your print to allow for cooling in critical areas

Optimizing for post-processing

Building on our earlier mention of post-processing, consider these advanced techniques:

  • Design sacrificial structures for holding parts during machining or finishing
  • Implement modular designs for easier painting or surface treatment
  • Add registration marks for precise assembly of multi-part prints

Iterative design and testing

Emphasize the importance of iteration in optimizing designs:

  • Develop a systematic approach to testing and refining your models
  • Use benchmarking prints to calibrate your design parameters
  • Implement version control to track improvements and allow for design rollbacks

By applying these optimization techniques, you'll be able to create 3D printable designs that not only meet your functional requirements but also maximize the capabilities of your chosen 3D printing technology. Remember that optimization is an ongoing process, and staying current with new printing technologies and materials will allow you to continually refine your approach.

In the next section, we'll explore how to take these optimized designs and create complex, functional 3D print models that push the boundaries of what's possible with additive manufacturing.

Creating complex and functional 3D print models

As we've progressed through the fundamentals of 3D printable design and optimization techniques, we're now ready to tackle the creation of complex and functional 3D print models. This section will explore advanced strategies for designing intricate, multi-part assemblies and functional prototypes that fully leverage the capabilities of 3D printing.

Designing interlocking and snap-fit components

Building on our earlier discussion of designing for assembly, let's delve into more advanced techniques:

  • Implement living hinges for flexible connections between parts
  • Design complex snap-fit mechanisms that account for material elasticity
  • Create self-aligning features to simplify assembly of multi-part models

Integrating moving parts

3D printing allows for the creation of functional mechanisms printed in place:

  • Design clearances for print-in-place gears, taking into account material expansion
  • Implement ball-and-socket joints with optimal tolerances for smooth movement
  • Create complex linkages and mechanisms that print as a single unit

Designing for strength and functionality

Expanding on our earlier discussions of topology optimization:

  • Use generative design tools to create organic, load-optimized structures
  • Implement lattice structures for lightweight yet strong components
  • Design composite structures that combine rigid and flexible materials for targeted performance

Creating multi-material models

For printers capable of multi-material printing, consider these advanced applications:

  • Design overmolded components with rigid cores and flexible exteriors
  • Create gradient materials for smooth transitions in mechanical properties
  • Implement embedded electronics or sensors within 3D printed structures

Designing for specific applications

Let's explore how to tailor designs for particular use cases:

  • Medical models: Design with biocompatible materials and patient-specific anatomical data
  • Aerospace components: Create lightweight, high-strength parts using advanced materials
  • Architectural models: Design modular structures with intricate details at various scales

Implementing advanced surface features

Building on our earlier discussions of embossing and engraving:

  • Design complex textures and patterns that enhance functionality or aesthetics
  • Create variable thickness skins for optimized weight and strength
  • Implement conformal surfaces that adapt to underlying structures

Designing for scale and replication

For projects requiring multiple prints or scaling:

  • Create parametric designs that can be easily scaled or customized
  • Implement modular systems for efficient production of large-scale objects
  • Design for efficient nesting and batch printing

Integrating non-printed components

Complex functional models often incorporate non-printed parts:

  • Design precise interfaces for integrating off-the-shelf components
  • Create jigs and fixtures for post-print insertion of threaded inserts or other hardware
  • Design for hybrid manufacturing, combining 3D printing with traditional machining processes

By mastering these advanced techniques for creating complex and functional 3D print models, you'll be able to fully exploit the unique capabilities of additive manufacturing. Remember that successful implementation of these strategies often requires iterative testing and refinement, as discussed in previous sections.

As we move forward, we'll explore how to prepare these complex models for printing, ensuring that your intricate designs translate successfully from digital files to physical objects.

Preparing your 3D model for printing

With our complex and functional 3D models designed, it's time to focus on the critical step of preparing these models for the actual printing process. This stage bridges the gap between digital design and physical realization, ensuring that our intricate creations translate successfully to the 3D printer.

Final model check and repair

Before proceeding to slicing, it's crucial to perform a thorough check of your model:

  • Use mesh analysis tools to identify and fix any remaining non-manifold edges, reversed normals, or self-intersections
  • Check for unintended gaps or holes, especially in complex assemblies
  • Verify that all parts are correctly positioned and oriented relative to each other

Advanced slicing strategies

Building on our earlier discussions of slicing software, let's explore some advanced techniques:

  • Implement variable layer heights to balance detail and print speed across different parts of your model
  • Use adaptive slicing algorithms that adjust parameters based on local geometry
  • Experiment with non-planar slicing for improved strength and surface finish on curved surfaces

Support structure optimization

For complex models, support structure design becomes even more critical:

  • Use tree-like supports for organic shapes to minimize contact points and material usage
  • Implement custom support structures designed directly in your CAD software for critical areas
  • Consider dissolvable supports for intricate internal geometries in multi-material prints

Print orientation refinement

While we've discussed print orientation before, complex models require a more nuanced approach:

  • Use orientation optimization algorithms to balance multiple factors like support volume, print time, and mechanical properties
  • Consider splitting large models and optimizing the orientation of individual parts
  • Analyze the impact of orientation on internal structures and moving parts

Preparing multi-material and composite prints

For advanced printers capable of multi-material printing:

  • Ensure proper material assignments for each part of your model
  • Define precise transition zones for gradient materials
  • Verify compatibility of materials for multi-material interfaces

Calibrating print parameters for functional parts

Functional models often require fine-tuning of print parameters:

  • Adjust extrusion rates and temperatures for optimal layer adhesion in load-bearing areas
  • Fine-tune retraction settings to minimize stringing in intricate mechanisms
  • Calibrate flow rates for consistent extrusion in variable thickness sections

Preparing for post-processing

Consider the post-printing stages during preparation:

  • Add sacrificial layers or features to aid in support removal or finishing
  • Include alignment marks or datum points for post-print machining or assembly
  • Design break-away sections for parts that require high precision finishing

Test prints and iteration

For complex models, test prints become even more crucial:

  • Print critical sections or scaled-down versions to verify design and print settings
  • Implement a systematic approach to documenting and analyzing test results
  • Be prepared to iterate on both design and print parameters based on test outcomes

By meticulously preparing your complex 3D models using these advanced techniques, you'll significantly increase the likelihood of successful prints. Remember that the preparation phase is an opportunity to anticipate and mitigate potential issues before they manifest in the final print.

As we move forward, we'll explore how to troubleshoot common issues that may arise despite careful preparation, ensuring you have the skills to overcome challenges and achieve outstanding results in your 3D printing projects.

Troubleshooting common 3D print design issues

Even with careful preparation and optimization, 3D print designs can sometimes encounter issues during the printing process. In this section, we'll explore common problems that may arise and provide strategies for diagnosing and resolving them, building on the knowledge we've developed throughout this guide.

Layer adhesion problems

As discussed in our section on designing for layer adhesion, poor bonding between layers can significantly weaken prints. If you're experiencing layer separation:

  • Revisit your model's orientation to minimize stress perpendicular to layer lines
  • Adjust printing temperature and cooling settings to improve layer fusion
  • Consider implementing gradual transitions in wall thickness to reduce internal stresses

Warping and curling

Building on our earlier discussions of thermal considerations:

  • Analyze your model for large, flat surfaces that may be prone to warping
  • Implement design features like chamfered edges or mouse ears to improve bed adhesion
  • Experiment with different infill patterns to distribute internal stresses more evenly

Support structure failures

If the advanced support strategies we covered earlier aren't fully resolving issues:

  • Re-evaluate your model's geometry to minimize overhangs where possible
  • Consider designing custom supports directly in your CAD software for critical areas
  • Experiment with different support densities and patterns in your slicer software

Dimensional accuracy issues

For functional parts where precise dimensions are crucial:

  • Account for material-specific shrinkage rates in your design
  • Implement test prints of critical features to calibrate your printer settings
  • Consider designing for post-print machining of high-precision surfaces

Surface quality problems

To address issues like visible layer lines or rough overhangs:

  • Experiment with variable layer heights to balance detail and print time
  • Implement adaptive slicing techniques for curved surfaces
  • Consider designing sacrificial surfaces that can be removed post-print for critical areas

Functional mechanism failures

For complex models with moving parts:

  • Analyze clearances and tolerances, adjusting for your specific printer and material
  • Implement break-away supports for internal mechanisms
  • Consider splitting complex assemblies into multiple prints for easier post-processing

Material-specific issues

Building on our earlier discussions of material properties:

  • For flexible materials, address potential extrusion issues by optimizing print speed and temperature
  • With brittle materials, implement design features like fillets to reduce stress concentrations
  • For high-temperature materials, consider designing custom cooling solutions to manage heat distribution

Systematic troubleshooting approach

To effectively address complex issues:

  • Implement a systematic documentation process for print attempts and outcomes
  • Use benchmarking models to isolate specific problems
  • Develop a workflow that iterates between design adjustments and print parameter tuning

By mastering these troubleshooting techniques, you'll be well-equipped to overcome the challenges that can arise when pushing the boundaries of 3D printable design. Remember that troubleshooting is an integral part of the design process, often leading to innovations and improvements in your models.

As we conclude this comprehensive guide, our final section will explore advanced techniques for 3D print model design, building on all the knowledge we've accumulated to push the limits of what's possible with additive manufacturing.

Advanced techniques for 3D print model design

As we reach the pinnacle of our comprehensive guide on 3D printable design, let's explore cutting-edge techniques that push the boundaries of what's possible with additive manufacturing. Building on the foundation we've established, these advanced methods will elevate your designs to new heights of complexity, functionality, and innovation.

Generative design and AI-assisted modeling

Moving beyond traditional CAD approaches:

  • Leverage machine learning algorithms to generate optimized structures based on specified constraints and load conditions
  • Implement evolutionary algorithms to iterate and refine designs automatically
  • Explore AI-powered topology optimization for creating ultra-efficient, organic structures

4D printing: Designing for transformation

Expanding on our earlier discussions of material properties:

  • Design models that change shape or function over time in response to environmental stimuli
  • Incorporate smart materials like shape memory polymers or hydrogels into your designs
  • Create self-assembling structures that transform post-printing

Micro and nanoscale 3D printing

Pushing the limits of print resolution:

  • Design functional microstructures for applications in fields like microfluidics or tissue engineering
  • Implement hierarchical designs that combine macro, micro, and nanoscale features
  • Explore two-photon polymerization techniques for ultra-high-resolution prints

Multi-material gradient design

Building on our earlier introduction to multi-material printing:

  • Design seamless transitions between materials with varying mechanical or optical properties
  • Create functionally graded materials (FGMs) for optimized performance across different regions of a part
  • Implement voxel-based design techniques for precise control over material distribution

Biomimetic and nature-inspired design

Leveraging natural structures for enhanced performance:

  • Implement cellular structures inspired by bone or plant anatomy for lightweight yet strong designs
  • Design self-healing mechanisms based on biological processes
  • Create bio-inspired surface textures for enhanced functionality (e.g., hydrophobic or adhesive properties)

Integrated electronics and 3D printed circuits

Expanding the functionality of 3D printed objects:

  • Design conductive pathways and embed electronic components within prints
  • Create 3D antenna designs for improved signal reception
  • Implement strain sensors or capacitive touch surfaces directly into printed parts

Metamaterials and programmable matter

Designing materials with properties not found in nature:

  • Create auxetic structures that expand when stretched
  • Design acoustic metamaterials for sound manipulation or cloaking
  • Implement mechanical metamaterials with tunable stiffness or energy absorption properties

Large-scale and continuous 3D printing

Adapting designs for emerging large-format technologies:

  • Implement modular designs for assembly of large-scale structures
  • Explore continuous liquid interface production (CLIP) for faster, larger prints
  • Design for robotic arm-based printing systems with multi-axis capabilities

Hybrid manufacturing integration

Combining 3D printing with traditional manufacturing processes:

  • Design parts for in-situ machining during the printing process
  • Implement conformal cooling channels in molds or tooling
  • Create complex preforms for composite layup or metal casting

By incorporating these advanced techniques into your workflow, you'll be at the forefront of 3D printable design innovation. Remember that many of these methods are still evolving, and experimentation is key to unlocking their full potential. As with all aspects of 3D printing, iterative testing and a willingness to push boundaries will lead to groundbreaking results.

As we conclude this comprehensive guide, it's clear that the field of 3D printable design is constantly evolving. By mastering the fundamentals we've covered and staying abreast of these cutting-edge techniques, you'll be well-equipped to tackle even the most challenging design projects and contribute to the ongoing revolution in additive manufacturing.

Resources for further learning and inspiration

As we conclude our comprehensive guide to designing for 3D printing, it's important to recognize that the field is constantly evolving. To stay at the cutting edge and continue developing your skills, you'll need access to ongoing learning resources and sources of inspiration. This section will explore various avenues for expanding your knowledge and creativity in 3D printable design.

Online learning platforms

Building on the software knowledge we discussed earlier, consider these platforms for in-depth tutorials and courses:

  • Coursera and edX: Offer university-level courses on 3D modeling and additive manufacturing
  • LinkedIn Learning: Provides software-specific tutorials for popular 3D modeling tools
  • Udemy: Features a wide range of practical courses on 3D printing and design

3D printing communities and forums

Engage with fellow designers to share knowledge and get feedback on your work:

Industry conferences and webinars

Stay updated on the latest advancements in 3D printing technology and design techniques:

Specialized design resources

Delve deeper into specific aspects of 3D printable design:

  • Topology Optimization: Learn more about generative design tools like Autodesk's Fusion 360
  • Material Science: Explore resources from material manufacturers to understand properties and design implications
  • Biomimicry: Study resources from the Biomimicry Institute for nature-inspired design ideas

Academic and research publications

For those interested in cutting-edge techniques like those discussed in our advanced section:

  • Check out our library of exclusive Whitepapers
  • Additive Manufacturing Journal: Peer-reviewed research on the latest in 3D printing
  • Materials Today: Covers advancements in materials science relevant to 3D printing
  • University research labs: Many institutions publish open-access papers on 3D printing innovations

Design inspiration sources

Fuel your creativity with these resources:

  • Behance and ArtStation: Showcase platforms featuring innovative 3D printed designs
  • Pinterest: Curate boards of 3D printing ideas and design concepts
  • Instagram: Follow hashtags like #3Dprinting and #additivemanufacturing for daily inspiration

Hands-on workshops and makerspaces

Apply the principles we've covered in real-world settings:

  • Local makerspaces: Offer access to various 3D printers and knowledgeable communities
  • University fab labs: Many institutions open their facilities to the public for learning and experimentation
  • Manufacturer workshops: Companies like UltiMaker often host hands-on training sessions

Open-source projects and repositories

Contribute to and learn from collaborative design efforts:

  • GitHub: Host for many open-source 3D printing projects, from slicers to design tools
  • NIH 3D Print Exchange: Repository of 3D-printable models for scientific and medical applications
  • OpenSCAD: Explore the extensive library of parametric designs for inspiration and learning

By leveraging these resources, you'll be well-equipped to continue your journey in 3D printable design long after finishing this guide. Remember that the most valuable learning often comes from hands-on experience and collaboration with others in the field.

Don't hesitate to experiment with new techniques, share your designs, and contribute to the growing body of knowledge in this exciting and rapidly evolving domain.

3D print with ease. Innovate without limits.

Learn more about UltiMaker 3D printers from our experts.

Talk to an expert