


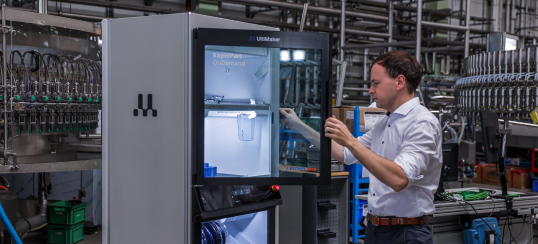


After installing the latest version, you’ll find mostly the same functional and easy to use layout as always. However, like a sensible family car that’s been modified and tuned by a Formula 1 mechanic, underneath the surface is a very different story. Ultimaker Cura now has a new engine, and it’s about to make things a lot more interesting.
Unlock the power of variable line width with Ultimaker Cura 5.0
The release of Ultimaker Cura 5.0 is one of the biggest improvements the software has ever seen. That simple statement might suggest a massive overhaul with a completely new user interface and lots of flashy new features. But, while we do have lots of exciting improvements, that isn’t the case.
The secret weapon of Ultimaker Cura 5.0 is our new slicing engine and its one biggest trick, variable line width. The slicing engine is the heart of our software. It’s what allows it to turn a digital 3D model into a simplified set of instructions that your FFF printer can read and understand (G-code). Those instructions tell your printer where to move the toolhead, how much material to extrude, and what temperature to do it at, amongst many other things.
Most slicing software, including Ultimaker Cura, work in fundamentally the same way. It breaks a digital 3D model into a stack of flat layers, each a fraction of a millimeter thick. Each of those layers is then interpreted by the slicing software and turned into a toolpath. How it does this depends on the settings chosen and the slicing algorithm used. Simple tweaks to common settings like the number of outer walls, infill pattern and density, and whether supports are used, can fundamentally change the toolpath of any given layer.
Modern slicers (Ultimaker Cura included) have gotten better and better at making these toolpaths more efficient and effective. Decreasing print times and improving the quality of the final printed parts. However, until now, all the most widely used slicers have had one unfortunate weakness. Line width.
The line width problem
In the past, when slicing a file, the width of a line depended on the width of your nozzle and your settings. If you wanted faster print times, you could change to a nozzle with a larger diameter with the tradeoff that your print would be less detailed and would have more noticeable layer lines. Want less noticeable layer lines? Use a smaller nozzle. It was also possible to increase or decrease the flow rate of your nozzle, meaning that more, or less, material would be pushed through the nozzle, affecting the layer width.
Whatever layer width you chose, that would be the width of every line, throughout your whole print. If you want to know why that’s a bad thing, try drawing a picture without being able to tilt your pen or being able to change how much downward pressure you’re using. Not easy, right?
Over time, some improvements were made, Ultimaker Cura, for example, added a setting that allowed you to make wall lines a different thickness from internal lines by adjusting the flow rate during a print. A more fundamental solution was elusive, however. Until now.
The line width solution
Enter the new Ultimaker Cura slicing engine which is now capable of fully dynamic variable line width. The new slicing engine was built by our talented team and tested by our loyal customers through multiple open betas. But, the answer to exactly how it came about lies further back still, in an academic paper which was written by Ultimaker software engineer Tim Kuipers.
The paper, which can be found here, posited a new method for handling adaptive line width that would be applicable to a wide range of 3D printing hardware. Tim’s paper was also eventually used as part of his PhD dissertation.
After being implemented, Tim’s solution makes it possible for variable line width to be applied automatically when slicing any digital 3D model. The resulting G-code can then be run on any printer. This is a huge leap forward as it essentially gives your printer a whole new set of capabilities. Earlier we mentioned how static line width is like drawing with a pen you can’t tilt or apply pressure to. Variable line width is like suddenly being given a paintbrush and a blank canvas. The possibilities are endless.
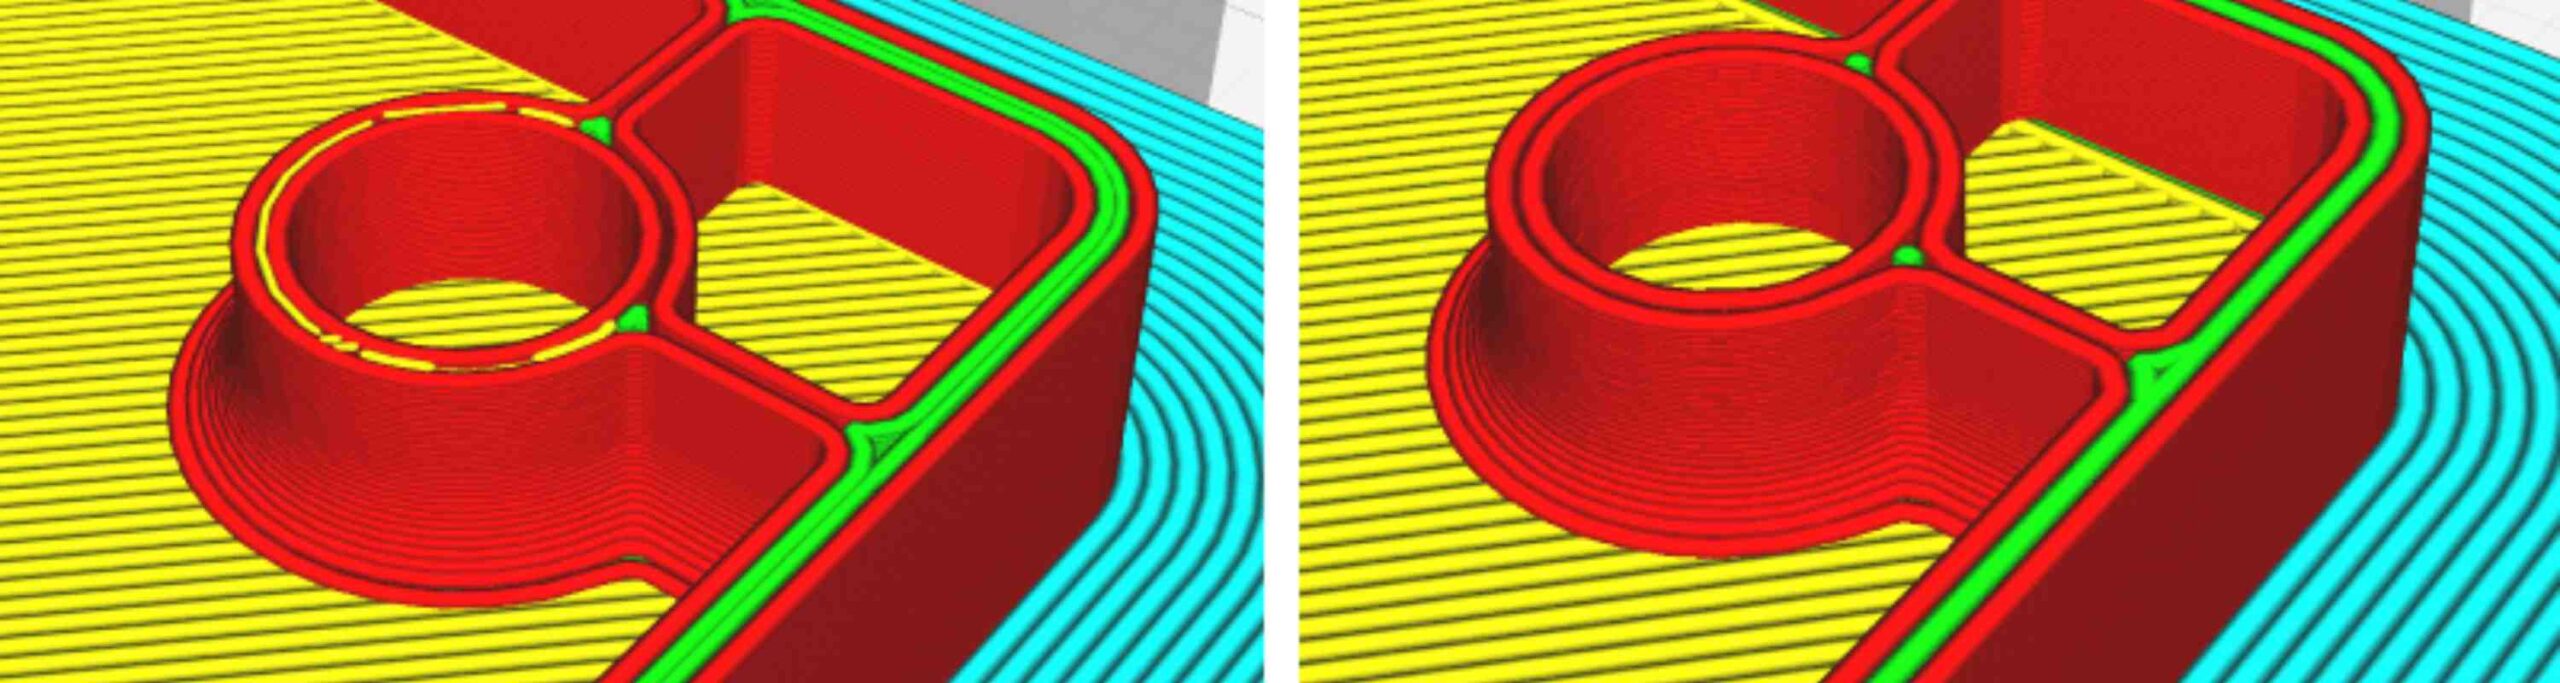
Left: Ultimaker Cura 4.13 Right: Ultimaker Cura 5.0
Surely someone has done this before, though, right? Well, yes and no. They’ve certainly tried, but no one has used our exact solution. Ours is the most complete variable line width solution available in a free and printer-agnostic slicer.
All variable line width techniques must overcome the issue of over-extrusion and under-extrusion. Both issues can occur when line width is increased or decreased by too much respectively. When they do occur, they can leave blemishes and defects on the surface of your print, as well as possibly affecting the dimensional accuracy and the structural integrity of your printed part.
As mentioned previously, there have been limited applications of variable line width (even within Ultimaker Cura) where line width is only modified under certain strict conditions. By doing this, the chance of introducing additional defects is greatly reduced.
There are also more advanced variable line width solutions used by certain proprietary slicers that are locked to specific printers. The reason this is possible is that when you know exactly what hardware you are using, it’s much easier to predict how changing your line width characteristics will influence your final print.
This highlights one of the biggest strengths of our solution. It’s available for anyone who uses Ultimaker Cura, no matter which FFF printer they’re using. Whether you’re using an Ultimaker S5, or a low-cost kit printer you assembled yourself, our new slicing engine will help you get better prints.
Fine details, thin walls, new possibilities
And now for the really interesting part! How exactly does our new slicing engine help you get better prints?
The two biggest and most obvious advantages are stronger prints and finer details. Anyone who owns an Ultimaker printer can also look forward to faster prints.
Let’s talk about part strength first as it’s the easiest and most obvious to explain. Previously, when slicing a file using static line width, if the thickness of part of the print was two-and-a-half times the chosen line thickness, two equally thick lines would be generated, with a small gap left in between.
This gap would weaken the final print. Similar behavior could be seen at corners or sharp points where the thickness of a part changes, but the internal lines of the print are unable to fit uniformly into the resulting geometry.
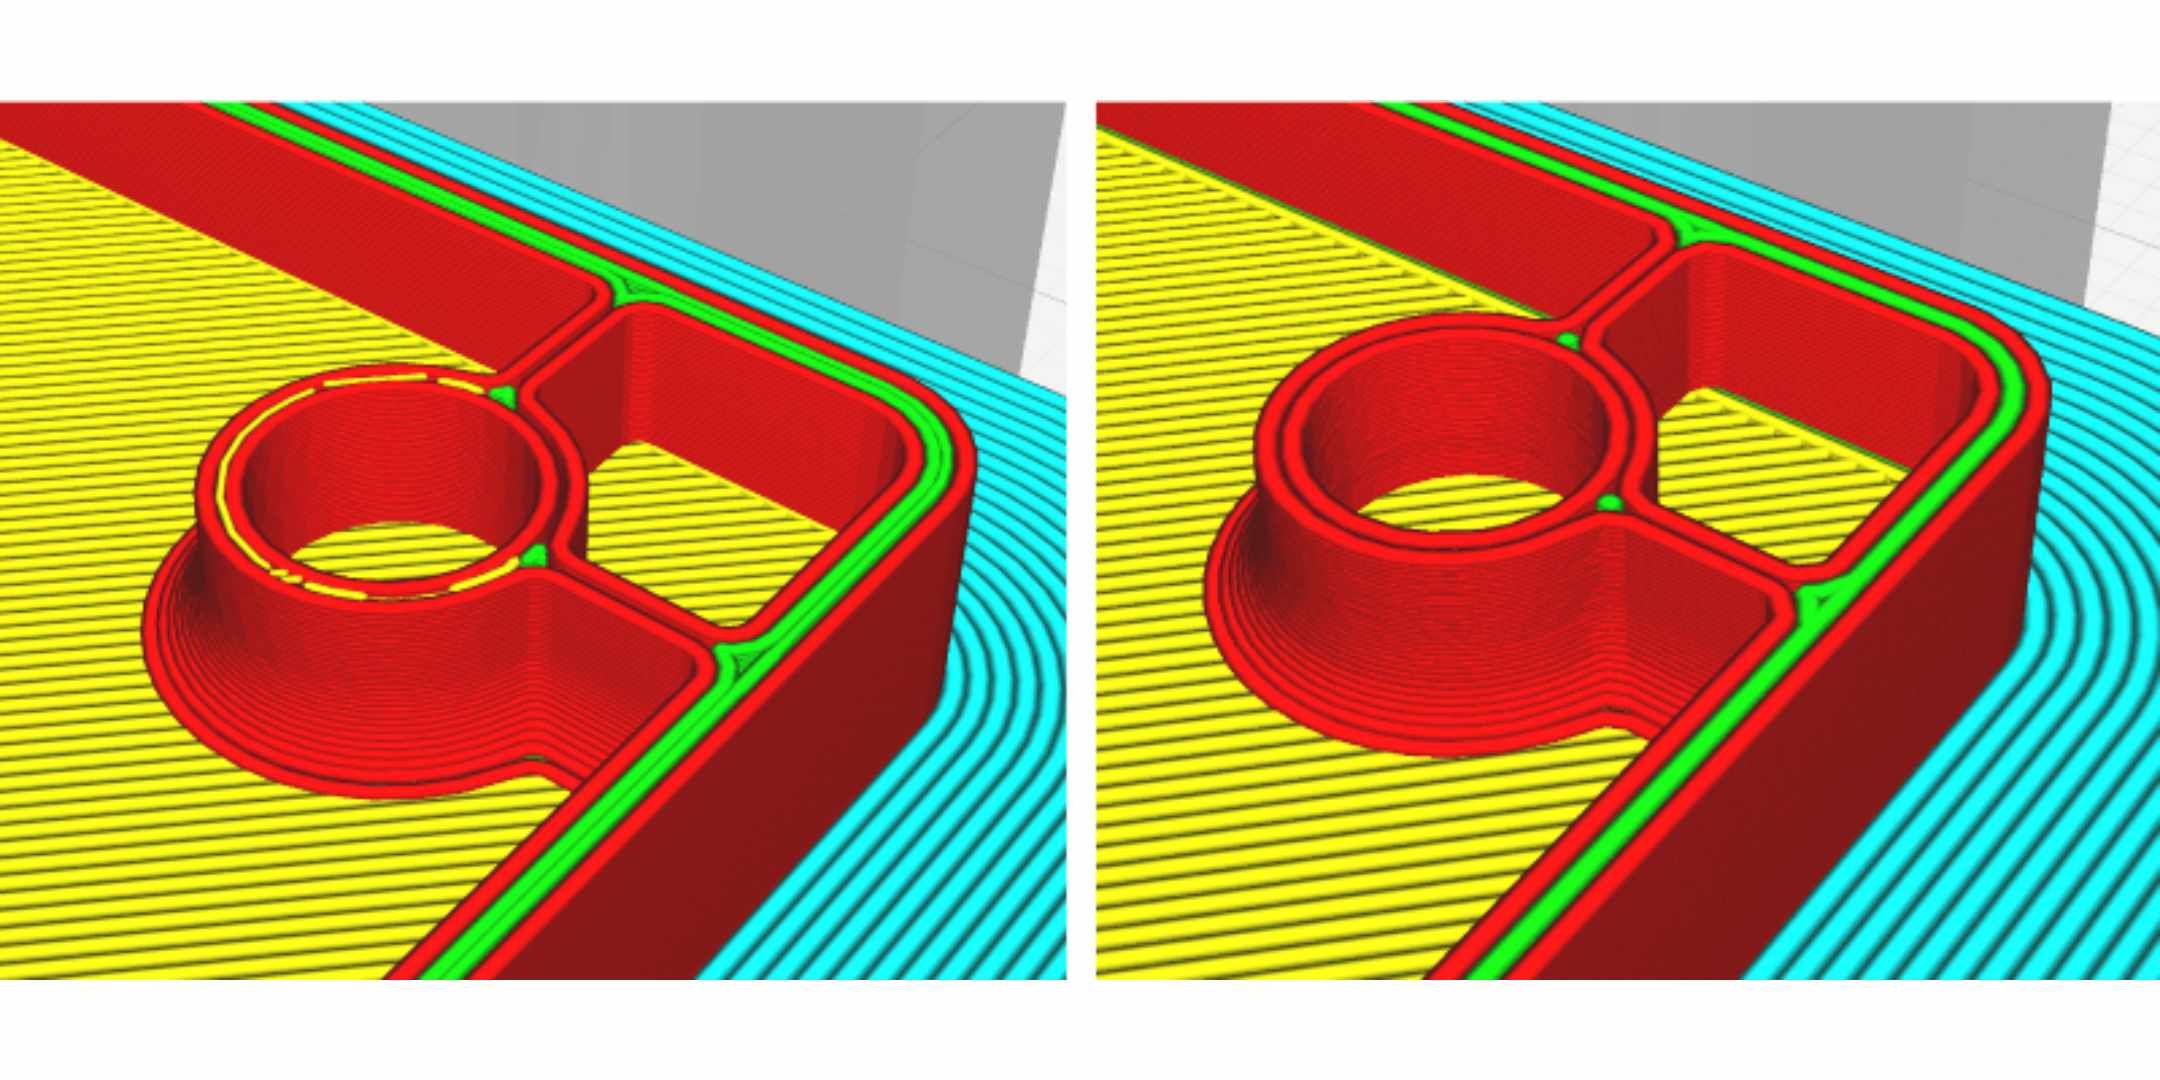
With the new slicing engine, the number of internal holes in your part is greatly reduced as lines can increase and decrease in thickness to occupy the space more completely. The result is stronger parts with less unintentional internal imperfections.
Left: Ultimaker Cura 4.13 Right: Ultimaker Cura 5.0
The next and most visually noticeable benefit is improved detail. In the past, when a detailed part of the print was less than one line thick, the file would be sliced to recreate it as accurately as possible. This would often result in muted, indistinct details. Like an artist trying to draw a detailed sketch with a large marker.
However, in cases where the details were extremely fine, they would be omitted completely when slicing, as the chance of printing them successfully is near zero, and trying to do so would increase the chance of a failure.
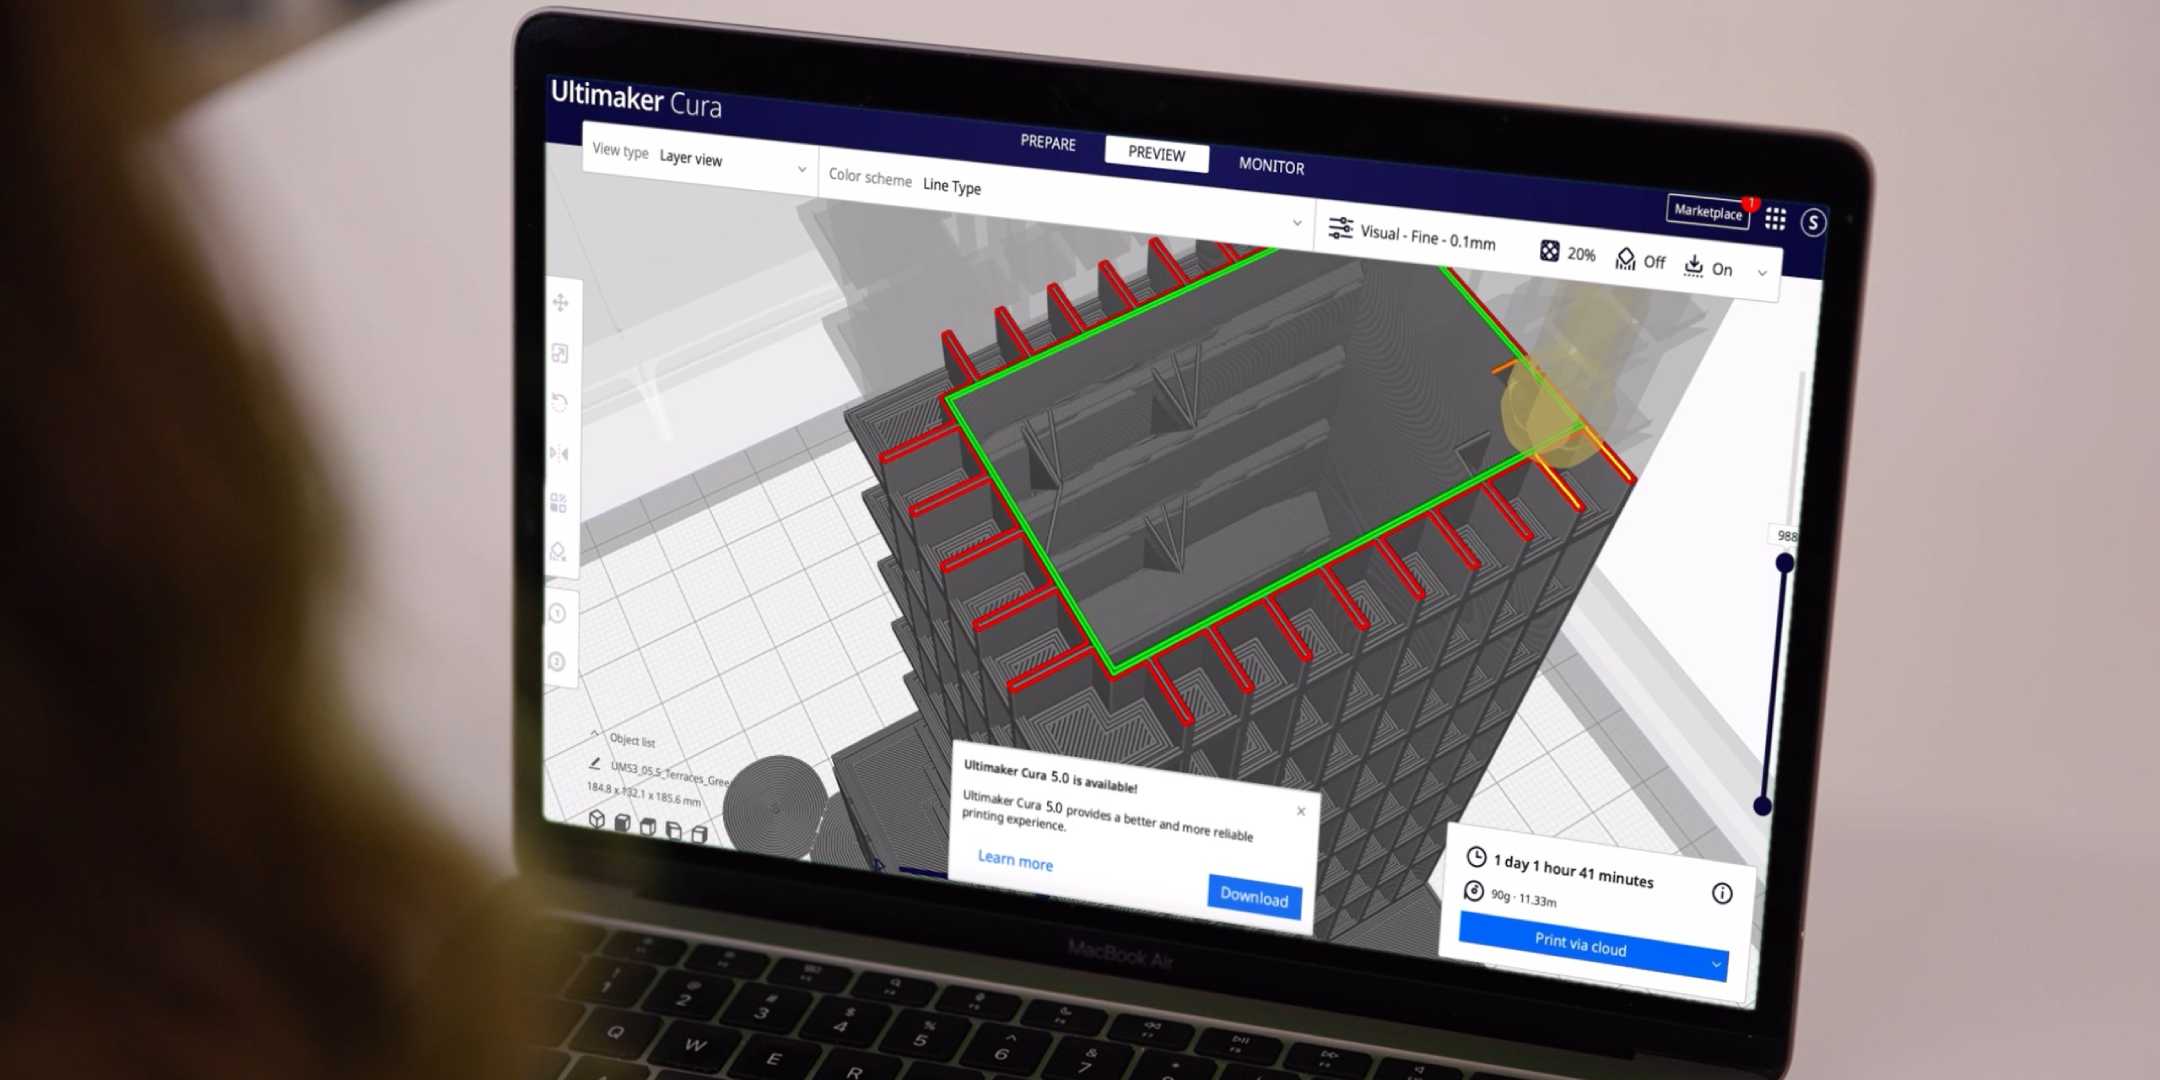
An example of this in practice can be seen in the following image that shows a model being previewed at three different scales in Ultimaker Cura version 4.13 that did not have variable line width capabilities.
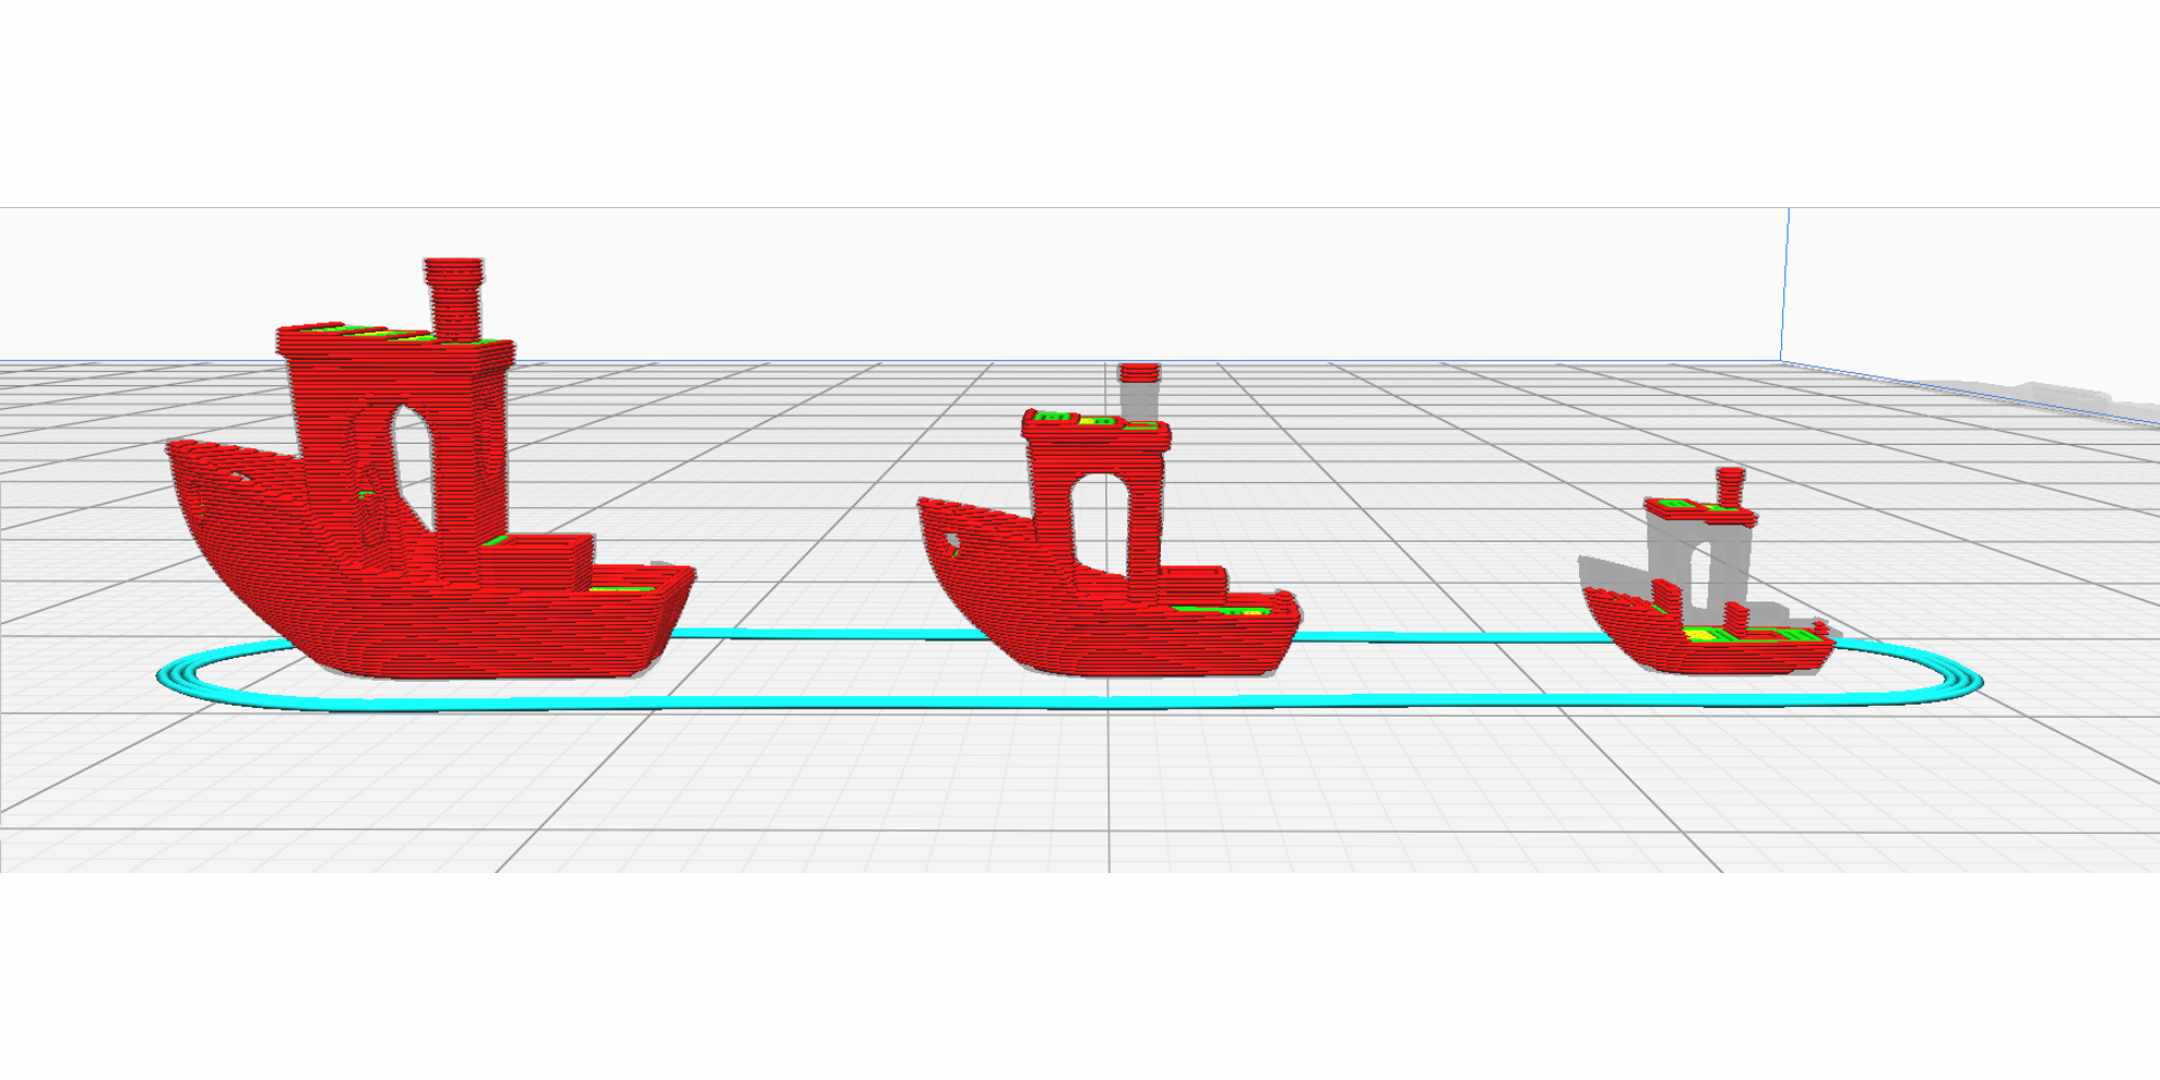
A Benchy sliced at 20%, 15%, and 10% scale in Ultimaker Cura version 4.13
The parts of the models in gray are parts that were not sliced correctly and would not have been printed if attempted. As you can see, the larger 20% scale Benchy was sliced correctly but the 15% and 10% scale Benchys displayed progressively more areas that were too small to print.
And now, previewing the mini models in Ultimaker Cura 5.0 with variable line width enabled.
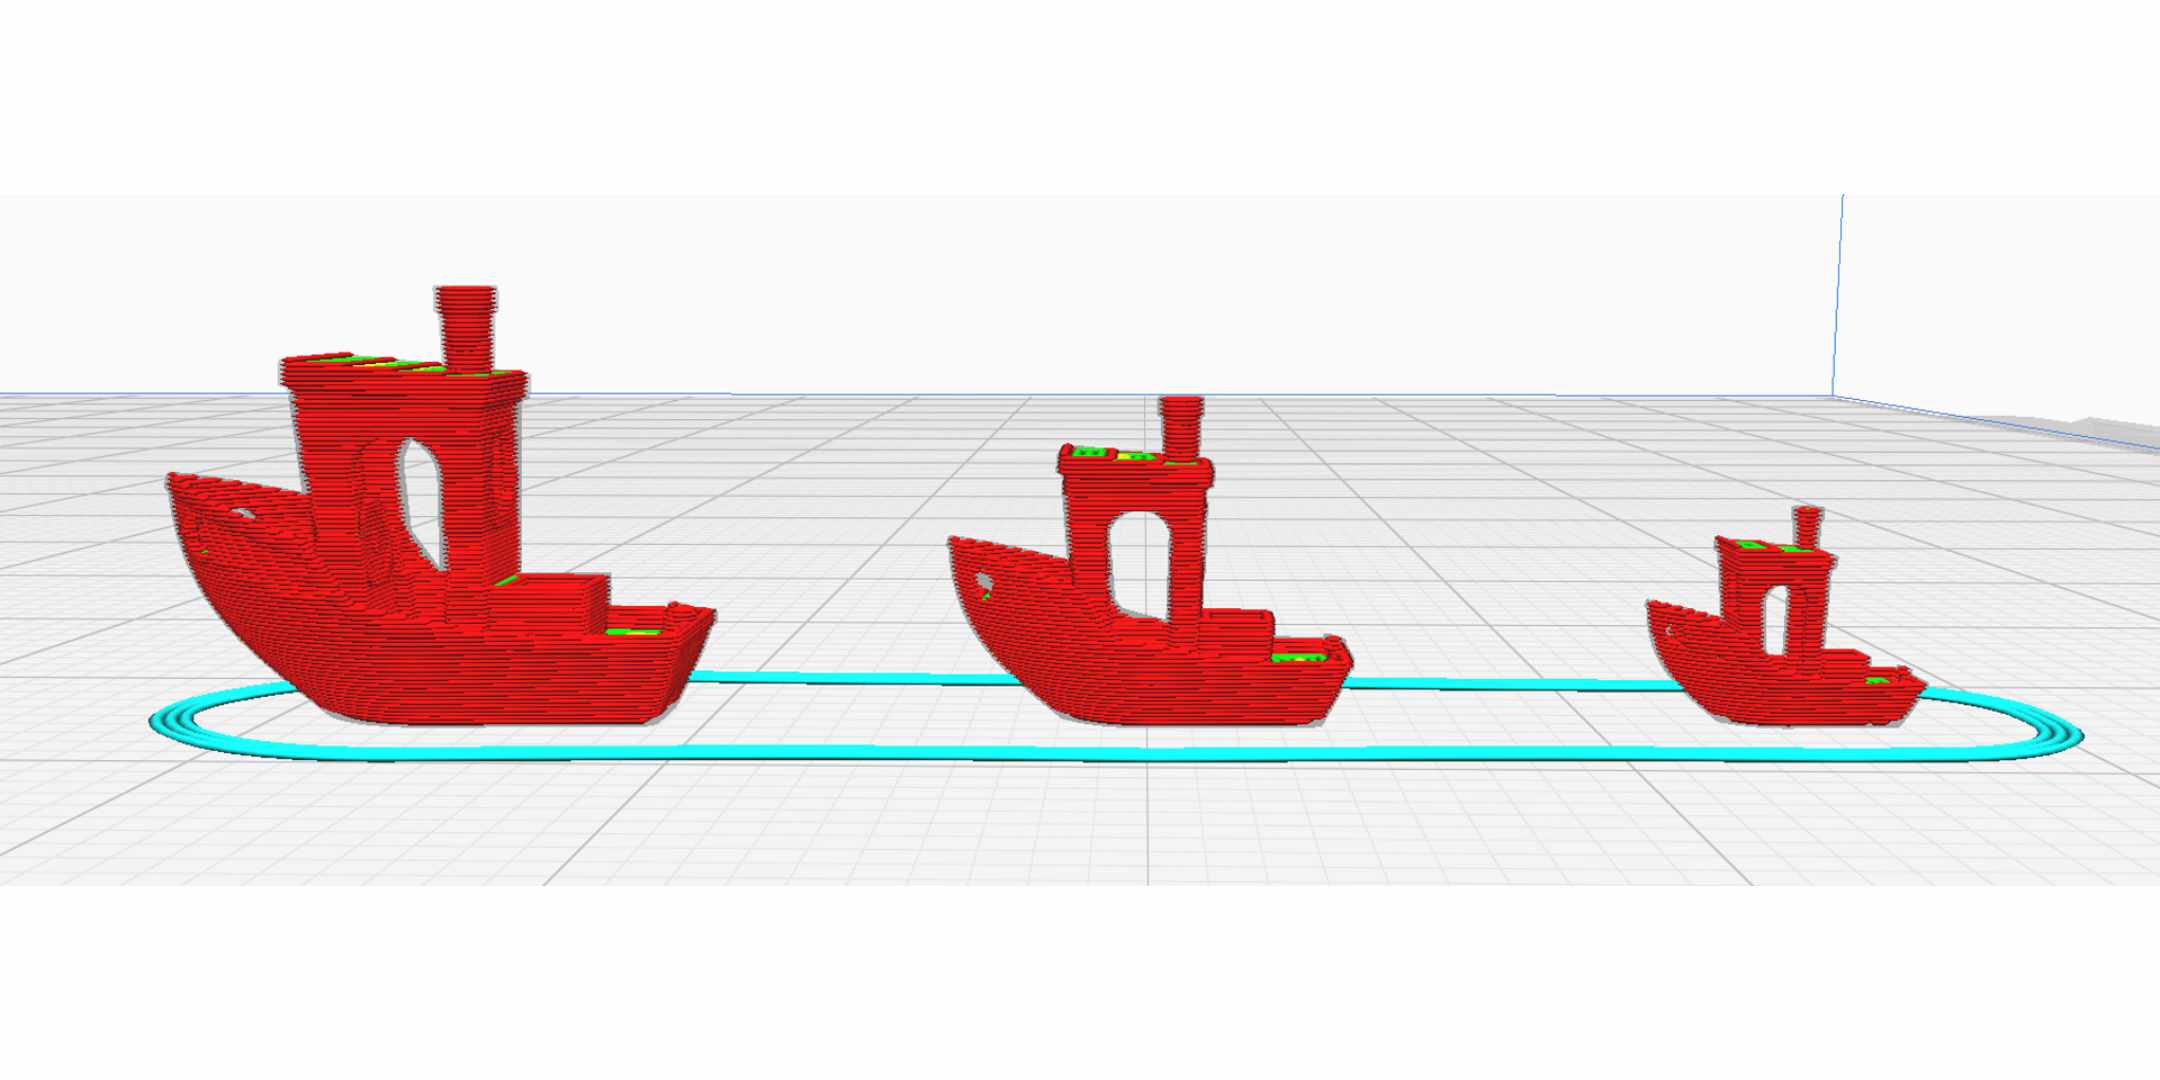
A Benchy sliced at 20%, 15%, and 10% scale in Ultimaker Cura version 5.0
You can see that all three models were able to be sliced correctly and if printed on a well-tuned printer, would be able to be printed correctly as well.
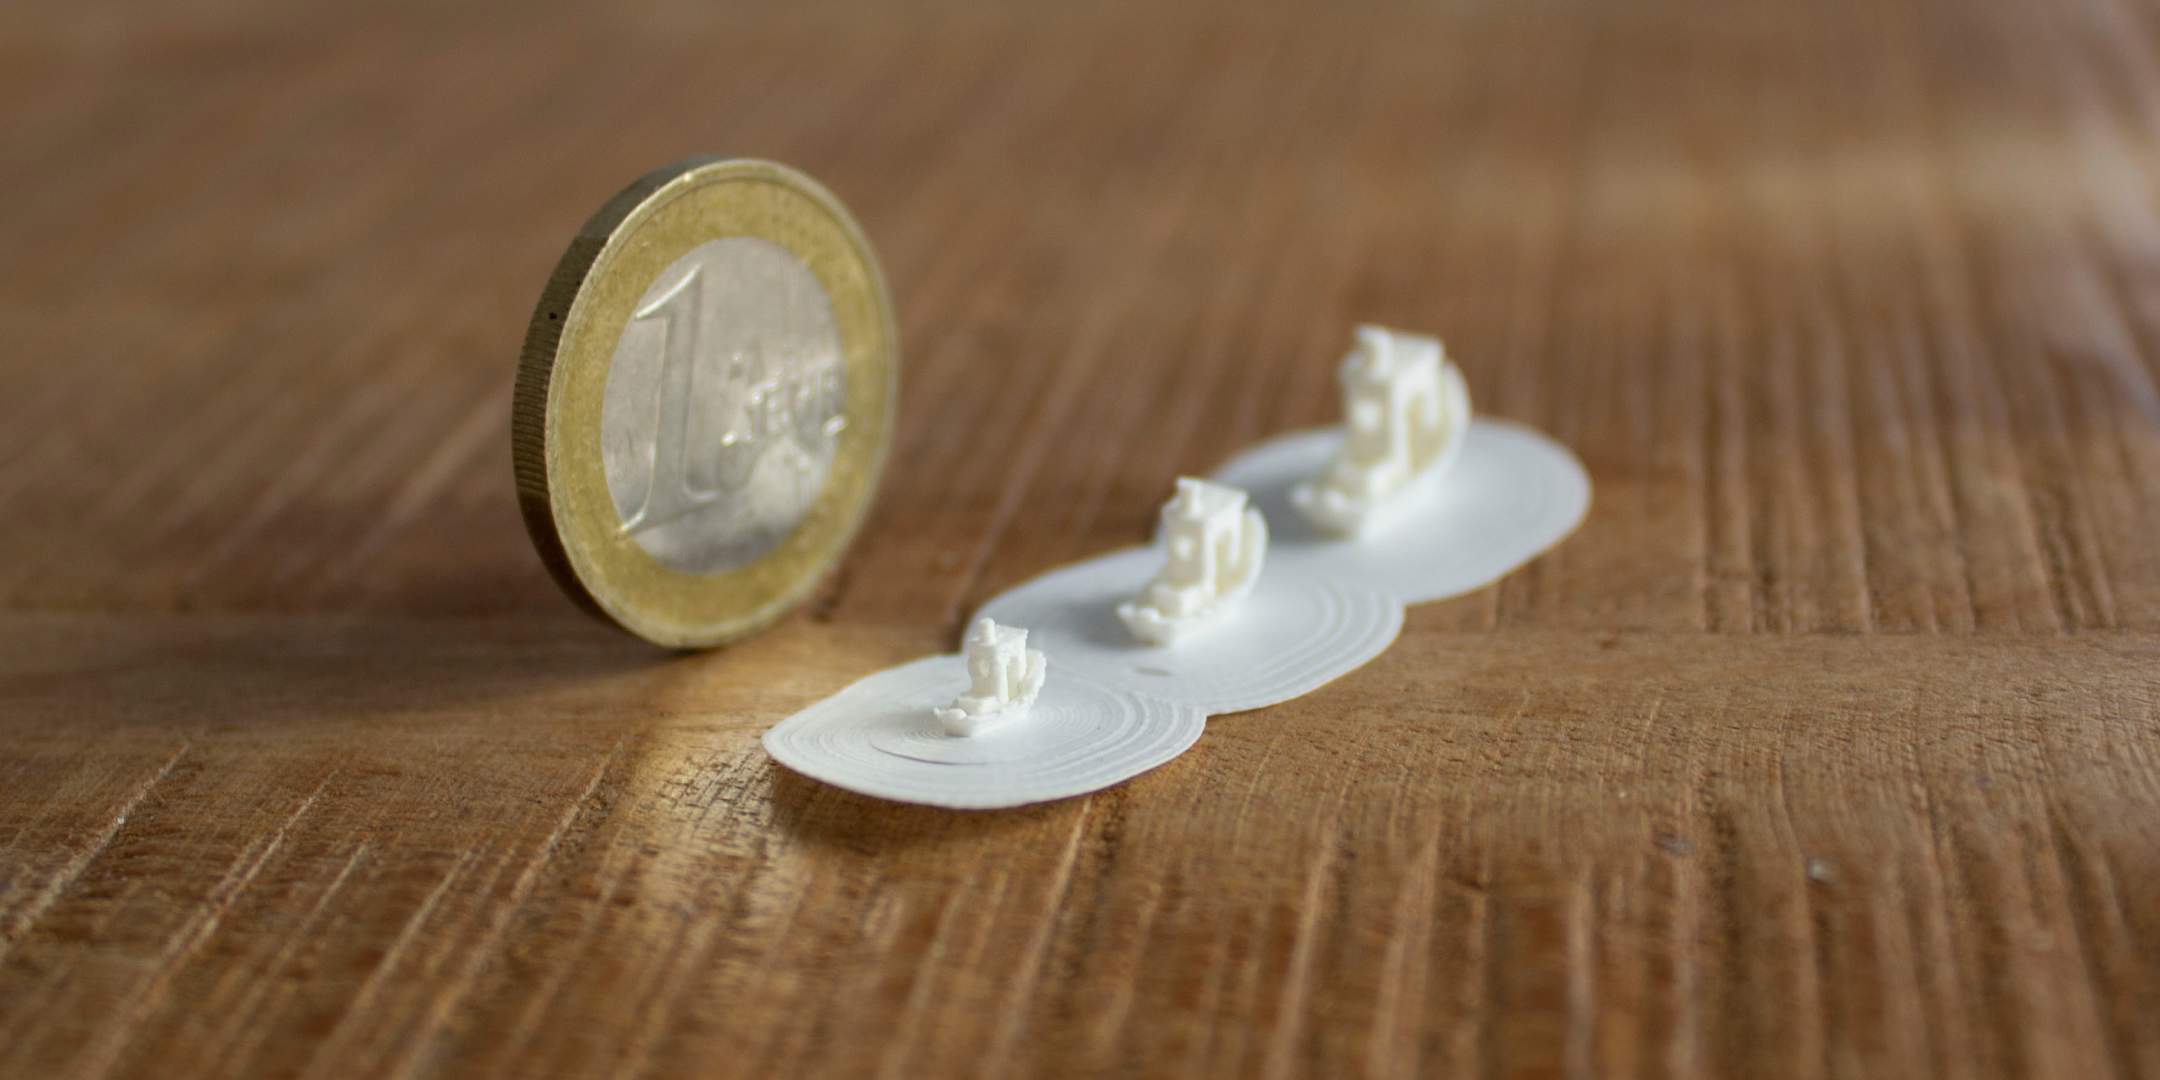
In fact, we did. Here are the same three little boats printed out (alongside a Euro coin for scale).
Finally, let’s look at speed. The speed improvements primarily come from increased toolpath efficiency. Fewer unnecessary lines mean less overall time spent printing. The biggest savings can be seen by owners of Ultimaker printers who use our recommended print profiles. Those users can expect to see print time reductions of up to 20%.
Print time reductions for non-Ultimaker printers are likely to be smaller but in most cases, there should still be some noticeable reduction.
All of these benefits were examined in detail and applied to a practical application during the recent Ultimaker Showcase by Steve Cox.
Exciting improvements on the horizon
The most energizing aspect of the new slicing engine is that, while we already managed to realize huge improvements, there are still untapped depths waiting to be discovered. Variable line width really is a whole new frontier of 3D printing that we’re only just scratching the surface of. In the coming months and years, we will continue to tune and tinker how we utilize it to squeeze out every bit of value we can.
The best part is that you don’t have to wait for us to test and release our optimizations. With the latest update came a whole bunch of new settings that you start playing around with straightaway!
While we are always working tirelessly to get the most out of our profiles, our users still manage to regularly surprise us by combining our settings in interesting and innovative ways. Download Ultimaker Cura 5.0 now to become one of those users.