


Part 1: Holey tea light holder
Last year I created the holey tea light holder.
Unlimited application potential.
Specialized for engineering applications.
High-performance and certified materials
Over 300 materials to choose from.
From polymers to composites to metals.
Let me share the story of two tea light holders I created that were featured during the Construct3D conferences in 2017 and 2018.
Last year I created the holey tea light holder.
I was inspired by an example provided by the entry for RegionPlot from the Wolfram Documentation Center.
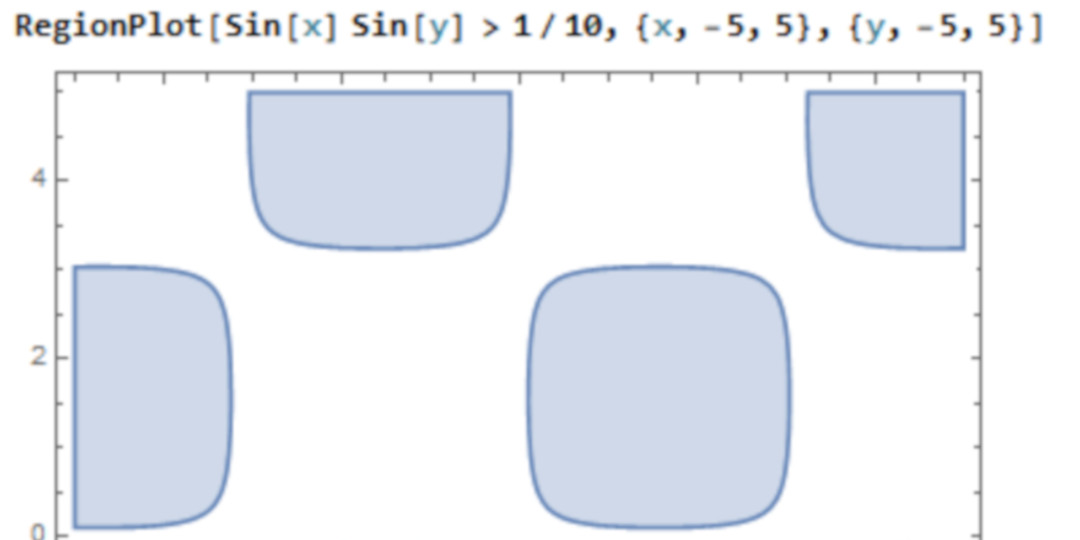
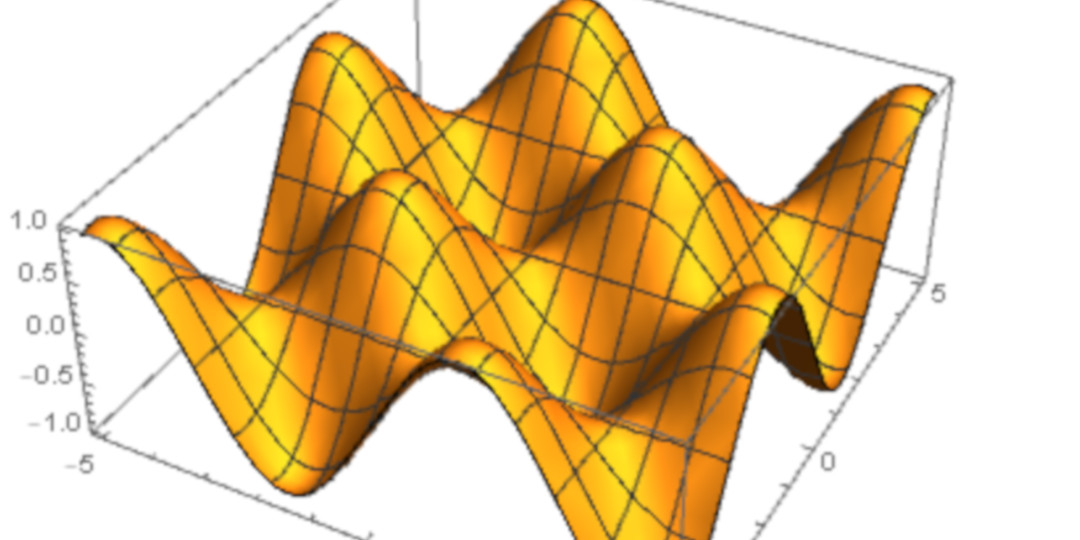
We can think of this as only showing the tops of the hills on the graph of the function
z = sin(x) sin(y), shown here:
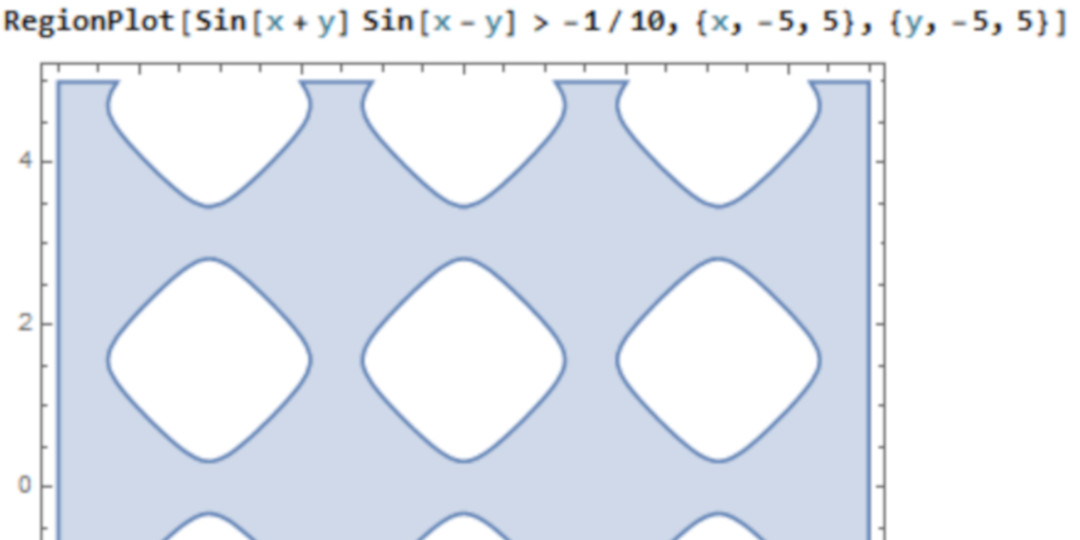
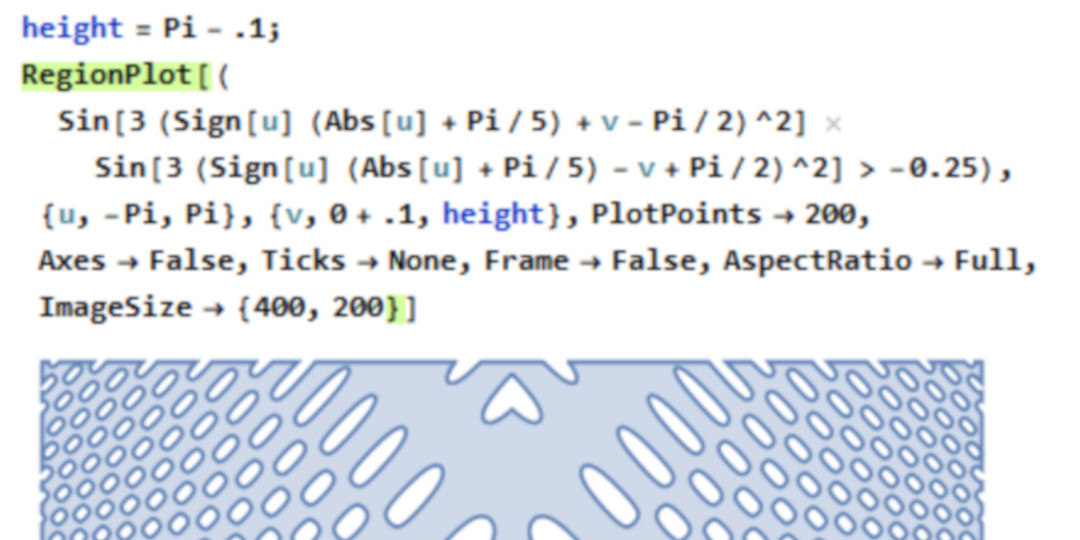
I modified the image by removing the valleys of the landscape so that the region would be connected and I also rotated the holes to be diagonally oriented, which I did by applying the transformation (x,y)→(x+y,x-y):
I then wanted to add in more complexity, which I did by applying a parabolic transformation. I also added in additional options to give better resolution to the holes.
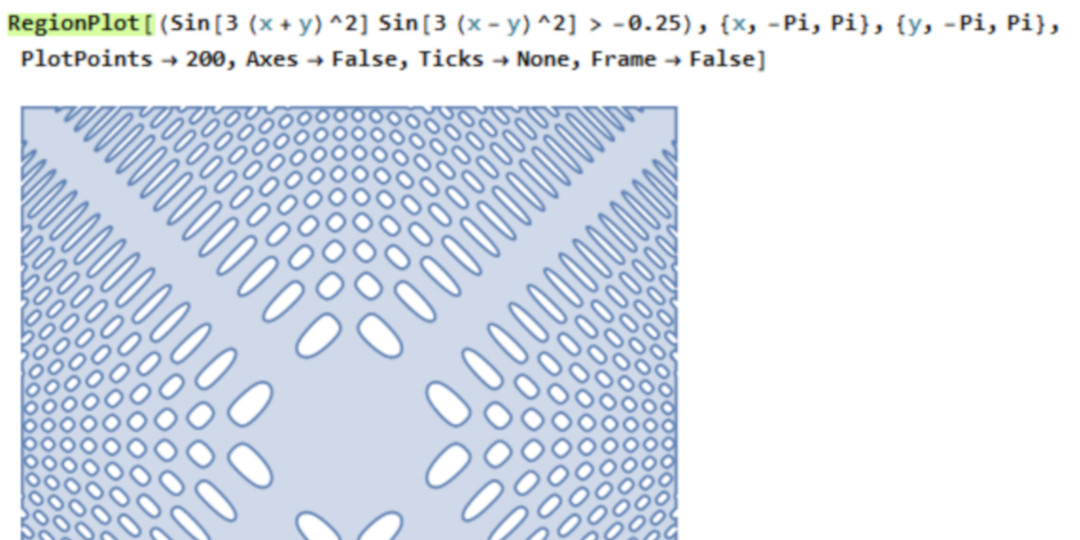
Some algorithmic coloring led to the following piece of art:

Next I wanted to wrap this two-dimensional image around a unit cylinder with height π. So I first changed the function a little bit so that its bounds would work with the parametrization and also reduced the size of the central horizontal and vertical bands to better feature the holes.
We're now ready to wrap this around the cylinder and encode the holes with a RegionFunction command. We finish this model by adding a disk as the base and a ring to the top:
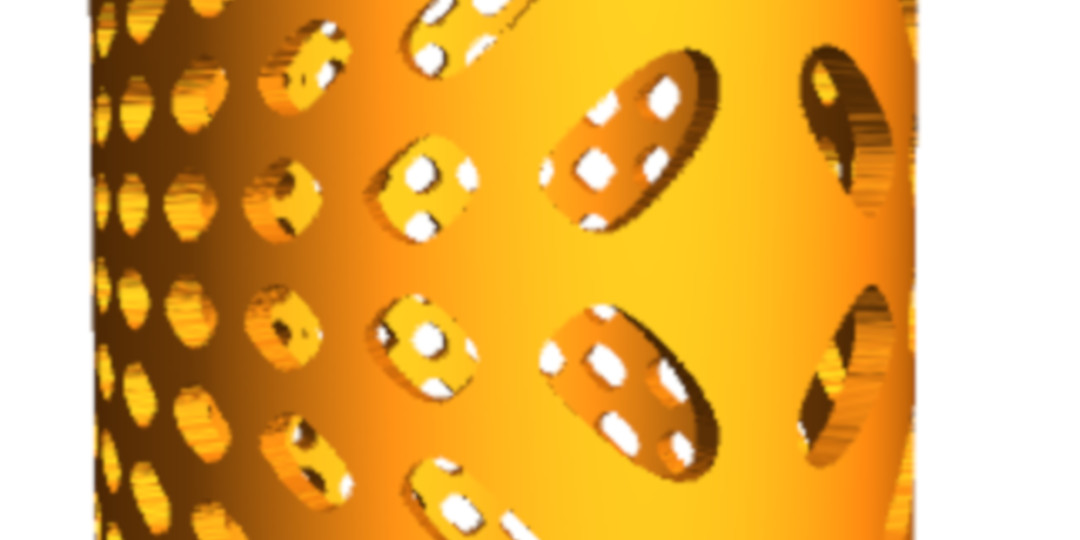
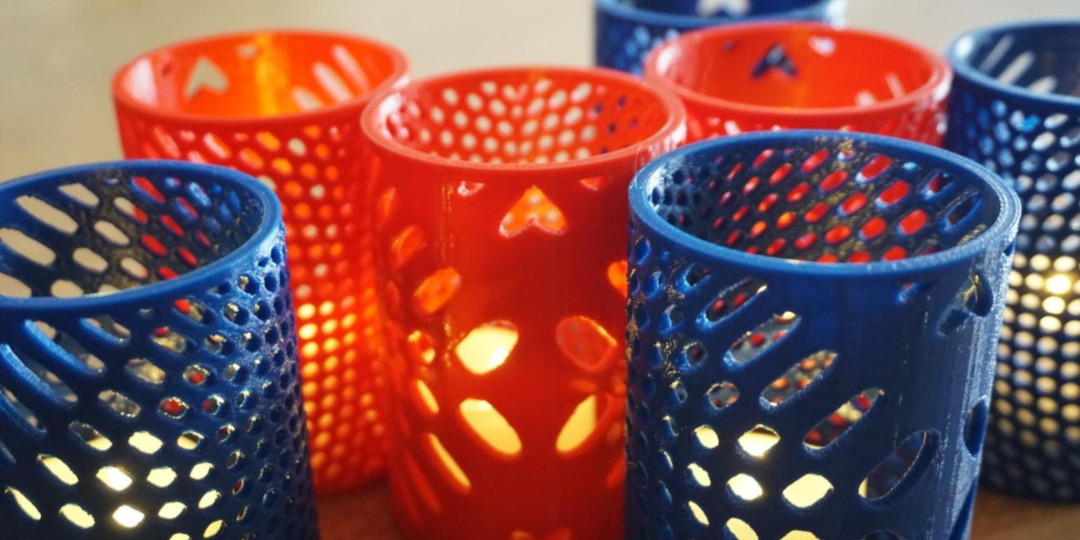
Click to view a 3D rendering on Sketchfab. You can download it at Thingiverse to print yourself.
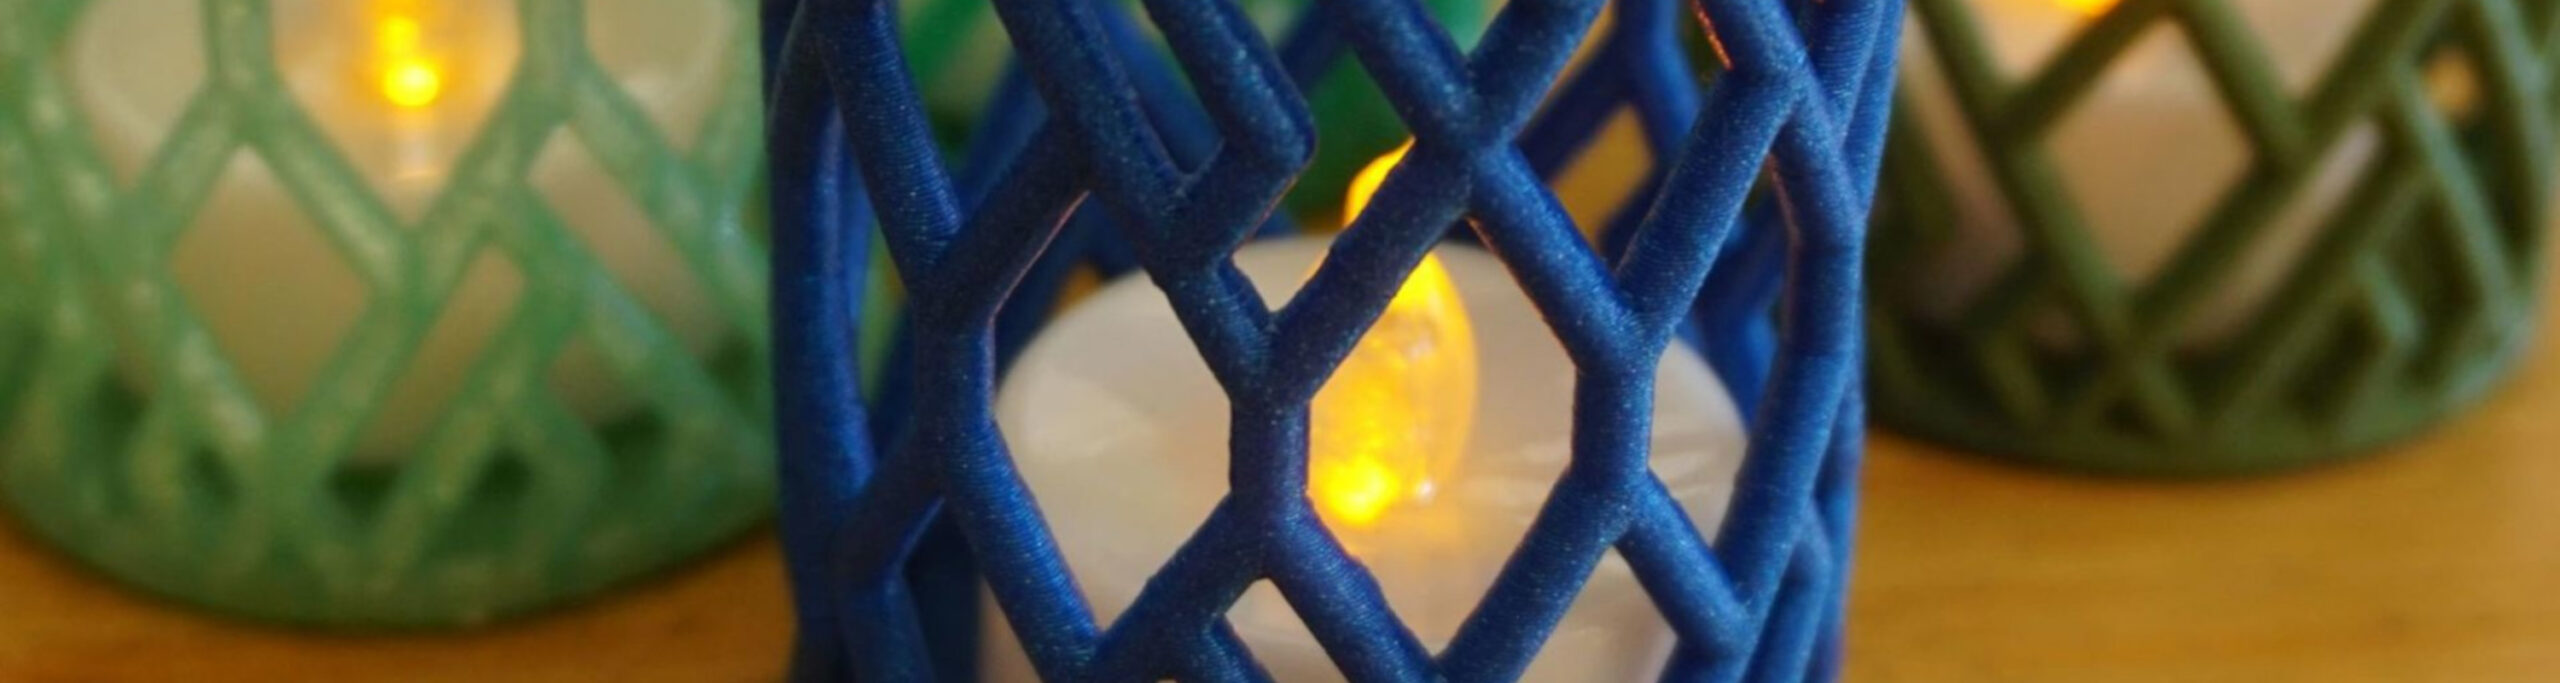
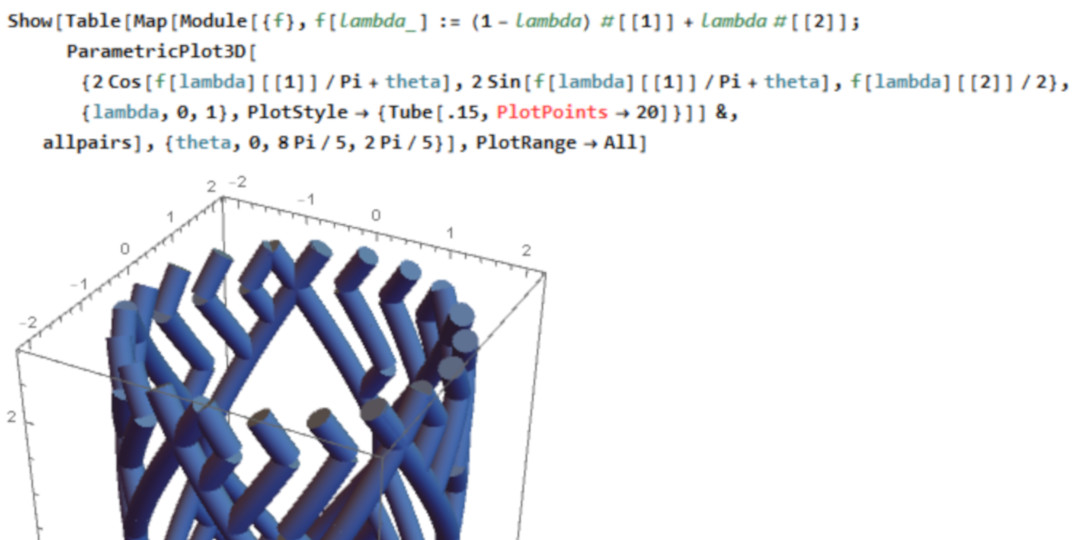
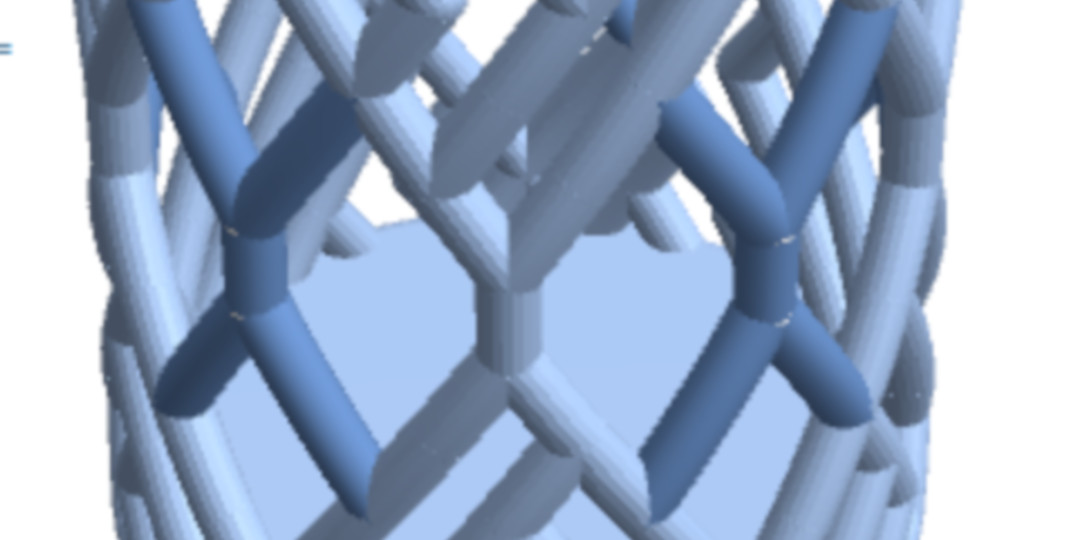
This year I created the "treelight" holder, so named because it involves random binary trees.
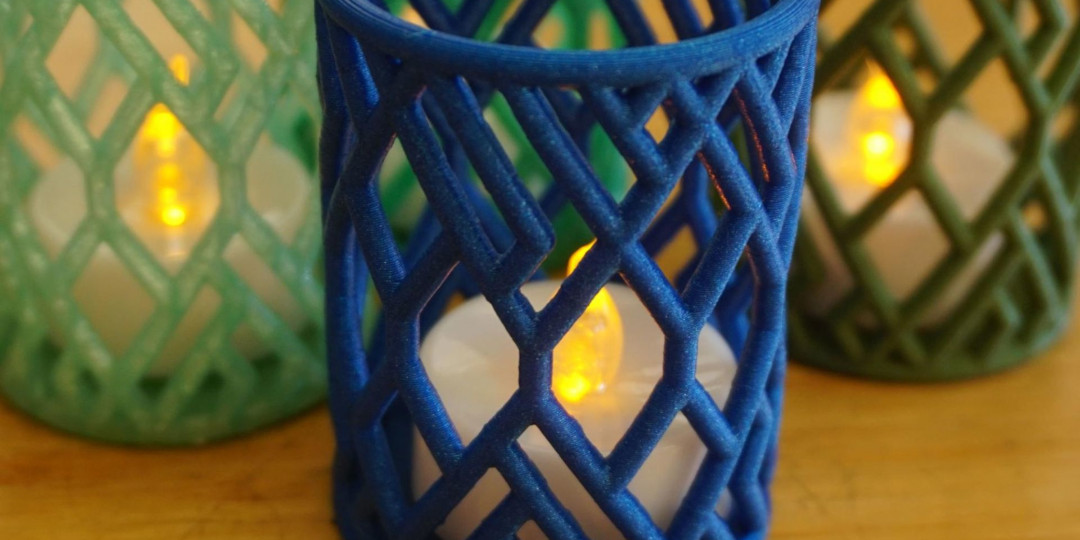
This tea light holder is a generative sculpture. In other words, it was created using random numbers without complete knowledge of what the final object would look like. The sculpture was generated by way of five paths that emanate and branch out from the middle of the sculpture both upward and downward, forming a tree structure. An additional set of supporting braces was added to complete the piece.
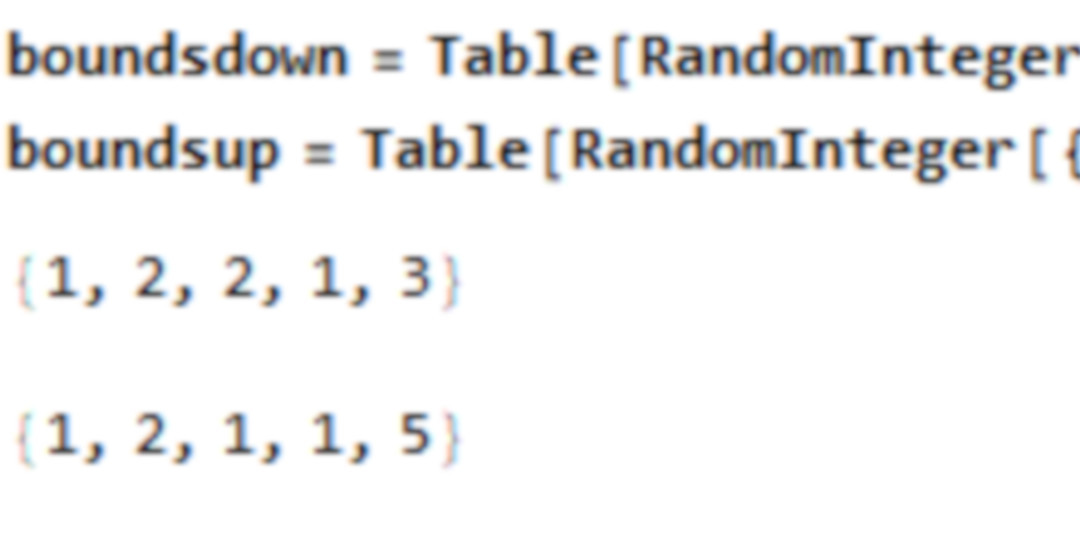
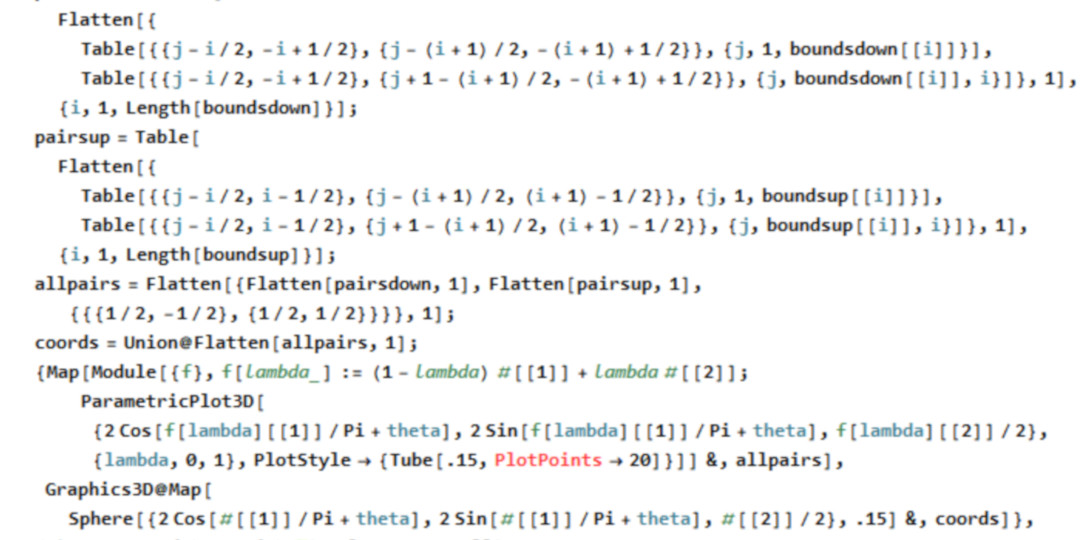
We'll walk through the steps involved in the construction process. The basic principle for the branching structure is that at each level one special node branches into two and all nodes on either side of the special node are pushed outward. This way, one tree is completely determined by the sequence of special nodes at each level, which we generate for the upward branching tree and downward branching trees here:
The dynamics of the branching process are provided here:
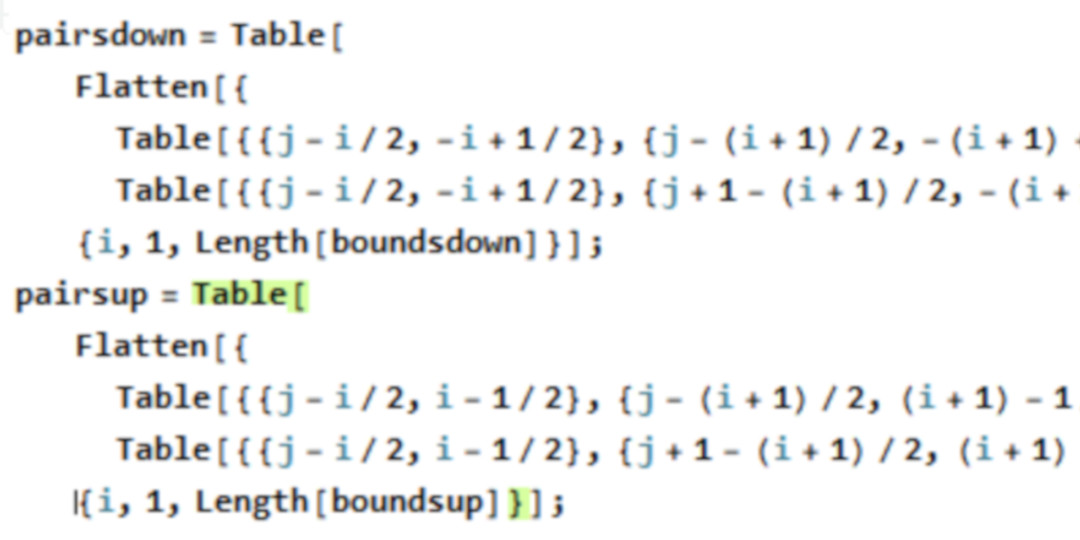
And the following code visualizes this one double-growing tree through line segments.
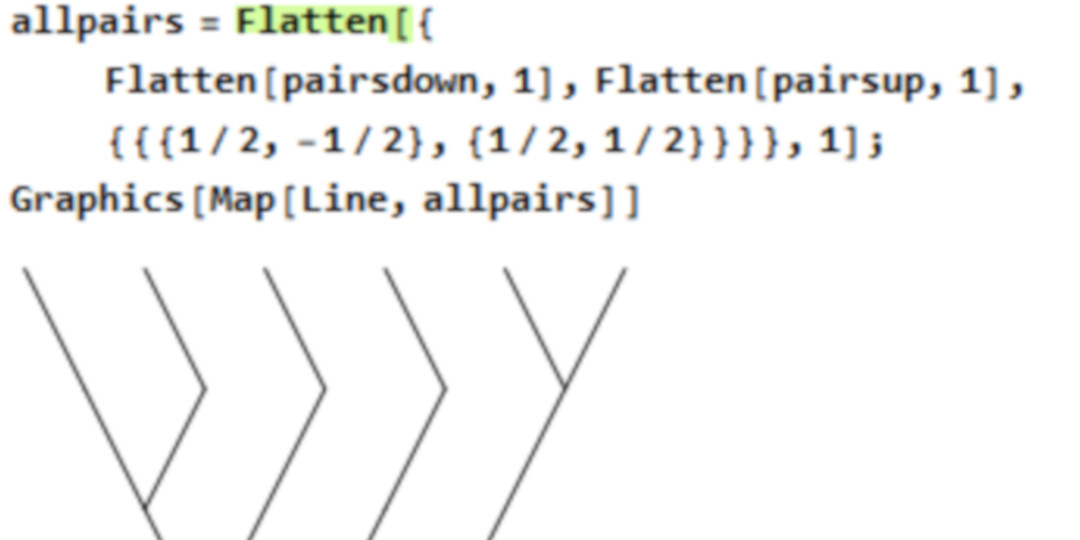
In order to give this tree depth, we use a ParametricPlot3D command for each line segment. This is in anticipation of the next step which involves curving the paths. An key construction is that we can parameterize every line segment by thinking of it as a linear interpolation between the two vertices. For example, if your points are (0,0,0) and (1,1,0), then the function
(λ,λ,0)=(1-λ)(0,0,0)+λ(1,1,0)
is a function that starts at the first point and ends at the second point. The following code applies a similar parametrization for every line segment given above.
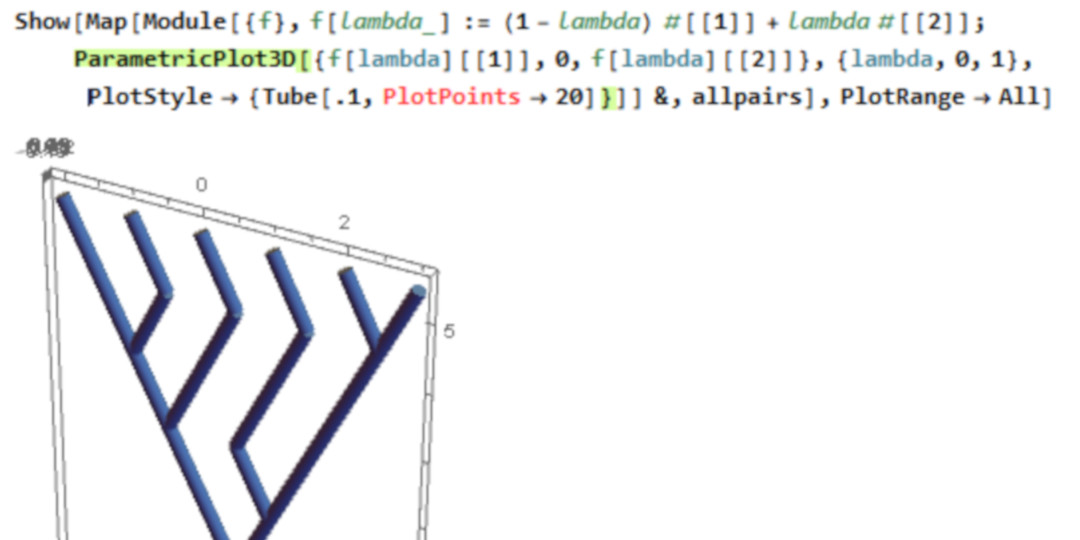
Now we scale the tree horizontally and vertically and wrap it around a cylinder. The wrapping occurs by applying some trigonometry. If you travel a distance θaround a the boundary of a unit circle, you are in position (cos(θ),sin(θ)). We ensure that the radius of this tea light holder is 2 so we multiply the x- and y-coordinates by 2.
A quick Table command generates all five trees:
We finalize the tree structure by adding spheres to the end of every line segment.
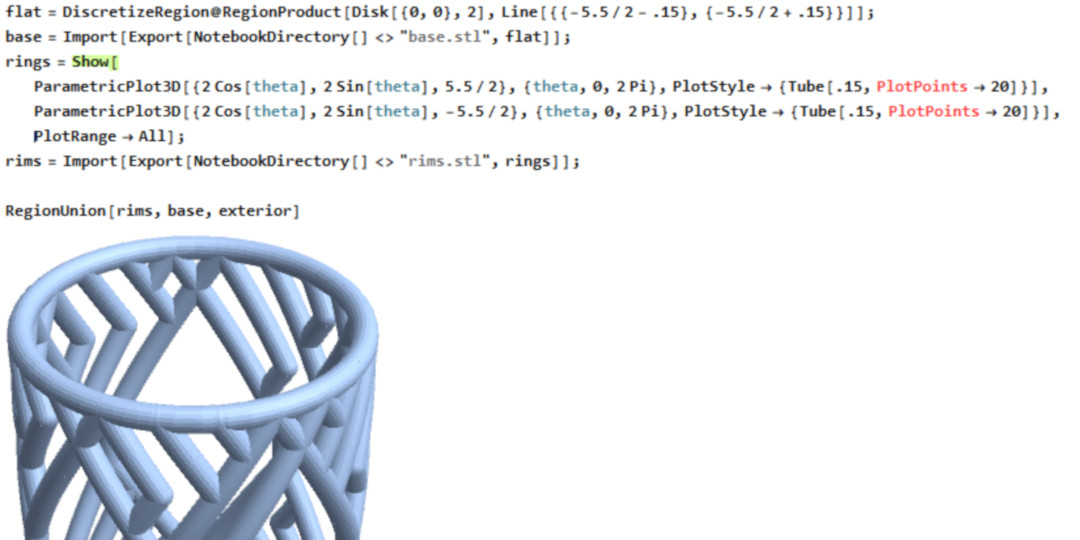
To complete the tea light holder, we add in the base and curved rings that form the top and bottom of the piece:
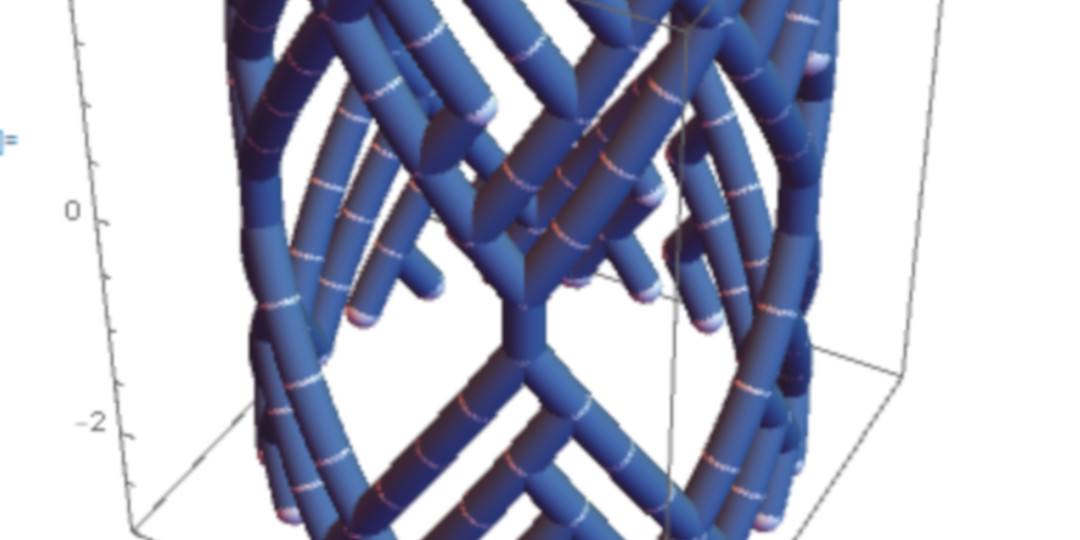
I realized that the final result looked a bit sparse if I was going to put a tealight inside. I figured that the best way to rectify this would be to add in some bridges:
The file didn't print right, so I sent it to NetFabb repair, re-imported it into Mathematica, and resized it so that it was just the right size (50mm in diameter).
Import[NotebookDirectory[] <> "treelight.repaired.stl"];
Export[NotebookDirectory[] <> "treelightholder.stl", RegionResize[%, 50]];
Here is the Sketchfab rendering.
You can also download it at Thingiverse to print yourself. Do let me know how it looks!
Christopher Hanusa is a mathematician, mathematics educator, and mathematical artist. To learn more about his teaching, research, and art, visit his Queens College website. To learn more about his portfolio of 3D printed mathematical jewelry, visit: Hanusa Design.