first puzzle cube and package to be made on a 3D printer entirely out of PLA-1

Davidson Desktop Doohickeys: Puzzle cubes

Pioneer Adam Davidson writes about a project in his curriculum that is a rite of passage for his high school's engineering program students. In this article, he explains at how it started, what caused it to change, and the end results.

Years ago, when I first began teaching at Riverside, I was asked to teach an engineering design course to 14-17-year-olds. As the only teacher in our program with a propensity for designing and creating, I was the obvious choice to send for training. I set out knowing I would need to learn how to utilize and implement a piece of CAD software called Inventor Pro. A day or two into the training and I was introduced to the Puzzle Cube project; a short assignment that reinforces the design process and introduces students to Inventor’s basic tools and usage---certainly not intended as a final project for the course.

Wowed by the potential of this assignment resulting in a toy to play with and the creation of a package to keep it in, I was determined to find ways of enhancing this mid-curriculum project. Most assignments in our engineering curricula are open source by design---meaning anything and everything about them is intended to be altered and you are encouraged to share these changes. During the first couple years of assigning this project, I treated it much like my experience at the training. Students followed the activity and project sheets exactly, reporting their likes and dislikes, and were assessed with rubrics. Because of this, students didn't seem to want to dig deeper into the design process---they just followed the directions---and what simple directions they were. So simple, in fact, that students had difficulty transitioning from one task to the next. They would ask “How?” and “Why?” so much it made sense to let them determine their own answers.

The project originally began by having students sketch a variety of parts that satisfied a set of criteria and a few constraints. For example, parts had to be a particular size to fit within a puzzle. The puzzle would later be designed by fitting parts together and discovering which parts were needed in the end to complete the 3 x 3 x 3 piece puzzle. The curriculum had many different activities for the students to reference and complete. But there was an insistence that students work individually and share their designs with classmates, instead of encouraging teamwork and reinforcing collaboration. Because the project became monotonous for me as an educator, and because students took it upon themselves to suggest (and request) changes in the project guidelines, I decided to upend this assignment and recreate it keeping in mind 3D printing technology and a bit of role-playing. I also decided to ditch the activity and projects sheets along with all rubrics. I created a few helpful guides and a persona whom I would role play.

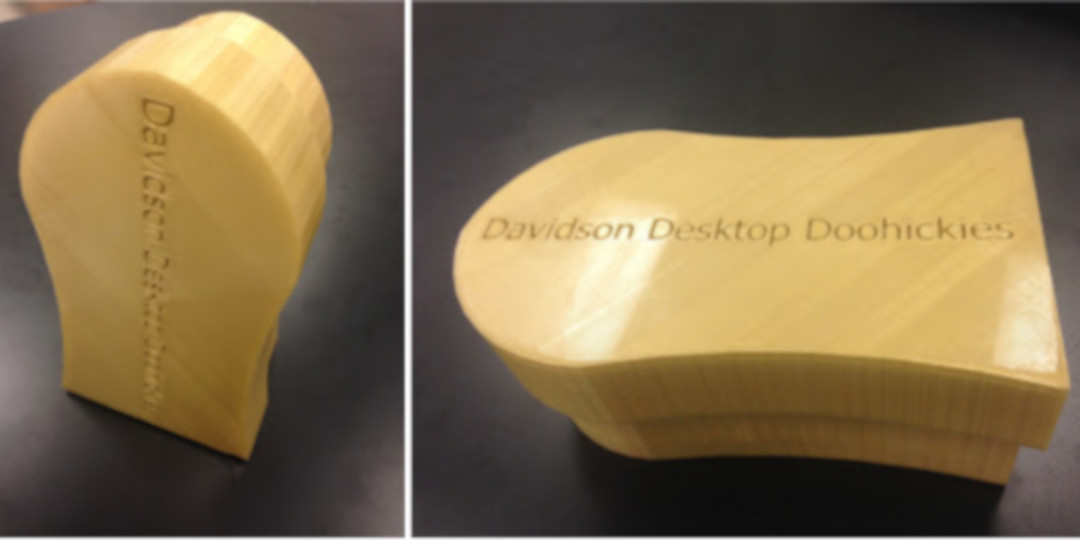
This changed the game completely. Students began enjoying the project again. They loved the idea that they were in charge of their own depth of learning. They selected their own teams. They developed contracts for their teams, and most importantly, held themselves to the team norms in their contract. The persona I developed, owner and operator of Davidson Desktop Doohickeys, became their boss; the person they could report to when problems arose and impress when designs were finalized. Instead of working individually, occasionally sharing their thoughts with classmates, the assignment became a team final project. The students, or employees as I would now refer to them, were encouraged to raise the bar each semester making the project take on new meaning, new constraints, and more challenges than ever before. They became deeply involved in the development of their curriculum. They were not responsible for creating the project, they were inherently doing it because they felt the need to make it “better” for the next group of employees.

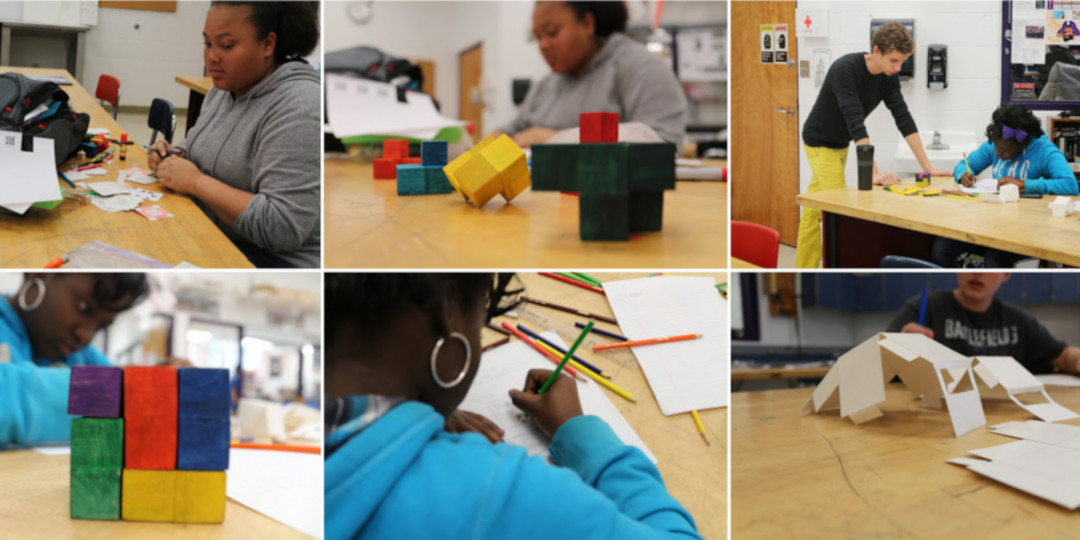
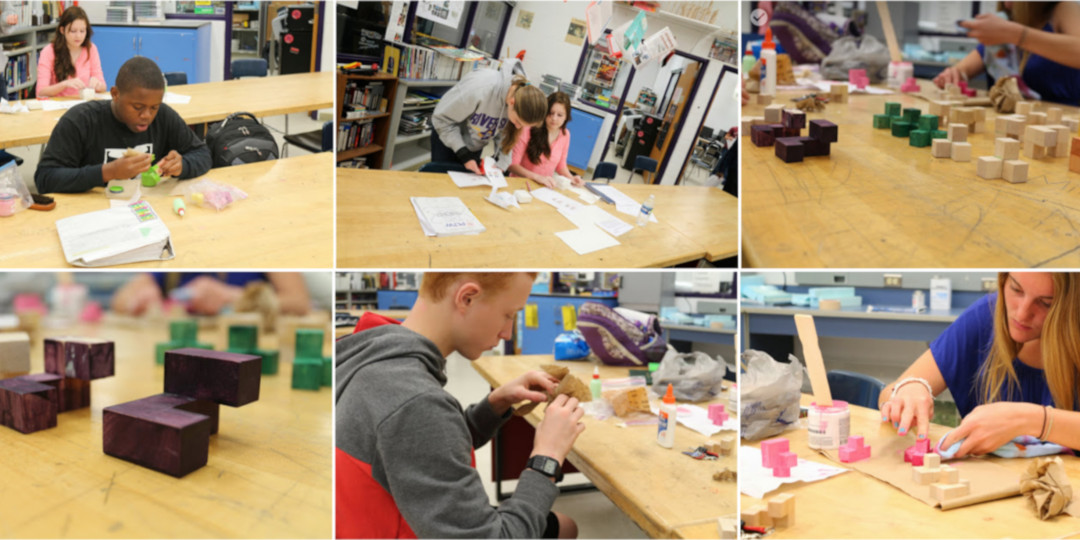
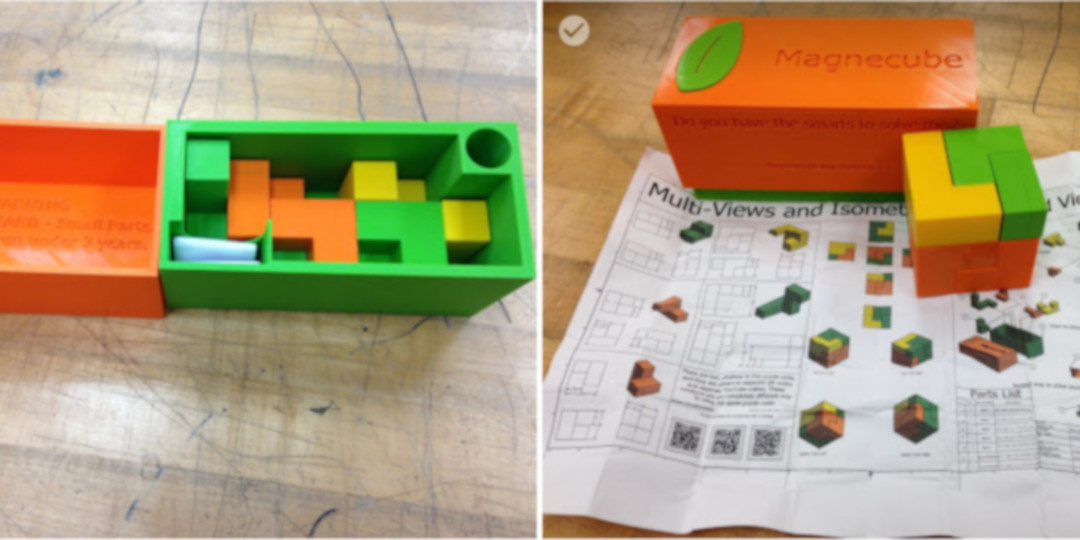
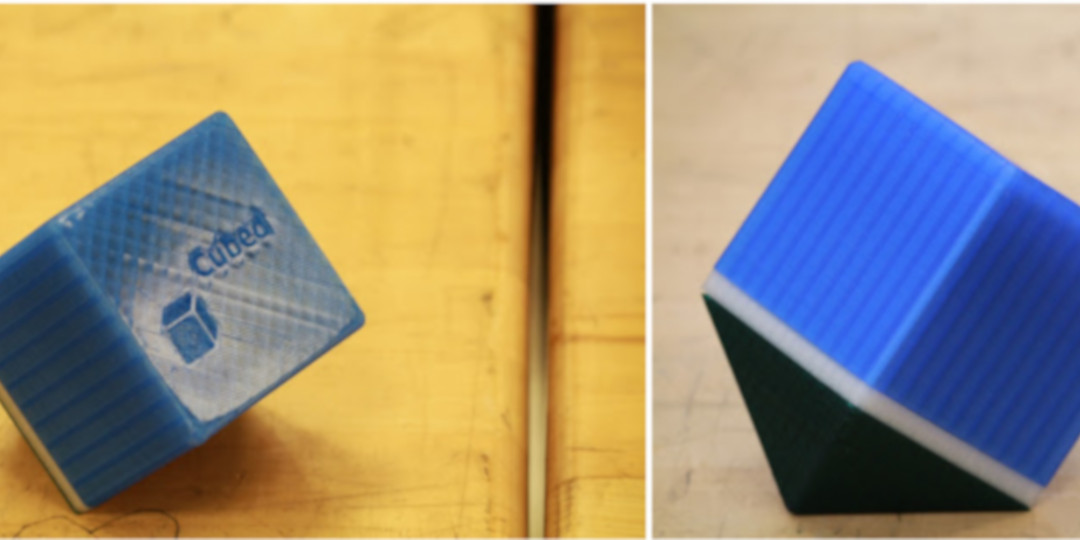
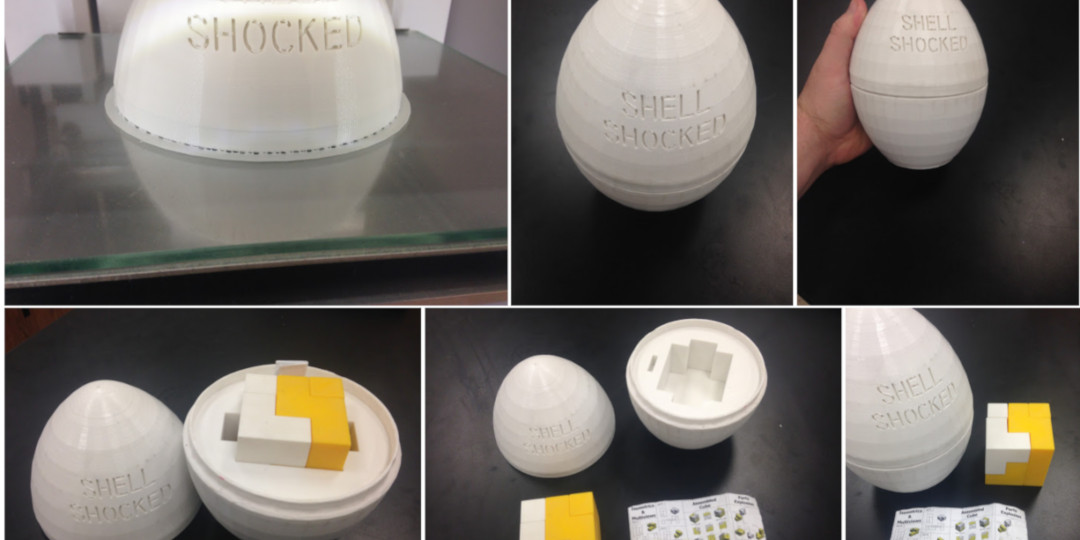
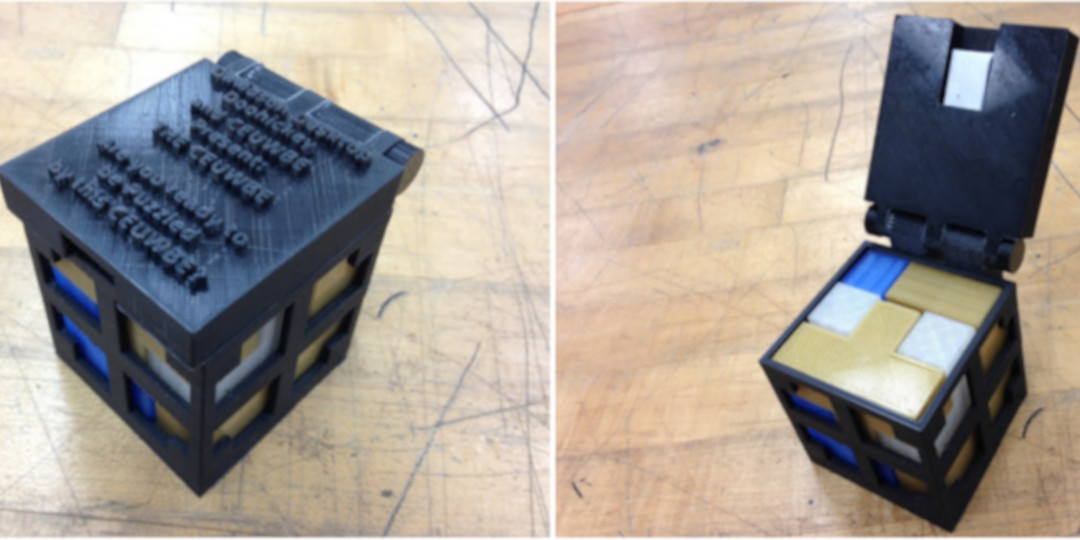
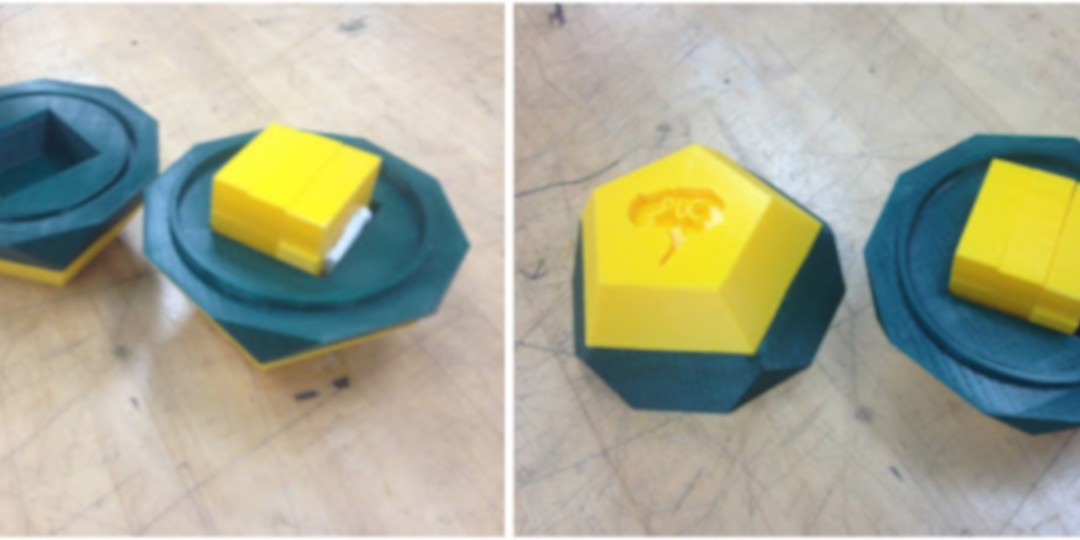
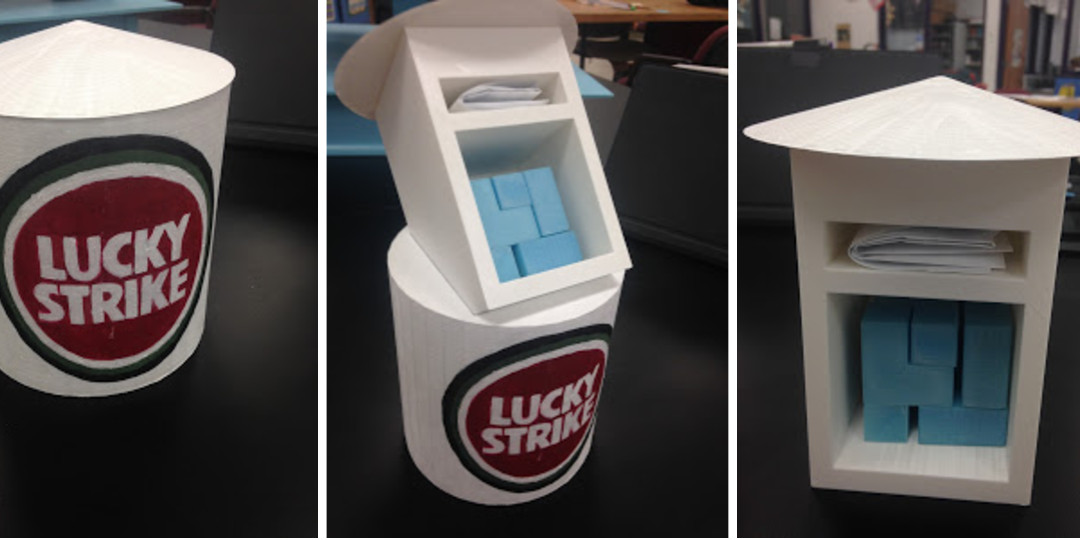
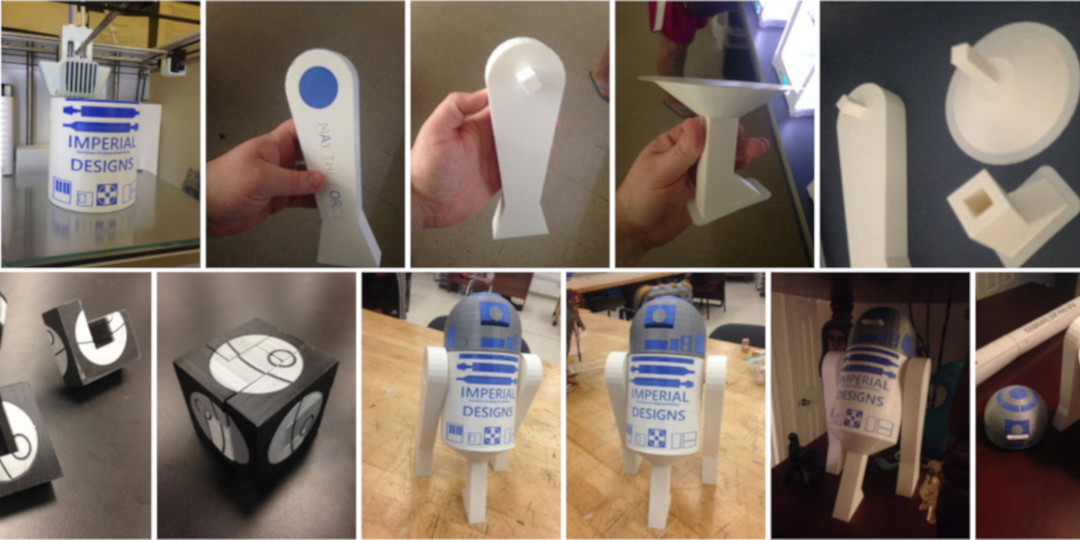
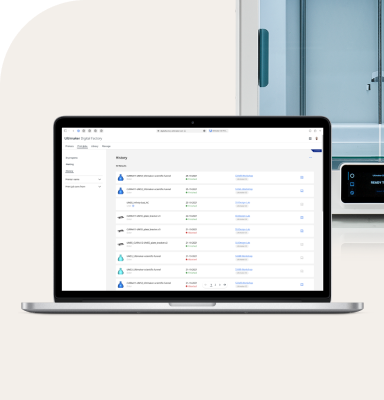
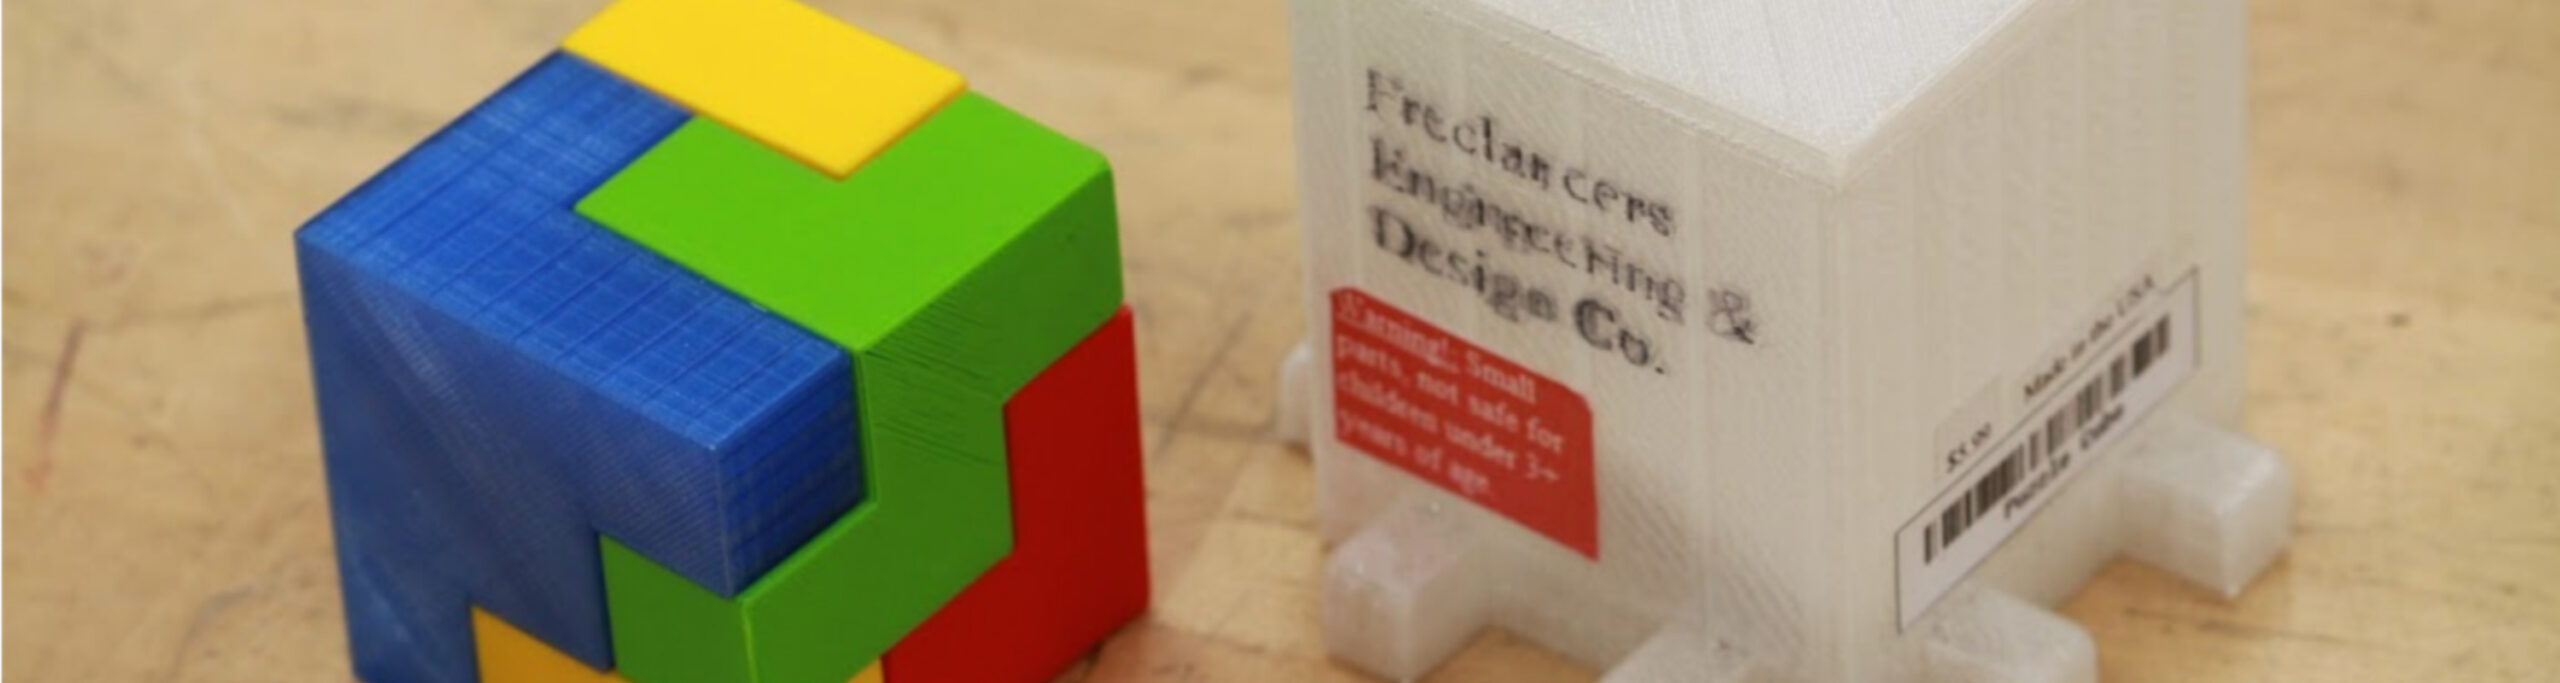
While writing this blog, I think back to nearly a decade ago when my students created wooden block puzzle cube parts. Gluing them together, they had to tirelessly sand them smooth. The parts were colored with permanent markers and sometimes poorly painted. Packages were made from card stock; net patterns held together with tape and rubber cement. Some were better than others, and over the years students created some awesome packages and had some great ideas. But this meant the project began changing as new potentials were realized and eventually with the implementation of our Ultimaker 2’s, 2+’s, and now our Ultimaker 3 Extended, my employees are creating extraordinary designs for their cube parts. They have moved on to extremely complex packages and can print them with precision they were never able to achieve using wooden blocks and cardstock. You can see the project's progression in this album.

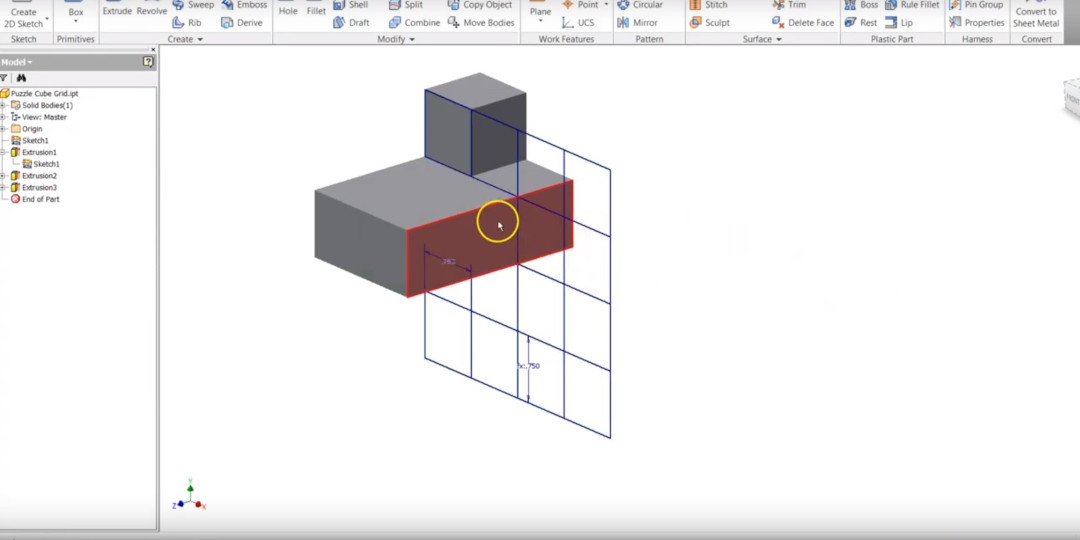
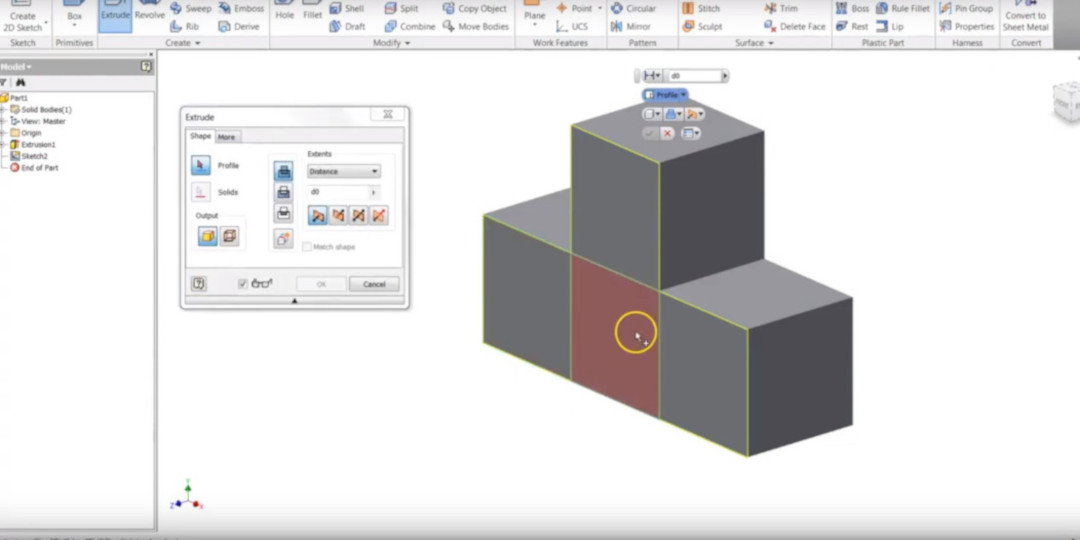
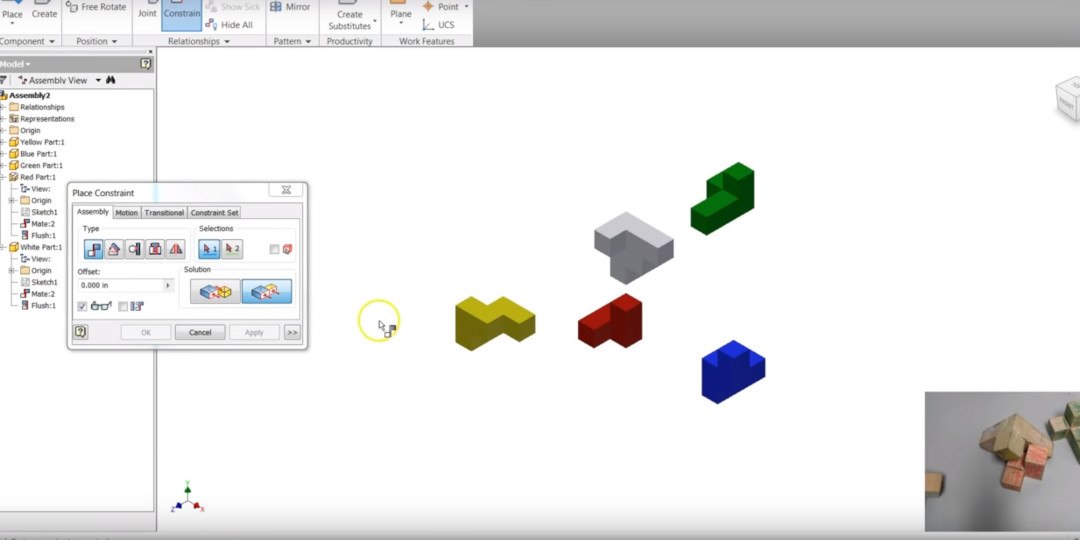
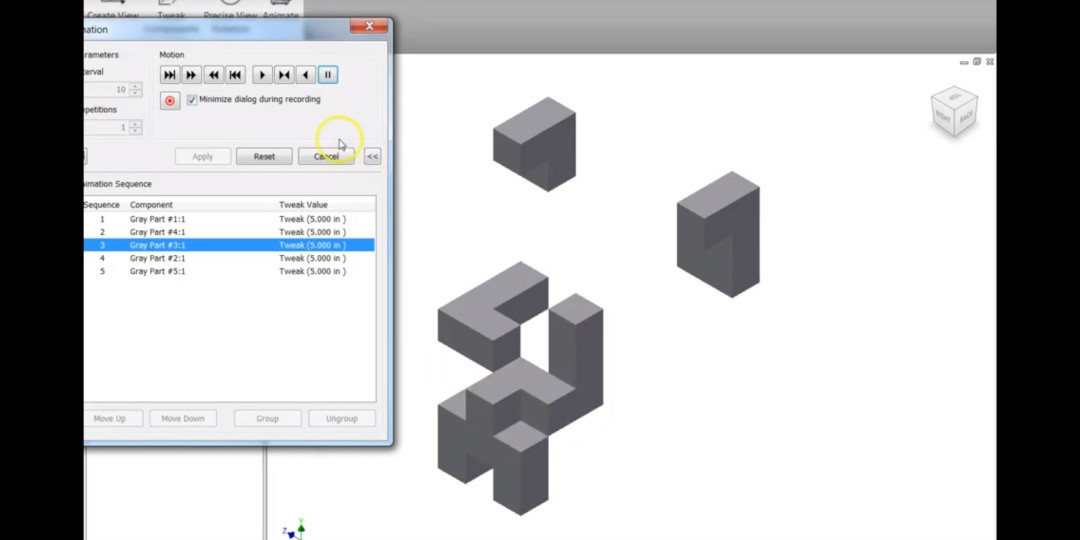
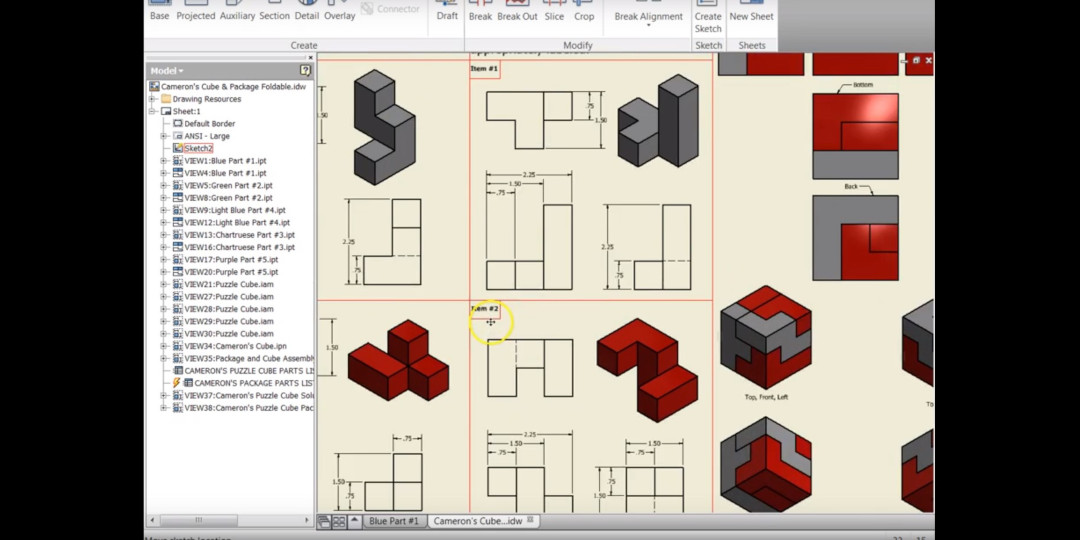
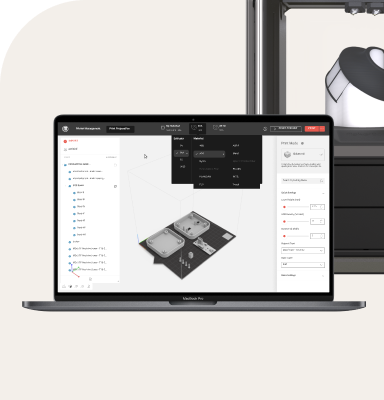
My employees still start with the end in mind, but now they work in teams from nearly the start of the semester. Using a 3-plane explosion solution sheet they create their own prototypes. They now work together to utilize a decision matrix to determine the best prototype, color choice, and other decisions they need to make as a team. Employees still use Inventor Pro to develop 3D models, assemblies, videos, and drawing sheets that are used to explain their completed product and demonstrate a working solution. Their skills are enhanced further when they create a package that matches their overarching theme and a portfolio that compiles their process and work.

Adam Davidson's students
Adam Davidson's students 2

With no project sheet and no rubrics, the client interviews they conduct have become very important. During this phase of the process, employees questions are unfettered. They discover constraints and criteria not yet identified. Employees document everything---reinforcing the proper use of their engineering notebooks. From the beginning to the end, they keep up with their trials and tribulations, their successes and failures. They use this information to further enhance their portfolio. They test their cube on potential customers. They include time, age, difficulty, attempts, and whether the test subjects were able to solve the puzzle. Once the data is gathered, it’s then analyzed, interpreted and presented as part of their portfolio. They finalize the whole thing by recommending changes they would make based on their observations and from the use of their product.

magnecube
This team was the first to enhance the inlay. They opted to make their leaf stay raised above the top of the package---an attempt at texture. They also provided an emboss on the outside and inside of the top of the lid.
cubed
Balanced packaging that spins like a dreidel.
egg
Egg shaped packaging.
hinge system
Hinged packaging.

This monstrous assignment takes the entire semester to reinforce the skills and techniques learned during other assignments. Students spend every Friday and four to five consecutive days at the end of the semester to complete all of their required tasks. This project has become a staple of our engineering program---a rite of passage of sorts. These products are so well created that they have become a popular attraction for other students and many teachers in the school. Most of the puzzle cubes are sold to our community during school events throughout the year and fundraise hundreds of dollars for our program.

geometric
When the cube is not present the package lid and base spin freely and can align in multiple orientations.
egyptian
Egyptian themed packaging.
lucky strike water tower
R2D2 themed package and Death Star themed cube
R2D2 and Death Star themed packaging.

The future of this project now lies in the hands of my employees. They challenge the way it is managed every year. A recent suggestion was to move away from requiring a puzzle cube as the desktop doohickey---perhaps a game changer for next year’s employees.

Puzzle Cube Solution Sheet - 3 Plane Explosion

puzzle cube solutions
Watch the video

This video explains how to use the 3 plane explosions on the Puzzle Cube Solutions sheet. This is the beginning of the design process and neither solution shown in this video should be used by a user. The video walks the user through what each section of the sheet is and how to use them. It also provides a reminder of the initial project constraints and the criteria for this sheet.

Puzzle Cube Grid and Part Creation

puzzle cube grid
Watch the video

This video assists users with creating Puzzle Cube part files by utilizing a student developed system of a 4 x 4 grid of 0.75 inch squares. It is not the only technique as identified in the next video but does make creating multiple parts in fast succession very simple.

Puzzle Cube Parts without the Grid

puzzle cube parts
Watch the video

This video provides an alternate way of creating the puzzle cube parts than to use a grid system. It is a more tedious way to make them but for some users it is the preferred method.

Puzzle Cube Assembly - A How To

basic assembly
Watch the video

This video is exactly as the title describes. It provides a step by step creation of an assembly file while showing a wooden prototype of the parts in real life and real time being assembled. This file requires the creation of all five part files.

Creating Presentation Files & Explosion Videos

creating presentation files
Watch the video

This video demonstrates how to use an assembly file, which must already exist, to create an exploded view known as a presentation file. It also shows how to manipulate the file in various ways to include making a .wmv (video) file that can later be uploaded to the IED YouTube channel and attached to a QR code. The QR code can then be placed on a part file and put into a drawing sheet.

Creating a Drawing Sheet

creating a drawing sheet
Watch the video

This video provides an overview of how to create a D sized drawing sheet for the Final Project. It requires the creation of all five-part files, an assembly file, a presentation file and a knowledge of drawing sheet documentation and expectations learned during a series of client interviews.

Printing a D sized Sheet on Plotter

printing a d sized sheet
Watch the video

This video, originally created for an employee named Buddy asking how to print to the plotter in our program for his final project, is a great way to learn how to print the final project drawing sheet and even how to add a printer, if you know the name of it and are on the campus network.